Replacing a tail light bulb on your Toyota Sienna doesn’t have to be a daunting task. At millertoyota.net, we provide you with the guidance and services needed to keep your vehicle running smoothly and safely. This guide will provide a step-by-step approach, ensuring you can handle this minor repair effectively. Whether you’re looking for maintenance tips, genuine parts, or expert service, our team at Miller Toyota is here to help you every step of the way. We offer reliable solutions and support for all your automotive needs. Trust Miller Toyota for all your tail light repair, bulb replacement, and general maintenance needs.
1. Why Is Replacing Your Toyota Sienna’s Tail Light Bulb Important?
Replacing a tail light bulb on your Toyota Sienna is vital for safety and legal compliance. A functioning tail light ensures that other drivers can see your vehicle, especially during low-light conditions, preventing potential accidents.
- Enhanced Visibility: Operative tail lights significantly improve your vehicle’s visibility to other drivers, particularly at night, during rain, or in foggy conditions, reducing the risk of rear-end collisions.
- Legal Compliance: Driving with a broken tail light can lead to fines and legal penalties, as it violates traffic safety regulations in most jurisdictions.
- Safety for You and Others: Functioning tail lights communicate your presence and actions (like braking) to other drivers, ensuring they can react accordingly, which is crucial for preventing accidents.
- Preventing Accidents: A burnt-out tail light can lead to misunderstandings on the road. Other drivers may not realize you are slowing down or stopping, increasing the risk of collisions.
- Maintaining Vehicle Safety Systems: Modern vehicles often integrate tail lights with other safety systems. Replacing a faulty bulb ensures these systems function correctly, providing comprehensive protection.
2. Identifying the Correct Tail Light Bulb for Your Toyota Sienna
Choosing the right tail light bulb for your Toyota Sienna is essential for proper function and safety. Different Sienna models and years may require specific bulb types, so accuracy is key.
- Consult Your Owner’s Manual: Your Toyota Sienna’s owner’s manual is the most reliable source for identifying the correct tail light bulb type. It provides detailed specifications tailored to your vehicle’s model year.
- Use Online Bulb Finders: Reputable automotive parts websites, like millertoyota.net, offer bulb finder tools. Simply enter your Sienna’s year, make, and model to find compatible bulbs.
- Check the Existing Bulb: Remove the burnt-out bulb and look for markings on its base or glass. The bulb type (e.g., 7443, 921) is usually printed directly on it.
- Visit a Local Auto Parts Store: Auto parts professionals can quickly identify the correct bulb for your Sienna. Bring your vehicle’s information or the old bulb for reference.
- Understand Bulb Specifications: Familiarize yourself with bulb specifications, such as voltage (usually 12V for cars) and wattage. Using the wrong specifications can lead to electrical issues or reduced brightness.
3. What Tools Do You Need To Replace the Tail Light Bulb Toyota Sienna?
Having the right tools on hand makes the tail light bulb replacement process smooth and efficient. Here’s a list of essential tools:
- New Tail Light Bulb: Ensure you have the correct replacement bulb for your Toyota Sienna, as specified in your owner’s manual or an auto parts database.
- Screwdriver Set: A Phillips-head or flathead screwdriver, depending on the type of screws holding the tail light assembly in place.
- Socket Set: A socket set with the appropriate size sockets to remove any bolts securing the tail light assembly.
- Plastic Trim Removal Tool: This tool helps to gently pry off plastic covers or panels without scratching or damaging the vehicle’s finish.
- Gloves: Wearing gloves protects your hands and provides a better grip on the bulb and assembly.
- Safety Glasses: Safety glasses protect your eyes from debris or accidental bulb breakage.
- Soft Cloth or Towel: Use a soft cloth to handle the new bulb and protect the vehicle’s surface from scratches.
- Work Light or Flashlight: Provides ample light to see clearly inside the tail light housing, especially in low-light conditions.
- Wheel Chocks: For safety, use wheel chocks to prevent the vehicle from rolling, especially if working on a sloped surface.
4. Step-by-Step Guide: How to Replace Tail Light Bulb Toyota Sienna
Replacing a tail light bulb on your Toyota Sienna can be straightforward with the right guidance. Follow these detailed steps for a successful replacement.
4.1. Gather Your Tools and Replacement Bulb
-
Ensure you have the correct replacement bulb.
-
Collect the necessary tools: screwdriver set, socket set, plastic trim removal tool, gloves, safety glasses, soft cloth, and a work light.
4.2. Prepare the Vehicle
- Park your Toyota Sienna on a level surface.
- Turn off the ignition and engage the parking brake.
- Use wheel chocks for added safety, especially on a slope.
4.3. Access the Tail Light Assembly
- Open the Rear Hatch: Open the rear hatch of your Toyota Sienna to access the tail light assembly.
- Locate the Access Panel: Inside the vehicle, locate the access panel behind the tail light assembly. This panel is usually held in place by plastic clips or screws.
- Remove the Access Panel: Use a plastic trim removal tool or a screwdriver to carefully remove the access panel. Gently pry around the edges to release the clips or unscrew the screws.
4.4. Disconnect the Electrical Connector
- Locate the Connector: Once the access panel is removed, you will see the electrical connector attached to the tail light assembly.
- Disconnect the Connector: Press the release tab on the connector and gently pull it away from the tail light assembly. Be careful not to pull on the wires.
4.5. Remove the Tail Light Assembly
- Identify Fasteners: Examine the tail light assembly to identify all screws or bolts holding it in place.
- Remove Screws/Bolts: Use the appropriate screwdriver or socket to remove the screws or bolts. Keep them in a safe place to avoid losing them.
- Gently Pry (If Necessary): If the assembly is still stuck, gently pry it loose using a plastic trim removal tool. Insert the tool between the tail light assembly and the vehicle body, and carefully work your way around the edges.
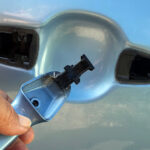
4.6. Remove the Old Bulb
- Locate Bulb Socket: Once the tail light assembly is removed, locate the socket for the tail light bulb.
- Twist and Remove: Grasp the bulb socket and twist it counterclockwise to release it from the tail light assembly. Pull the socket straight out.
- Remove Old Bulb: Gently pull the old bulb straight out of the socket. Note the orientation of the bulb for correct installation of the new one.
4.7. Install the New Bulb
- Insert New Bulb: Align the pins on the new bulb with the slots in the socket and gently push the bulb straight in.
- Reinstall Socket: Align the socket with the opening in the tail light assembly and push it in. Twist the socket clockwise to lock it in place.
4.8. Reassemble the Tail Light Assembly
- Reattach Assembly: Carefully align the tail light assembly with the vehicle body and push it into place.
- Reinstall Fasteners: Reinstall the screws or bolts that you removed earlier. Tighten them securely, but be careful not to overtighten.
4.9. Reconnect the Electrical Connector
- Attach Connector: Push the electrical connector back onto the tail light assembly until it clicks into place. Ensure it is securely attached.
4.10. Replace the Access Panel
- Align Panel: Align the access panel with the opening in the vehicle’s interior.
- Secure Panel: Push the panel back into place, ensuring all clips are securely fastened or screws are tightened.
4.11. Test the New Bulb
- Turn on Lights: Turn on the vehicle’s ignition and switch on the headlights to test the new tail light bulb.
- Check Brake Lights: Have someone press the brake pedal while you check the brake lights to ensure they are functioning correctly.
4.12. Final Check
- Inspect Assembly: Ensure the tail light assembly is securely attached and that all lights are working properly.
- Clean Up: Remove any tools and materials from the work area.
5. Common Issues and Troubleshooting Tips
Replacing a tail light bulb can sometimes present unexpected challenges. Here are some common issues and troubleshooting tips to help you resolve them effectively.
- Bulb Doesn’t Light Up:
- Issue: New bulb doesn’t light up after installation.
- Troubleshooting:
- Check Bulb Seating: Ensure the bulb is fully and correctly seated in the socket.
- Inspect the Socket: Look for corrosion or damage in the socket. Clean or replace if necessary.
- Verify Voltage: Use a multimeter to check if the socket is receiving power.
- Check Fuses: A blown fuse can prevent the tail light from working. Replace the fuse with the correct amperage.
- Tail Light Assembly Won’t Come Loose:
- Issue: Tail light assembly is stuck and difficult to remove.
- Troubleshooting:
- Check for Hidden Fasteners: Ensure all screws or bolts have been removed.
- Use Plastic Trim Tools: Gently pry the assembly loose with plastic trim tools to avoid damage.
- Apply Lubricant: Use a silicone-based lubricant around the edges to help loosen the assembly.
- Electrical Connector Issues:
- Issue: Electrical connector is difficult to disconnect or reconnect.
- Troubleshooting:
- Check Release Tab: Make sure the release tab on the connector is fully depressed before pulling.
- Clean Connectors: Clean any corrosion or debris from the connector with electrical contact cleaner.
- Inspect Wires: Look for damaged or frayed wires. Repair or replace as needed.
- Bulb Socket is Damaged:
- Issue: Bulb socket is cracked or corroded.
- Troubleshooting:
- Replace Socket: Purchase a new bulb socket from millertoyota.net or an auto parts store.
- Clean Contacts: Clean the metal contacts inside the socket with electrical contact cleaner.
- Ensure Proper Fit: Make sure the new socket fits snugly into the tail light assembly.
- Moisture Inside Tail Light Assembly:
- Issue: Moisture is accumulating inside the tail light assembly.
- Troubleshooting:
- Check Seals: Inspect the tail light assembly seals for damage.
- Replace Gasket: Replace the gasket or seal around the tail light assembly.
- Drill Drain Hole: As a temporary fix, drill a small drain hole at the bottom of the assembly to allow moisture to escape.
6. Safety Precautions When Replacing Tail Light Bulbs
Taking safety precautions is crucial when replacing tail light bulbs to prevent injuries and ensure a smooth process. Here are essential safety measures to follow:
- Wear Safety Glasses: Protect your eyes from debris or accidental bulb breakage by wearing safety glasses throughout the replacement process.
- Use Gloves: Wear gloves to protect your hands from dirt, sharp edges, and potential chemicals. Gloves also provide a better grip on tools and the bulb.
- Disconnect the Battery (Optional): Although not always necessary for a tail light bulb replacement, disconnecting the negative terminal of your car battery can prevent electrical accidents.
- Ensure Vehicle Stability: Park your vehicle on a level surface, engage the parking brake, and use wheel chocks to prevent any movement during the repair.
- Work in a Well-Lit Area: Adequate lighting is essential for clear visibility. Use a work light or flashlight to illuminate the tail light assembly and surrounding area.
- Handle Bulbs Carefully: New and used bulbs can be fragile and may shatter if dropped. Handle them gently and avoid touching the glass with bare hands, as oils from your skin can cause the bulb to overheat and fail prematurely.
- Dispose of Old Bulbs Properly: Dispose of old bulbs responsibly. Some bulbs contain materials that may be harmful to the environment. Check local regulations for proper disposal methods.
- Avoid Working on a Hot Exhaust: Ensure the exhaust system has cooled down completely before starting the repair, as it can cause severe burns.
- Keep Tools Organized: Keep your tools organized and within easy reach to prevent accidents and streamline the replacement process.
- Consult the Owner’s Manual: Refer to your vehicle’s owner’s manual for specific instructions and safety information related to tail light bulb replacement.
7. Maintenance Tips to Extend Tail Light Bulb Life
Proper maintenance can significantly extend the life of your Toyota Sienna’s tail light bulbs, saving you time and money. Here are some practical tips:
- Avoid Slamming the Trunk or Hatch: Excessive vibration from slamming the trunk or hatch can damage the delicate filaments in the tail light bulbs, leading to premature failure. Close these gently to minimize impact.
- Regularly Inspect Tail Lights: Make it a habit to check your tail lights regularly, ideally once a month. Look for any signs of dimming, flickering, or complete failure. Early detection can prevent more significant issues.
- Ensure Proper Voltage: Overvoltage can cause bulbs to burn out quickly. Have your vehicle’s electrical system checked periodically to ensure it is operating within the correct voltage range.
- Use High-Quality Bulbs: Invest in high-quality replacement bulbs from reputable brands like those available at millertoyota.net. These bulbs are designed to last longer and provide more reliable performance than cheaper alternatives.
- Check and Clean Bulb Sockets: Corrosion or dirt in the bulb sockets can cause poor electrical connections, leading to bulb failure. Clean the sockets periodically with electrical contact cleaner to ensure a good connection.
- Protect Bulbs from Moisture: Moisture inside the tail light assembly can cause bulbs to short out or corrode. Check the tail light seals and gaskets regularly, and replace them if they are damaged.
- Minimize On/Off Switching: Frequent on/off switching can shorten bulb life. Avoid unnecessary use of your lights, especially in conditions where they are not needed.
- Handle Bulbs with Care: When replacing bulbs, handle them with clean gloves to prevent oil and dirt from contaminating the glass. Contaminants can cause the bulb to overheat and fail prematurely.
- Check for Loose Connections: Loose wiring or connections can cause bulbs to flicker and burn out faster. Inspect the wiring and connections regularly, and tighten any loose connections.
- Replace Bulbs in Pairs: When one tail light bulb fails, consider replacing both at the same time. This ensures that both lights have the same brightness and extends the overall lifespan of the lighting system.
8. Understanding Tail Light Assembly Components
Familiarizing yourself with the components of the tail light assembly can help you better understand how to maintain and repair it. Here’s an overview of the key parts:
-
Outer Lens:
- Function: The outer lens is the colored plastic cover that protects the internal components of the tail light assembly from the elements.
- Material: Typically made of durable, impact-resistant plastic.
- Maintenance: Clean regularly to ensure optimal visibility and replace if cracked or damaged.
-
Bulb Sockets:
- Function: These are the receptacles that hold the tail light bulbs in place, providing the electrical connection needed for the bulbs to function.
- Material: Usually made of heat-resistant plastic or ceramic.
- Maintenance: Check for corrosion and clean as necessary. Replace if damaged or if the electrical contacts are worn.
-
Reflector:
- Function: The reflector is a mirrored surface behind the bulb that helps to amplify and direct the light emitted by the bulb, improving visibility.
- Material: Often made of plastic with a reflective coating.
- Maintenance: Keep clean to maximize light reflection. Replace if the reflective coating is damaged or worn.
-
Wiring Harness:
- Function: The wiring harness is a set of wires that connect the tail light assembly to the vehicle’s electrical system, providing power to the bulbs.
- Material: Insulated copper wires with connectors.
- Maintenance: Inspect for damage, such as frayed wires or loose connections. Repair or replace as needed.
-
Seals and Gaskets:
- Function: Seals and gaskets are used to create a watertight barrier between the tail light assembly and the vehicle body, preventing moisture and debris from entering.
- Material: Rubber or foam.
- Maintenance: Check regularly for cracks or deterioration. Replace if necessary to maintain a proper seal.
-
Mounting Points/Hardware:
- Function: These are the screws, bolts, or clips that secure the tail light assembly to the vehicle body.
- Material: Metal or plastic.
- Maintenance: Ensure they are securely fastened. Replace any damaged or missing hardware to prevent the assembly from coming loose.
-
Housing:
- Function: The housing is the main body of the tail light assembly, providing structural support and protection for the internal components.
- Material: Typically made of durable plastic.
- Maintenance: Check for cracks or damage. Replace if the housing is compromised.
-
Bulbs:
- Function: Provide the light source for the tail lights, brake lights, and turn signals.
- Types: Incandescent, LED, or halogen.
- Maintenance: Replace when they burn out or become dim. Ensure the correct bulb type is used for each function.
9. When to Seek Professional Help at Miller Toyota
While replacing a tail light bulb on your Toyota Sienna is often a straightforward task, there are situations where seeking professional help from Miller Toyota is the best course of action.
- Complex Electrical Issues: If you’ve replaced the bulb and checked the fuse, but the tail light still doesn’t work, there may be a more complex electrical problem.
- Damaged Wiring: If you notice frayed, corroded, or damaged wiring around the tail light assembly, it’s best to have a professional handle the repairs.
- Tail Light Assembly Damage: If the tail light assembly itself is cracked, broken, or damaged, it may need to be replaced.
- Persistent Moisture Problems: If you repeatedly find moisture inside the tail light assembly despite replacing seals and gaskets, there may be a structural issue that requires professional attention.
- Unfamiliarity with the Process: If you’re not comfortable working on your vehicle or unsure about any step of the replacement process, it’s always a good idea to seek professional assistance.
- Time Constraints: If you don’t have the time to deal with the tail light bulb replacement yourself, a professional can quickly and efficiently handle the job for you.
- Specialized Tools Required: Some tail light assemblies may require specialized tools to remove or replace.
- Safety Concerns: Working with electrical components can be risky if you’re not familiar with the proper safety precautions.
10. Frequently Asked Questions (FAQs) About Tail Light Bulb Replacement
Here are some frequently asked questions about tail light bulb replacement on a Toyota Sienna:
- Q1: How often should I replace my Toyota Sienna’s tail light bulbs?
- Tail light bulbs should be replaced as soon as they burn out or show signs of dimming. Regularly inspect your lights and replace bulbs promptly to ensure safety.
- Q2: Can I use LED bulbs in place of standard bulbs in my Toyota Sienna’s tail lights?
- Yes, LED bulbs can be used as replacements, but ensure they are compatible with your vehicle’s electrical system.
- Q3: What type of bulb do I need for my Toyota Sienna’s tail lights?
- Refer to your owner’s manual or an auto parts store to identify the correct bulb type for your specific Sienna model and year.
- Q4: Is it difficult to replace a tail light bulb on a Toyota Sienna myself?
- Replacing a tail light bulb is generally a straightforward task that most people can do with the right tools and guidance.
- Q5: What tools do I need to replace a tail light bulb on my Toyota Sienna?
- You will typically need a screwdriver set, socket set, plastic trim removal tool, gloves, safety glasses, and a new tail light bulb.
- Q6: Can a faulty tail light bulb affect my Toyota Sienna’s other electrical systems?
- In some cases, a faulty tail light bulb can cause electrical issues or interfere with other systems, particularly if it causes a short circuit.
- Q7: How much does it cost to have a tail light bulb replaced by a professional at Miller Toyota?
- The cost can vary depending on the specific model and the type of bulb required. Contact millertoyota.net for an accurate estimate.
- Q8: Are there any specific safety precautions I should take when replacing a tail light bulb?
- Yes, wear safety glasses, use gloves, ensure the vehicle is stable, and disconnect the battery if you are not comfortable working with electrical components.
- Q9: What should I do if the new tail light bulb doesn’t work after I install it?
- Check the bulb seating, inspect the socket for corrosion, verify voltage, and check the fuses. If the problem persists, seek professional help.
- Q10: Where can I purchase replacement tail light bulbs for my Toyota Sienna?
- You can purchase replacement tail light bulbs at millertoyota.net, auto parts stores, or online retailers. Ensure you get the correct bulb type for your vehicle.
Replacing a tail light bulb on your Toyota Sienna is a straightforward process that enhances your vehicle’s safety and ensures legal compliance. By following this comprehensive guide, you can confidently handle this minor repair and maintain your vehicle in top condition. Remember, millertoyota.net is always here to provide expert assistance and genuine parts for all your Toyota needs.
Ready to get started? Visit millertoyota.net today to find the right tail light bulb for your Toyota Sienna, schedule a service appointment, or contact our knowledgeable team for personalized assistance!