Changing a 2012 Toyota Corolla headlight bulb might seem daunting, but it’s a manageable task that can save you money and time by avoiding a trip to the mechanic; millertoyota.net is here to guide you through the process with clear, step-by-step instructions, ensuring your safety and optimal visibility on the road. You’ll learn about the right tools, the correct bulb types, and essential safety precautions for a successful headlight replacement, enhancing your vehicle’s lighting performance and road safety while exploring options like halogen, LED headlight upgrades, and auto repair tips.
1. Why is Knowing How to Change a 2012 Toyota Corolla Headlight Bulb Important?
Knowing how to change a 2012 Toyota Corolla headlight bulb is important for safety, cost savings, and convenience. Replacing a headlight bulb promptly ensures optimal visibility and compliance with traffic laws, while learning the process empowers you to handle this common maintenance task yourself, saving on labor costs and dealership visits, according to RepairPal.
- Enhanced Safety: Functioning headlights are crucial for safe driving, especially at night or in adverse weather conditions.
- Cost Savings: DIY headlight replacement avoids labor costs charged by mechanics.
- Legal Compliance: Driving with a burnt-out headlight can result in fines and penalties.
- Convenience: Replacing the bulb yourself saves time compared to scheduling a service appointment.
- Prevent Further Damage: A faulty bulb can sometimes affect other electrical components.
2. What Tools and Materials Do I Need to Change a 2012 Toyota Corolla Headlight Bulb?
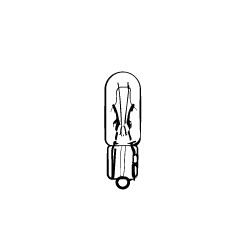
To change a 2012 Toyota Corolla headlight bulb, you will need a new headlight bulb (check your owner’s manual for the correct type, typically 9005 for high beam and 9006 for low beam), gloves, a screwdriver (usually a Phillips head), and possibly a small socket set; having these tools ensures a smooth and safe replacement process.
- New Headlight Bulb: Consult your owner’s manual or a parts store for the correct bulb type (9005 for high beam, 9006 for low beam).
- Gloves: Protect your hands from dirt and oils, which can damage the new bulb.
- Screwdriver: A Phillips head screwdriver is typically needed to remove the headlight assembly cover.
- Socket Set (Optional): May be required for accessing certain bulb compartments.
- Work Light or Flashlight: Provides better visibility, especially in dimly lit conditions.
- Clean Cloth: To wipe off any smudges or dirt on the new bulb.
- Safety Glasses: Protect your eyes from debris.
3. What are the Different Types of Headlight Bulbs for a 2012 Toyota Corolla?
The different types of headlight bulbs for a 2012 Toyota Corolla include halogen, LED, and HID (High-Intensity Discharge) options, with halogen being the standard type while LEDs offer brighter and more energy-efficient performance, and HIDs provide a very bright, white light but usually require a more complex installation.
- Halogen Bulbs: These are the standard bulbs that come with most vehicles. They are affordable and provide adequate light output.
- LED Bulbs: LEDs are brighter, last longer, and are more energy-efficient than halogen bulbs. They also produce less heat.
- HID (High-Intensity Discharge) Bulbs: HID bulbs produce a very bright, white light. They are more expensive and typically require a ballast for operation.
- Xenon Bulbs: Similar to HID, providing a bright, efficient light.
- Projector Headlights: Some Corollas come with projector headlights, which focus the light more precisely.
4. How Do I Prepare My 2012 Toyota Corolla Before Changing the Headlight Bulb?
Before changing the headlight bulb on your 2012 Toyota Corolla, ensure the car is turned off and the engine is cool, engage the parking brake, open the hood, and locate the headlight assembly; this preparation ensures your safety and easy access to the bulb.
- Turn Off the Engine: Ensure the car is completely off to avoid any electrical hazards.
- Allow the Engine to Cool: The engine compartment can get very hot, so give it time to cool down.
- Engage the Parking Brake: For safety, engage the parking brake.
- Open the Hood: Locate the hood release lever, usually under the dashboard, and open the hood.
- Locate the Headlight Assembly: Identify the headlight assembly on the side where you need to replace the bulb.
- Clear the Area: Remove any obstructions around the headlight assembly for easier access.
- Consult the Owner’s Manual: Refer to your 2012 Toyota Corolla owner’s manual for specific instructions and diagrams.
5. What are the Step-by-Step Instructions for Changing a 2012 Toyota Corolla Headlight Bulb?
The step-by-step instructions for changing a 2012 Toyota Corolla headlight bulb involve opening the hood, disconnecting the electrical connector, removing the dust cover, unclipping the bulb, replacing the bulb, and reassembling the components, ensuring proper alignment and secure connections at each step.
- Open the Hood: Securely prop open the hood of your 2012 Toyota Corolla.
- Locate the Headlight Assembly: Find the headlight assembly on the side where you need to replace the bulb.
- Disconnect the Electrical Connector:
- Locate the electrical connector attached to the back of the headlight bulb.
- Gently press the release tab on the connector.
- Pull the connector straight back to disconnect it from the bulb.
 Disconnected Electrical Connector
Disconnect the electrical connector to safely remove the headlight bulb.
- Remove the Dust Cover:
- Twist the dust cover (usually black rubber or plastic) counterclockwise.
- Remove the cover to expose the headlight bulb.
- Unclip the Bulb:
- Locate the metal clip holding the bulb in place.
- Press the clip inwards and either up or down to release it. The mechanism can vary, so inspect it closely.
- Carefully swing the clip out of the way.
- Remove the Old Bulb:
- Gently pull the old bulb straight out of the socket. Avoid touching the glass part of the bulb.
- Install the New Bulb:
- Align the new bulb with the socket. Ensure it matches the correct orientation.
- Push the new bulb straight into the socket until it is fully seated.
- Be careful not to touch the glass of the new bulb. Use gloves or a clean cloth if necessary.
- Reclip the Bulb:
- Swing the metal clip back into place to secure the new bulb.
- Ensure the clip is properly fastened to hold the bulb firmly.
- Replace the Dust Cover:
- Align the dust cover with the opening.
- Twist the cover clockwise until it is securely in place.
- Reconnect the Electrical Connector:
- Align the electrical connector with the back of the new bulb.
- Push the connector straight in until it clicks into place.
- Make sure the connector is securely attached.
- Test the New Bulb:
- Turn on the car’s headlights to ensure the new bulb is working correctly.
- Check both low beam and high beam functions.
- Repeat for the Other Side (If Necessary):
- If you need to replace the bulb on the other side, repeat the same steps.
- Close the Hood:
- Carefully lower the hood and ensure it latches securely.
- Dispose of the Old Bulb Properly:
- Do not throw the old bulb in the regular trash. Dispose of it at a local recycling center or auto parts store.
6. What Safety Precautions Should I Take When Changing a Headlight Bulb?
When changing a headlight bulb, take safety precautions such as wearing gloves to avoid contaminating the bulb, disconnecting the battery to prevent electrical shock, and allowing the bulb to cool down to prevent burns, according to the National Highway Traffic Safety Administration (NHTSA).
- Wear Gloves: Always wear gloves to prevent oil from your skin from getting on the bulb, as this can cause it to overheat and fail prematurely.
- Disconnect the Battery (Optional): Disconnecting the negative terminal of the battery can prevent electrical shock, though it’s not always necessary.
- Allow the Bulb to Cool Down: If the headlight was recently in use, allow the bulb to cool down before handling it to prevent burns.
- Avoid Touching the Glass: Do not touch the glass part of the new bulb. If you accidentally touch it, clean it with rubbing alcohol before installation.
- Work in a Well-Lit Area: Ensure you have adequate lighting to see what you’re doing.
- Use the Correct Bulb Type: Always use the bulb type specified in your vehicle’s owner’s manual.
- Secure the Vehicle: Make sure your car is parked on a level surface and the parking brake is engaged.
- Consult the Owner’s Manual: Refer to your vehicle’s owner’s manual for specific instructions and safety information.
7. What Common Mistakes Should I Avoid When Changing a 2012 Toyota Corolla Headlight Bulb?
Common mistakes to avoid when changing a 2012 Toyota Corolla headlight bulb include touching the bulb glass, using the wrong bulb type, not securing the bulb properly, and forgetting to reconnect the electrical connector, all of which can lead to reduced bulb life or improper functioning.
- Touching the Bulb Glass: Touching the glass of the bulb with your bare hands can leave oils that cause the bulb to overheat and fail.
- Using the Wrong Bulb Type: Using the wrong bulb type can damage the headlight assembly or cause it to function improperly.
- Not Securing the Bulb Properly: If the bulb is not securely clipped in place, it can vibrate and fail prematurely.
- Forgetting to Reconnect the Electrical Connector: Failing to reconnect the electrical connector will prevent the bulb from lighting up.
- Damaging the Connector: Forcing the connector can damage it, leading to poor connections or failure.
- Cross-Threading Screws: Be careful not to cross-thread any screws when reassembling the headlight assembly.
- Neglecting to Test: Always test the new bulb after installation to ensure it works correctly.
- Improper Dust Cover Placement: Ensure the dust cover is correctly placed to protect the bulb from moisture and debris.
8. How Do I Ensure the New Headlight Bulb is Properly Aligned?
To ensure the new headlight bulb is properly aligned, check that the bulb is fully seated in the socket, the retaining clip is secure, and the headlight beam is correctly aimed after installation, possibly requiring adjustment using the headlight alignment screws; proper alignment is essential for optimal visibility and avoiding glare for other drivers.
- Check Bulb Seating: Ensure the bulb is fully seated in the socket and that it is not loose.
- Secure the Retaining Clip: Make sure the retaining clip is properly fastened to hold the bulb firmly in place.
- Inspect Beam Alignment: After installation, turn on the headlights and check the beam alignment. The beam should be level and not too high or too low.
- Use Headlight Alignment Screws: Most headlight assemblies have alignment screws that allow you to adjust the beam. Consult your owner’s manual for the location of these screws.
- Park on a Level Surface: Park your car on a level surface facing a wall or garage door to check the beam alignment.
- Measure the Beam Height: Measure the height of the headlight from the ground and transfer that measurement to the wall. The brightest part of the beam should be at or slightly below this height.
- Adjust Horizontally: If the beam is too far to the left or right, use the horizontal adjustment screw to center it.
- Professional Alignment: If you are unsure about aligning the headlights yourself, take your car to a professional for alignment.
9. How Often Should I Replace My 2012 Toyota Corolla Headlight Bulbs?
You should replace your 2012 Toyota Corolla headlight bulbs every 50,000 to 60,000 miles, or about every 3 to 5 years, or sooner if you notice dimming or discoloration, as recommended by the Car Care Council, ensuring optimal visibility and safety.
- Halogen Bulbs: Halogen bulbs typically last between 500 to 1,000 hours.
- LED Bulbs: LED bulbs can last much longer, often up to 30,000 to 50,000 hours.
- HID Bulbs: HID bulbs usually last between 2,000 to 3,000 hours.
- Check Regularly: Inspect your headlights regularly to check for dimming, discoloration, or flickering.
- Replace in Pairs: It’s often recommended to replace headlight bulbs in pairs. If one bulb burns out, the other is likely to fail soon as well.
- Driving Conditions: If you frequently drive at night or in adverse weather conditions, you may need to replace your headlight bulbs more often.
- Manufacturer Recommendations: Consult your vehicle’s owner’s manual for specific recommendations on headlight bulb replacement.
10. What Are the Benefits of Upgrading to LED Headlight Bulbs on My 2012 Toyota Corolla?
The benefits of upgrading to LED headlight bulbs on your 2012 Toyota Corolla include brighter light output, longer lifespan, lower energy consumption, and improved visibility, enhancing safety and reducing the frequency of replacements, according to the U.S. Department of Energy.
- Brighter Light Output: LED bulbs produce a brighter, more focused beam of light, improving visibility.
- Longer Lifespan: LEDs last significantly longer than halogen bulbs, reducing the need for frequent replacements.
- Lower Energy Consumption: LEDs consume less energy, which can help improve fuel efficiency.
- Improved Visibility: The brighter light and focused beam can enhance visibility in dark or adverse weather conditions.
- Modern Look: LED headlights can give your car a more modern and stylish appearance.
- Instant On/Off: LEDs turn on instantly, providing immediate illumination.
- Reduced Heat: LEDs produce less heat than halogen bulbs, which can help prolong the life of the headlight assembly.
- Durability: LEDs are more resistant to vibrations and impacts, making them more durable.
11. How Much Does It Cost to Change a 2012 Toyota Corolla Headlight Bulb?
The cost to change a 2012 Toyota Corolla headlight bulb can range from $20 to $100 if you do it yourself, including the cost of the bulb, or $80 to $200 if you have a professional mechanic do it, depending on the type of bulb and labor costs, as reported by Kelley Blue Book.
- DIY Replacement:
- Bulb Cost: Halogen bulbs typically cost between $10 and $30 each.
- Total Cost: If you do it yourself, the total cost will be the price of the bulb(s).
- Professional Replacement:
- Labor Cost: Labor costs can range from $60 to $120, depending on the mechanic’s hourly rate and the complexity of the job.
- Bulb Cost: The cost of the bulb will be added to the labor cost.
- Total Cost: The total cost for professional replacement can range from $80 to $200 or more.
- Bulb Type:
- Halogen: $10 – $30 per bulb
- LED: $30 – $100 per bulb
- HID: $50 – $200 per bulb
12. Where Can I Buy Replacement Headlight Bulbs for My 2012 Toyota Corolla in Boise, Idaho?
You can buy replacement headlight bulbs for your 2012 Toyota Corolla in Boise, Idaho, at local auto parts stores like AutoZone, Advance Auto Parts, and O’Reilly Auto Parts, as well as from dealerships like Miller Toyota, ensuring you get the correct bulb type and quality for your vehicle.
- Auto Parts Stores:
- AutoZone: Located at multiple locations in Boise, such as 522 N Milwaukee St.
- Advance Auto Parts: Several locations in Boise, including 7820 Fairview Ave.
- O’Reilly Auto Parts: Multiple locations in Boise, such as 8625 W Fairview Ave.
- Dealerships:
- Miller Toyota: Located at 208 N Maple Grove Rd, Boise, ID 83704. They can provide OEM (Original Equipment Manufacturer) bulbs that are specifically designed for your Toyota Corolla.
 Miller Toyota
Miller Toyota offers a wide range of services and genuine parts for your vehicle.
- Online Retailers:
- Amazon: A wide selection of headlight bulbs with customer reviews and fast shipping.
- eBay: Offers a variety of bulbs from different sellers, often at competitive prices.
- Walmart:
- Located at various locations in Boise, offering a selection of automotive bulbs.
- Check Local Listings:
- Use online directories like Yelp or Google Maps to find local auto parts stores and dealerships near you.
13. Can I Replace My Headlight Bulbs with a Different Wattage?
You should not replace your headlight bulbs with a different wattage than what is recommended in your 2012 Toyota Corolla’s owner’s manual, as higher wattage bulbs can generate excessive heat, potentially damaging the wiring and headlight assembly, while lower wattage bulbs may not provide adequate illumination for safe driving.
- Heat Generation: Higher wattage bulbs generate more heat, which can melt or damage the headlight assembly, wiring, and connectors.
- Electrical Load: Using a higher wattage bulb can overload the electrical system, potentially blowing fuses or damaging other electrical components.
- Reduced Lifespan: Overloading the system can also shorten the lifespan of the bulb itself.
- Dim Lighting: Lower wattage bulbs may not provide sufficient illumination, reducing visibility and safety, especially at night.
- Legal Compliance: Using bulbs that do not meet the vehicle’s specifications may violate local traffic laws.
- Owner’s Manual: Always refer to your vehicle’s owner’s manual for the recommended bulb wattage and type.
- Professional Advice: Consult with a professional mechanic or auto parts specialist if you are unsure about the correct bulb wattage for your vehicle.
14. What Should I Do If My New Headlight Bulb Still Doesn’t Work?
If your new headlight bulb still doesn’t work, check the fuse, ensure the bulb is properly connected, inspect the wiring for damage, and test the ground connection to rule out common issues, or consult a professional if the problem persists, ensuring a safe and effective resolution.
- Check the Fuse:
- Locate the fuse box, usually under the dashboard or in the engine compartment.
- Consult your owner’s manual for the location of the headlight fuse.
- Use a fuse tester or visual inspection to check if the fuse is blown.
- Replace the blown fuse with a new one of the same amperage.
- Ensure Proper Connection:
- Double-check that the electrical connector is securely attached to the back of the bulb.
- Make sure the connector is not damaged or corroded.
- Inspect the Wiring:
- Look for any signs of damage to the wiring, such as cuts, frays, or melted insulation.
- Check the wiring harness for loose connections.
- Test the Ground Connection:
- Ensure the headlight assembly has a good ground connection.
- Check the ground wire for corrosion or looseness.
- Clean and tighten the ground connection if necessary.
- Check the Bulb Itself:
- Inspect the new bulb for any visible defects or damage.
- Try a different new bulb to rule out the possibility of a faulty bulb.
- Test the Socket:
- Use a multimeter to test the voltage at the bulb socket.
- Ensure that the socket is receiving power when the headlights are turned on.
- Consult a Professional:
- If you have checked all of the above and the bulb still doesn’t work, consult a professional mechanic or electrician for further diagnosis and repair.
15. How Can I Prevent My Headlight Bulbs From Burning Out Quickly?
To prevent your headlight bulbs from burning out quickly, avoid touching the bulb glass, ensure proper voltage regulation, avoid sudden vibrations, and replace bulbs in pairs to maintain balanced performance and prolong lifespan.
- Avoid Touching the Bulb Glass:
- Always wear gloves when handling headlight bulbs to prevent oil from your skin from getting on the glass.
- If you accidentally touch the glass, clean it with rubbing alcohol before installation.
- Ensure Proper Voltage Regulation:
- Check your car’s voltage regulator to ensure it is functioning correctly.
- Overvoltage can shorten the lifespan of headlight bulbs.
- Avoid Sudden Vibrations:
- Minimize driving on rough roads, which can cause vibrations that damage the bulb filament.
- Ensure the headlight assembly is securely mounted to prevent vibrations.
- Replace Bulbs in Pairs:
- When one headlight bulb burns out, replace both bulbs at the same time.
- The remaining bulb is likely to fail soon as well, and replacing them together ensures balanced performance.
- Use High-Quality Bulbs:
- Invest in high-quality headlight bulbs from reputable brands.
- Cheaper bulbs may have a shorter lifespan.
- Check for Moisture:
- Ensure the headlight assembly is properly sealed to prevent moisture from entering.
- Moisture can cause corrosion and shorten the lifespan of the bulb.
- Turn Off Headlights When Not Needed:
- Turn off your headlights when they are not needed, such as during daylight hours.
- This can help prolong the lifespan of the bulbs.
- Inspect Regularly:
- Inspect your headlights regularly to check for dimming, discoloration, or flickering.
- Replace the bulbs as soon as you notice any issues.
16. What is the Warranty on Replacement Headlight Bulbs for a 2012 Toyota Corolla?
The warranty on replacement headlight bulbs for a 2012 Toyota Corolla typically ranges from 90 days to 1 year, depending on the brand and type of bulb, with some premium brands offering extended warranties; check the specific warranty terms when purchasing the bulb.
- Standard Halogen Bulbs: These typically come with a limited warranty, often around 90 days to 1 year.
- Premium Halogen Bulbs: Some premium brands offer extended warranties, up to 1 to 2 years.
- LED Bulbs: LED headlight bulbs often have longer warranties, ranging from 1 to 3 years.
- HID Bulbs: HID bulbs usually come with warranties ranging from 1 to 2 years.
- OEM Bulbs: Original Equipment Manufacturer (OEM) bulbs purchased from a Toyota dealership may have a warranty that matches the vehicle’s parts warranty, which can be more comprehensive.
- Warranty Coverage: The warranty typically covers defects in materials and workmanship. It may not cover damage caused by improper installation, misuse, or normal wear and tear.
- Proof of Purchase: Keep your purchase receipt and warranty information in a safe place. You will need to provide proof of purchase to make a warranty claim.
- Check with the Retailer: Always check the specific warranty terms with the retailer or manufacturer before purchasing a replacement headlight bulb.
17. Are There Any Aftermarket Headlight Assembly Upgrades Available for a 2012 Toyota Corolla?
Yes, there are aftermarket headlight assembly upgrades available for a 2012 Toyota Corolla, including projector headlights, halo headlights, and LED headlight assemblies, which can improve aesthetics and lighting performance, according to popular automotive forums and retailers like CARiD.
- Projector Headlights:
- Description: Projector headlights use a lens to focus the light into a tighter, more directed beam, providing better visibility.
- Benefits: Improved light output, sharper beam pattern, and a modern appearance.
- Halo Headlights (Angel Eyes):
- Description: Halo headlights feature illuminated rings around the headlight lens, adding a distinctive look.
- Benefits: Enhanced aesthetics, increased visibility, and a custom appearance.
- LED Headlight Assemblies:
- Description: These assemblies replace the entire headlight unit with LEDs, offering brighter and more energy-efficient lighting.
- Benefits: Superior light output, longer lifespan, and a modern look.
- Sequential Turn Signal Headlights:
- Description: These headlights include turn signals that light up in a sequential or sweeping motion.
- Benefits: Enhanced visibility and a unique, stylish appearance.
- Blacked-Out Headlights:
- Description: These headlights have a dark or blacked-out housing, giving the car a more aggressive look.
- Benefits: Aesthetic upgrade, sporty appearance.
- Where to Buy:
- CARiD: Offers a wide selection of aftermarket headlight assemblies for the 2012 Toyota Corolla.
- Amazon: Provides a variety of options from different manufacturers and sellers.
- eBay: Offers competitive prices on aftermarket headlight assemblies.
- Local Auto Parts Stores: Check with local auto parts stores in Boise, Idaho, for availability.
18. What Are the Legal Requirements for Headlights in Idaho?
The legal requirements for headlights in Idaho mandate that vehicles must have two working headlights that emit white light, be visible from at least 500 feet, and be used from sunset to sunrise and during adverse weather conditions, ensuring safe visibility on the road, as per Idaho state law.
- Number of Headlights: All vehicles must have at least two working headlights.
- Color of Light: Headlights must emit a white light.
- Visibility: Headlights must be visible from a distance of at least 500 feet.
- Usage Times: Headlights must be used from sunset to sunrise and at any other time when visibility is reduced to 500 feet or less due to insufficient light or adverse weather conditions.
- High Beam Usage: High beams should be used to provide better visibility in dark areas but must be dimmed when approaching oncoming traffic within 500 feet or following another vehicle within 200 feet.
- Restrictions: Blue or colored headlights are typically prohibited.
- Additional Lighting: Fog lights are permitted but must be used in conjunction with low beam headlights.
- Regular Inspection: It is the driver’s responsibility to ensure that headlights are functioning properly and are correctly aimed.
19. How Do I Aim My 2012 Toyota Corolla Headlights After Replacing the Bulb?
To aim your 2012 Toyota Corolla headlights after replacing the bulb, park on a level surface facing a wall, measure the headlight height, mark it on the wall, and adjust the headlight beams to align with the marks using the adjustment screws, ensuring proper visibility and avoiding glare for other drivers.
- Park on a Level Surface:
- Park your 2012 Toyota Corolla on a level surface facing a wall or garage door.
- The distance between the headlights and the wall should be approximately 25 feet.
- Prepare the Vehicle:
- Ensure the vehicle has a full tank of gas and that the tires are properly inflated.
- Remove any heavy loads from the trunk or cargo area.
- Measure Headlight Height:
- Measure the distance from the ground to the center of the headlight lens.
- Transfer this measurement to the wall. Mark the height with tape or a marker.
- Mark Vertical Alignment:
- Find the center point of your vehicle (you can use the emblem on the hood as a reference).
- Measure the distance from this center point to each headlight.
- Transfer these measurements to the wall, marking the horizontal center of each headlight.
- Adjust Headlight Beams:
- Open the hood of your 2012 Toyota Corolla.
- Locate the headlight adjustment screws. There are typically two screws per headlight: one for vertical adjustment and one for horizontal adjustment.
- Use a screwdriver to adjust the screws. The goal is to align the brightest part of the headlight beam with the marks on the wall.
- Vertical Adjustment: Adjust the vertical screw so that the top of the high-intensity zone of the beam is at or slightly below the height you marked on the wall.
- Horizontal Adjustment: Adjust the horizontal screw so that the center of the beam is aligned with the horizontal marks on the wall.
- Test and Fine-Tune:
- After making the initial adjustments, take your car for a short drive at night.
- Check the headlight alignment on a dark road.
- Make any necessary fine-tuning adjustments to ensure optimal visibility and to avoid blinding oncoming traffic.
20. Where Can I Find a Reliable Mechanic in Boise, Idaho, to Change My 2012 Toyota Corolla Headlight Bulb?
You can find a reliable mechanic in Boise, Idaho, to change your 2012 Toyota Corolla headlight bulb by checking online reviews on sites like Yelp and Google, asking for recommendations from friends and family, and considering dealerships like Miller Toyota for specialized service, ensuring you find a trusted professional for your car maintenance needs.
- Online Review Sites:
- Yelp: Check Yelp for mechanic shops in Boise, Idaho, and read customer reviews.
- Google Reviews: Look at Google Reviews for local mechanics and auto repair shops.
- Better Business Bureau (BBB): Check the BBB for ratings and reviews of local businesses.
- Recommendations from Friends and Family:
- Ask friends, family, and coworkers for recommendations.
- Personal referrals can be a great way to find a trustworthy mechanic.
- Dealerships:
- Miller Toyota: Located at 208 N Maple Grove Rd, Boise, ID 83704. Dealerships often have certified technicians who specialize in Toyota vehicles.
 Miller Toyota Service
Miller Toyota provides expert service and maintenance for your Toyota Corolla.
- ASE-Certified Mechanics:
- Look for mechanics who are certified by the National Institute for Automotive Service Excellence (ASE).
- ASE certification indicates that the mechanic has met certain standards of knowledge and competence.
- Check for Specializations:
- Some mechanics specialize in certain types of vehicles or repairs.
- If you have specific concerns or issues with your Toyota Corolla, look for a mechanic with experience in Toyota vehicles.
- Ask for Estimates:
- Call several shops and ask for estimates on the cost of replacing your headlight bulb.
- Be sure to ask if the estimate includes the cost of the bulb and labor.
- Visit the Shop:
- Visit the shop in person to get a feel for the environment and the level of service.
- Look for a clean and organized shop with friendly and knowledgeable staff.
- Consider Warranty:
- Ask about the shop’s warranty policy on parts and labor.
- A good warranty can provide peace of mind in case of any issues with the repair.
FAQ: Changing 2012 Toyota Corolla Headlight Bulbs
- What type of headlight bulb does a 2012 Toyota Corolla use? A 2012 Toyota Corolla typically uses 9005 (HB3) for high beam and 9006 (HB4) for low beam headlights.
- Can I use LED bulbs in my 2012 Toyota Corolla? Yes, you can use LED bulbs, but ensure they are compatible and properly installed for optimal performance.
- How do I access the headlight bulb in a 2012 Toyota Corolla? Open the hood, remove the dust cover behind the headlight assembly, and then detach the bulb.
- Is it easy to change a headlight bulb on a 2012 Toyota Corolla myself? Yes, with basic tools and following instructions, changing the bulb is a manageable DIY task.
- What tools are needed to change a 2012 Toyota Corolla headlight bulb? You will need gloves, a screwdriver (usually Phillips head), and possibly a socket set.
- How often should I replace my headlight bulbs? Replace them every 50,000 to 60,000 miles or every 3 to 5 years, or sooner if dimming occurs.
- What safety precautions should I take when changing a headlight bulb? Wear gloves, avoid touching the bulb glass, and ensure the car is turned off and the engine is cool.
- Where can I buy replacement headlight bulbs for my 2012 Toyota Corolla? You can buy them at auto parts stores like AutoZone, Advance Auto Parts, O’Reilly, and dealerships like Miller Toyota.
- How much does it cost to have a mechanic change my headlight bulb? It typically costs between $80 to $200, depending on labor and bulb type.
- What are the legal requirements for headlights in Idaho? Headlights must be white, visible from 500 feet, and used from sunset to sunrise and during adverse weather.
Ready to brighten your drive? Head over to millertoyota.net to explore our latest Toyota models, book a service appointment, or contact our expert team for personalized assistance!