That persistent rattle from your dashboard can drive anyone crazy. For owners of a 2013 Toyota Corolla, a common culprit for interior noise can be the center console air vent assembly. What started as a minor annoyance in my ’13 Toyota Corolla quickly escalated into a full-blown DIY repair project. Thinking a quick tap might silence the rattle, I unfortunately ended up breaking the vent instead! If you’re facing a similar situation, fear not. This guide will walk you through replacing your 2013 Toyota Corolla‘s center console air vent, restoring peace and quiet to your ride.
 Reassembled broken air vent of a 2013 Toyota Corolla showing cracked plastic pieces.
Initially, the rattling in my 2013 Corolla‘s center console was intermittent, but it soon became constant, especially while driving. Through some careful pressing and prodding around the console – which I had recently taken apart to investigate another sound – I pinpointed the source: the air vent assembly at the top. In a moment of frustration, a forceful tap turned into a destructive bang. The result? The top of the vent assembly shattered. The image above shows the broken pieces I painstakingly reassembled to document the damage. Driving with the broken vent was even noisier, so I removed the top portion entirely for the drive home.
 2013 Toyota Corolla's dashboard with the top of the center console air vent removed after damage.
As you can see above, driving back was done with the damaged top section of the 2013 Toyota Corolla‘s air vent completely removed to minimize rattling. Upon returning home, I immediately ordered a replacement air vent assembly online to fix my ’13 Corolla.
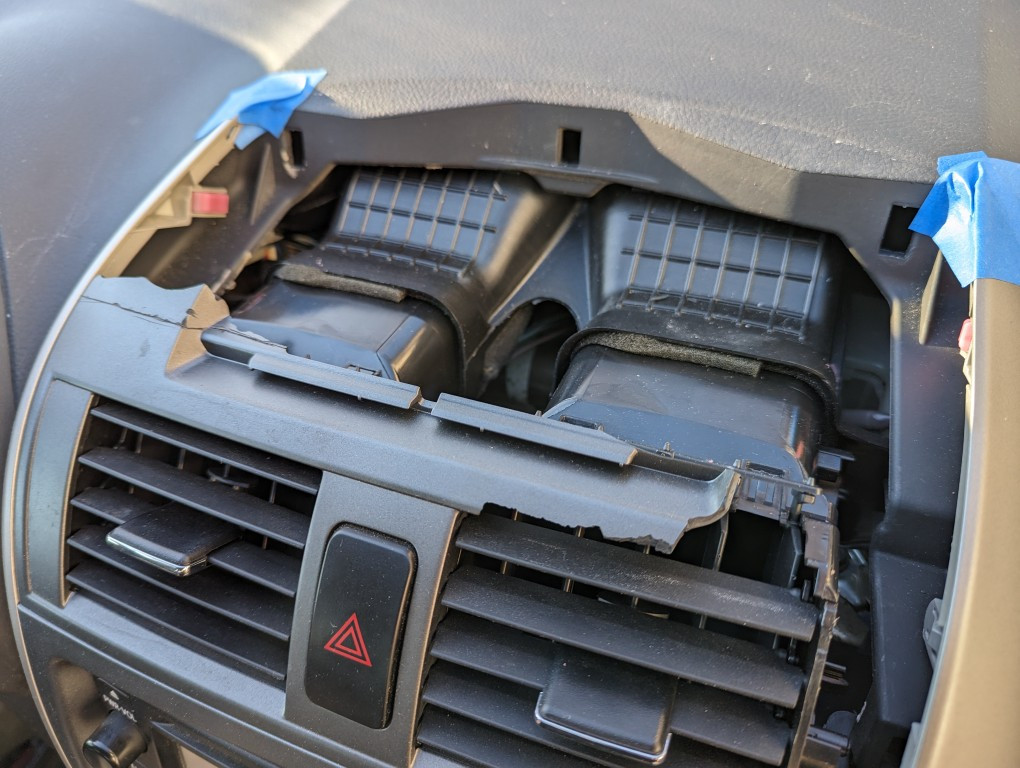
 Side covers of a 2013 Toyota Corolla center console removed to access air vent assembly.
The replacement process for a 2013 Toyota Corolla air vent begins with removing the silver plastic side covers of the center console. These covers are secured by plastic clips and can be pulled off directly towards you. A thin plastic shim or trim removal tool can be helpful to get a grip and gently pry them loose. Opening the glove box on the right side provides a bit more room to maneuver and remove that cover.
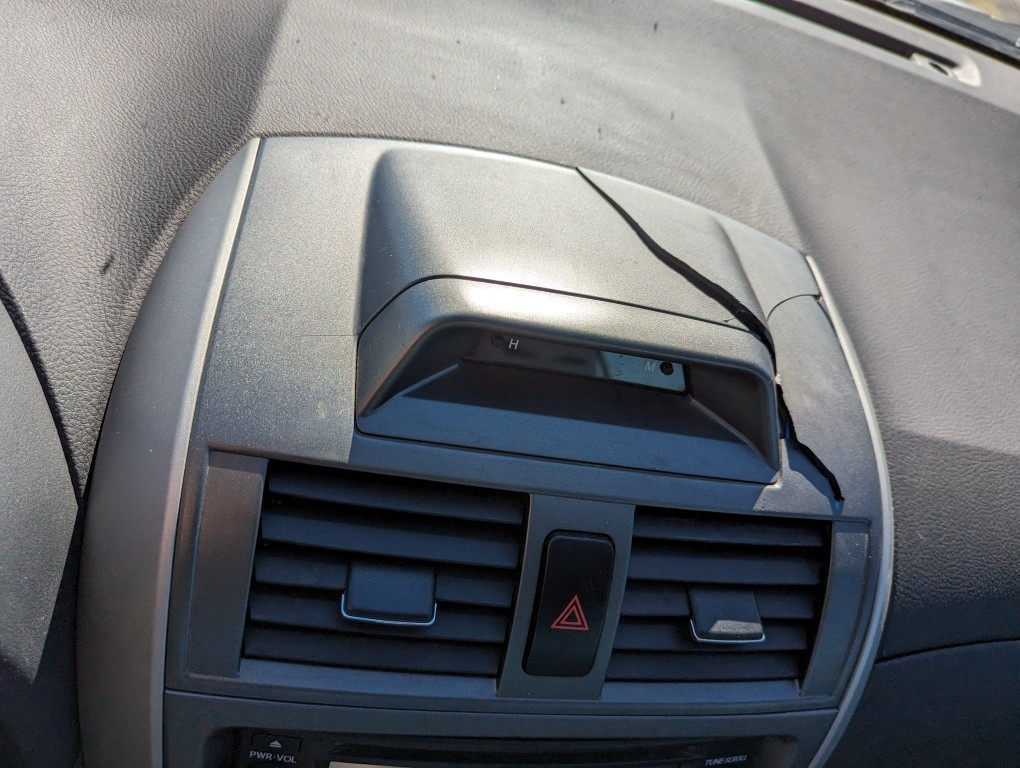
 Close-up of the damaged air vent assembly in a 2013 Toyota Corolla before removal.
Here’s a closer look at the original, broken air vent assembly in my 2013 Toyota Corolla just before I removed it. This gives you an idea of the part we are targeting for replacement.
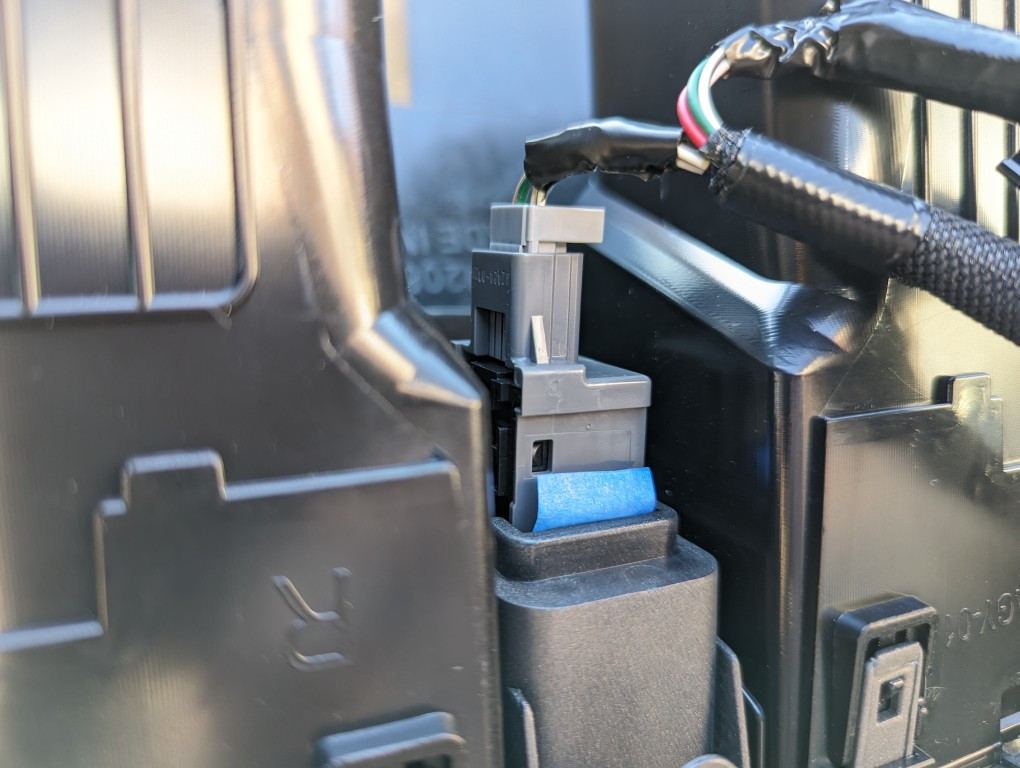
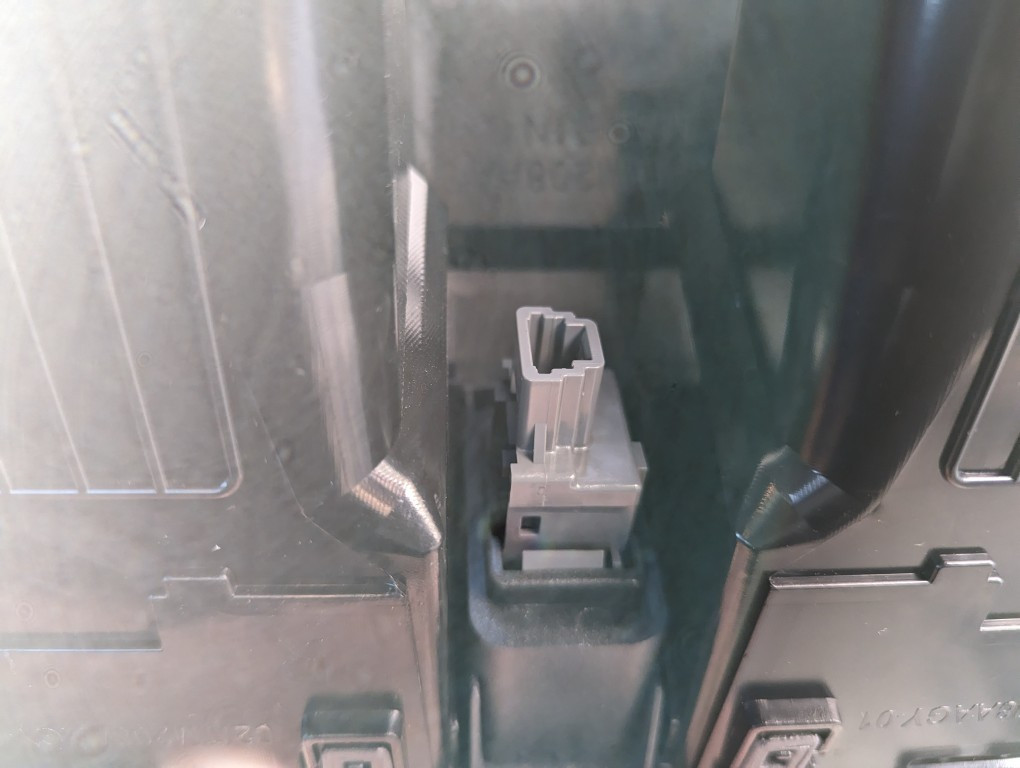 Caution lights switch being disconnected from the 2013 Toyota Corolla air vent assembly.
To remove the air vent assembly from the 2013 Corolla, gently pull it straight out. As you pull, you’ll see a wire connected to the hazard/caution lights switch. Disconnect this cable from the back of the switch. This switch will need to be transferred to the new replacement air vent.
 Close up of the caution lights switch from a 2013 Toyota Corolla center console.
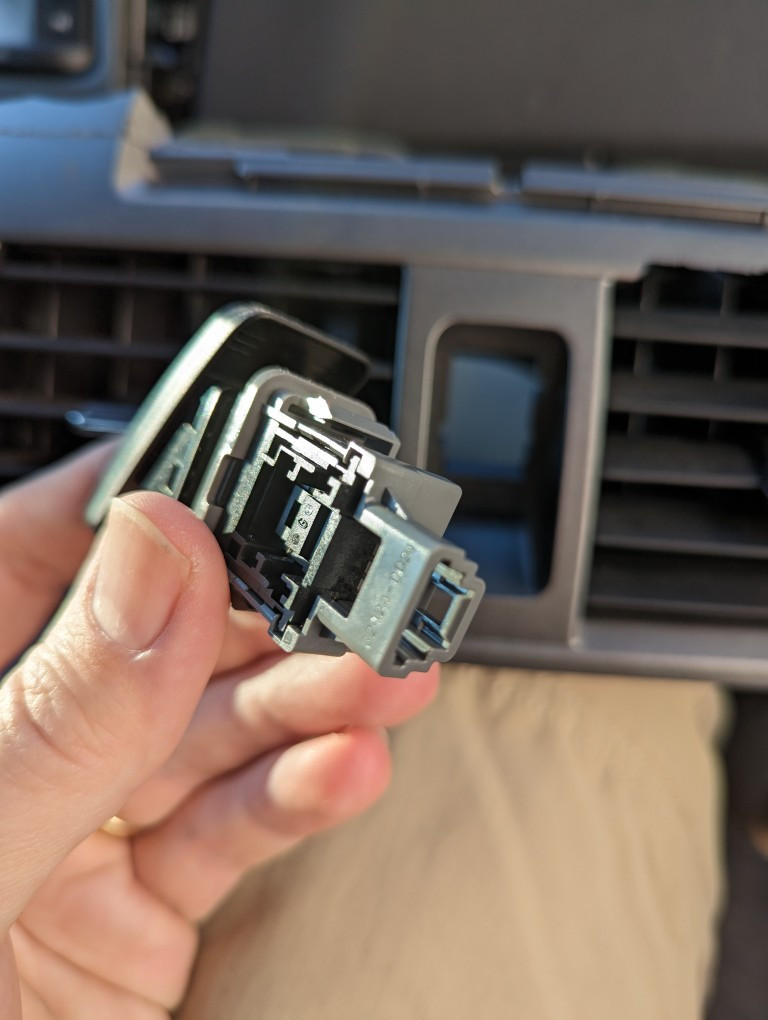
The caution light switch in a 2013 Toyota Corolla‘s air vent is held in place by two plastic clips, one at the top and one at the bottom. If the switch is snug, use a plastic shim or small screwdriver to gently depress the clips from the back. This will release the top and then the bottom clip, allowing the switch to be easily pulled out.
 Clock and caution lights switch cables from the old 2013 Toyota Corolla air vent assembly.
My original 2013 Toyota Corolla air vent assembly included a clock feature, which meant there was an additional connector on the wiring harness alongside the caution light switch cable. To keep things tidy during reassembly and minimize potential rattles in my ’13 Corolla, I secured this extra cable with a twist tie and tucked it between the air vents.
 New replacement air vent assembly for a 2013 Toyota Corolla purchased online.
 Different angle of the replacement center console air vent for a 2013 Toyota Corolla.
Here are images of the replacement air vent assembly I ordered online for just $21. This particular replacement for a 2013 Toyota Corolla doesn’t have the clock slot, which was fine by me and saved about $20 compared to versions with the clock. It also doesn’t include a new caution light switch, but we are reusing the original one from the ’13 Corolla.
 Masking tape applied to the caution lights switch for a snug fit in the replacement 2013 Toyota Corolla air vent.
 Closer view of masking tape reinforcement on the caution lights switch for a 2013 Toyota Corolla vent install.
 Multiple angles showing masking tape fix for loose caution switch in the new 2013 Toyota Corolla air vent.
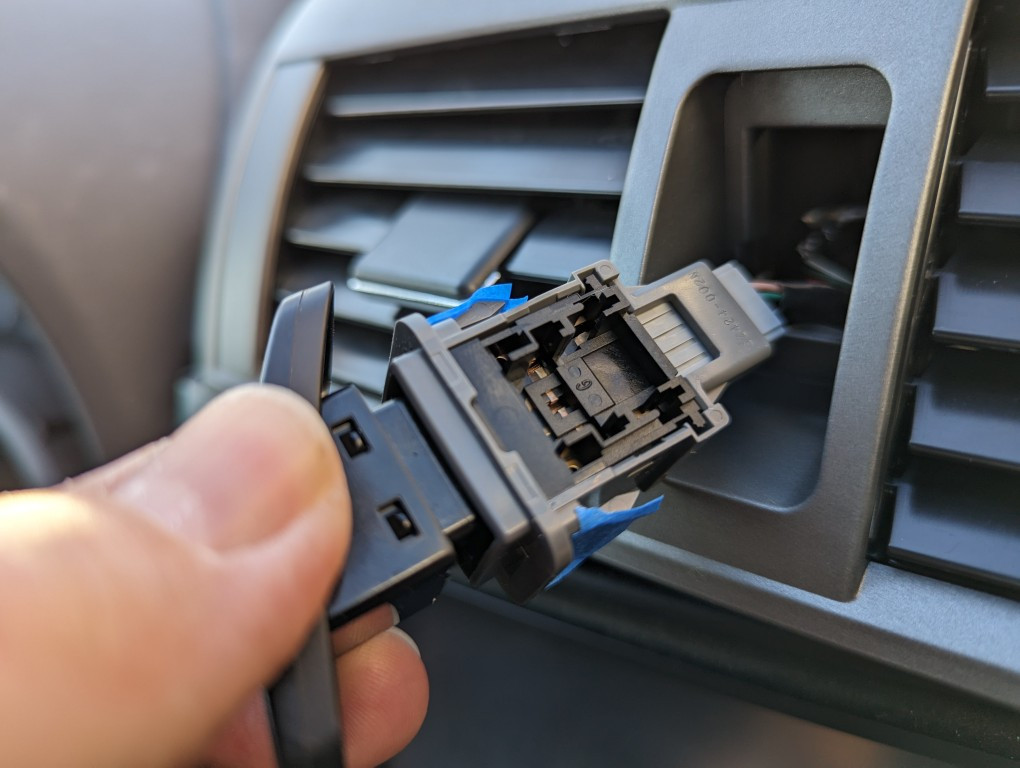
Reassembly for your 2013 Toyota Corolla starts by installing the caution lights switch into the new air vent assembly. Thread the cable through the designated hole, connect it to the switch, and push the switch into place. I encountered a slight issue: the hole in my replacement vent was a bit too large, and the switch wasn’t held securely. My simple solution was to use masking tape. I applied a couple of layers of tape to the top and bottom prongs of the switch, which provided just enough extra thickness for a snug and secure fit.
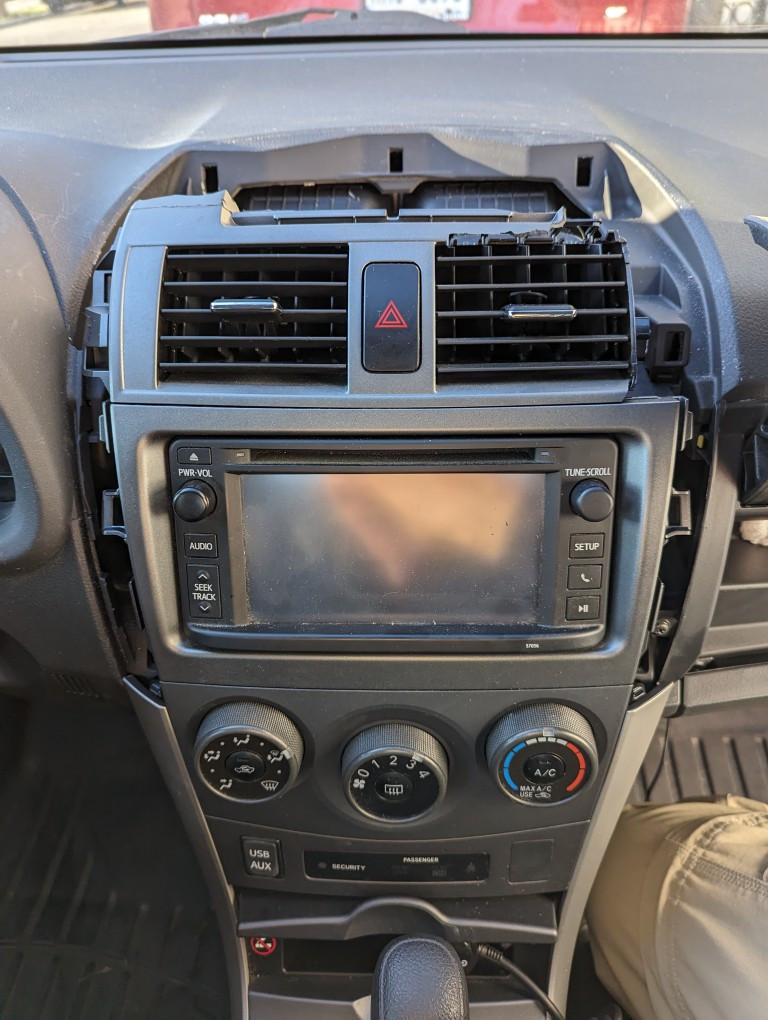
 Replacement air vent assembly aligned for installation in a 2013 Toyota Corolla center console.
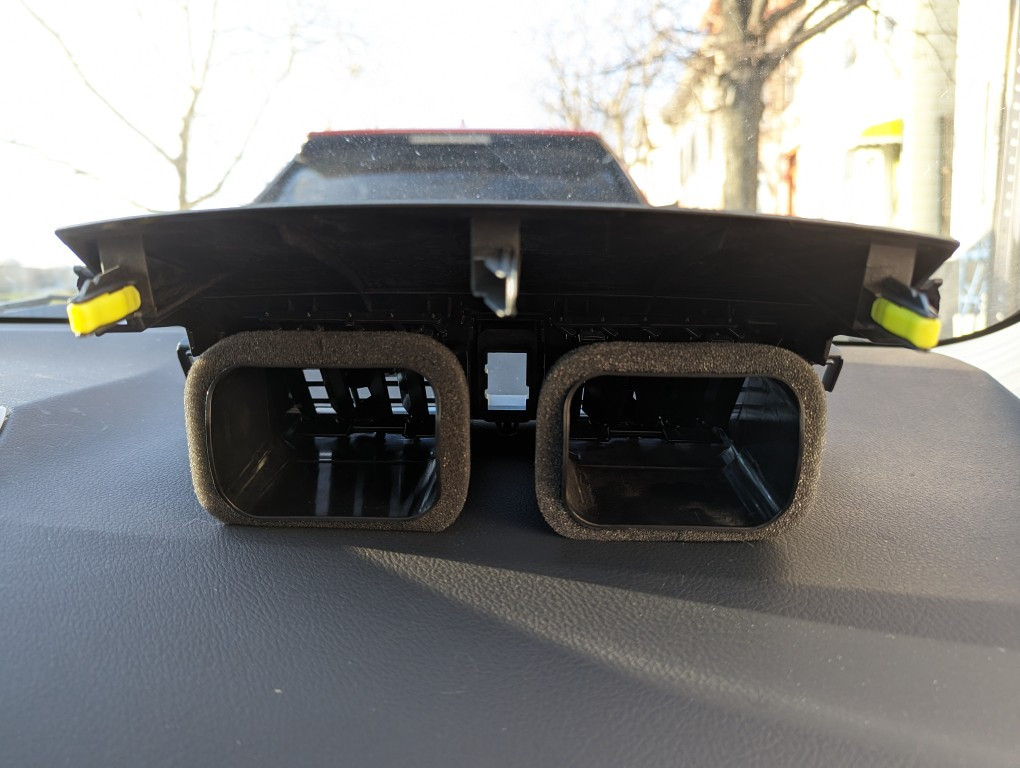
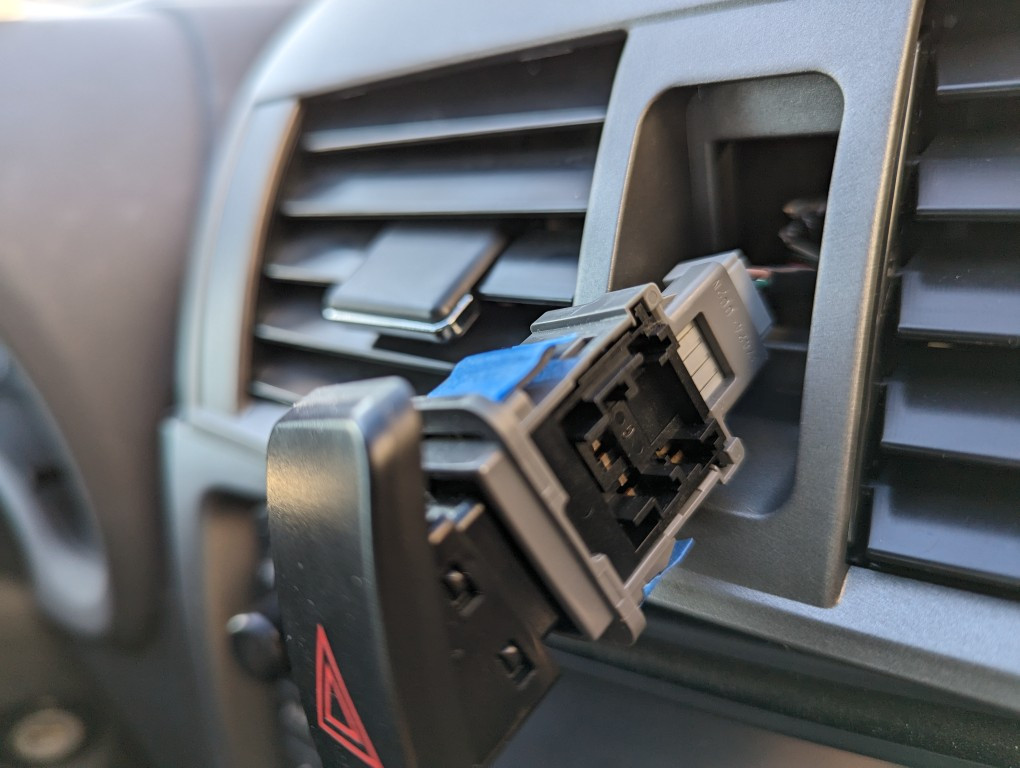
The next step is to align the replacement air vent assembly with the air ducts and clip receptacles in your 2013 Toyota Corolla. Perhaps because it was a brand new part, my replacement vent was a very tight fit. Take your time, double-check the alignment, and gently but firmly push it into place.
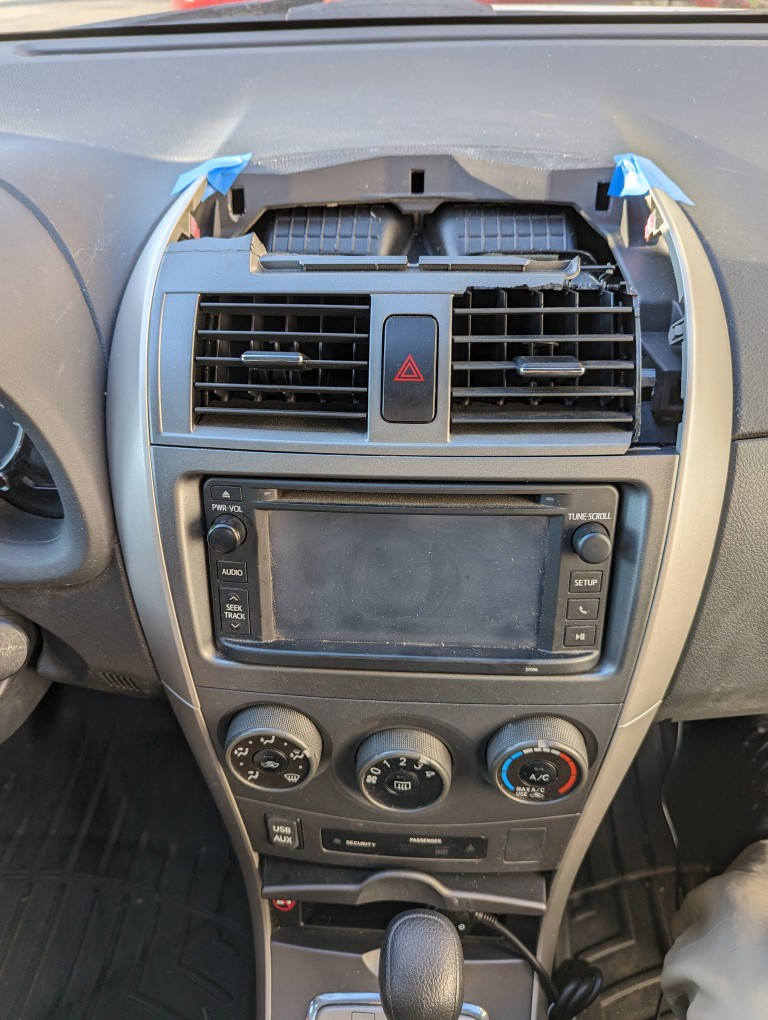
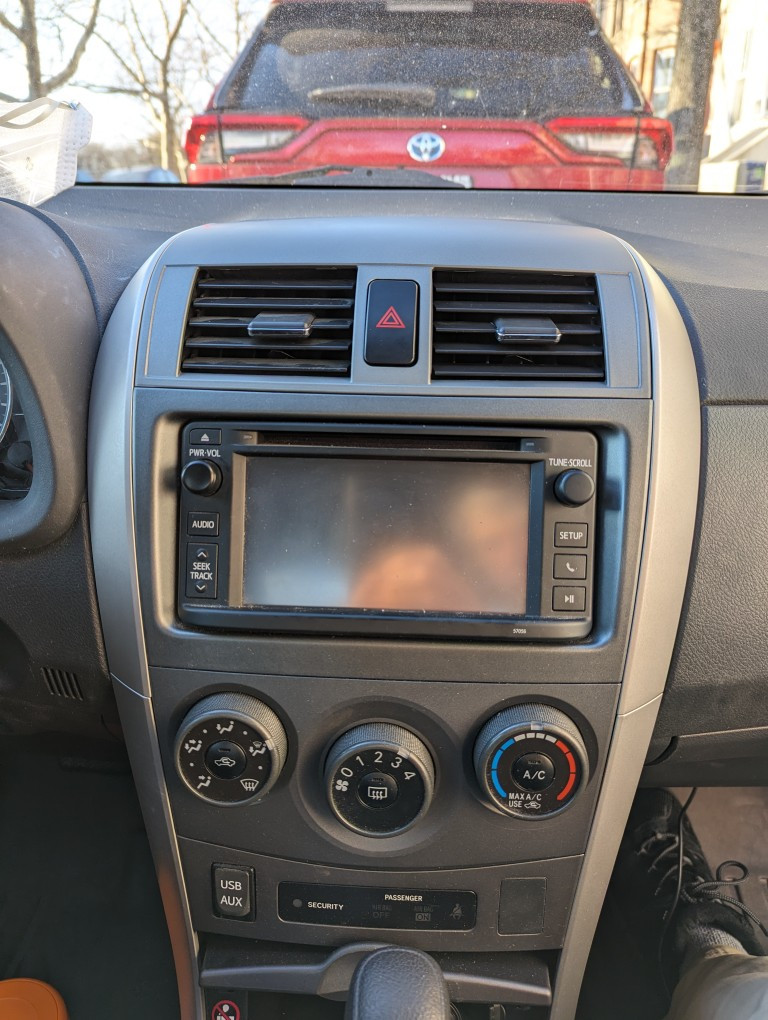
 Replacement air vent assembly clicked into place in the 2013 Toyota Corolla dashboard.
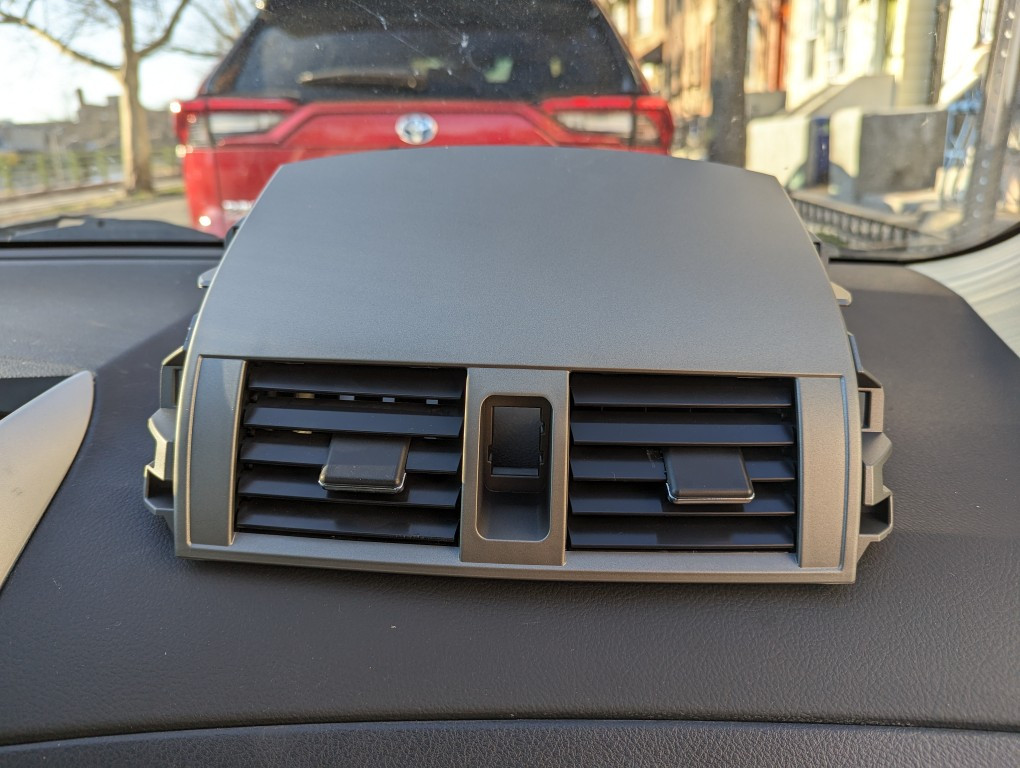
Eventually, you should hear and feel it click into place on both sides, sitting flush with the radio and dashboard of your 2013 Corolla.
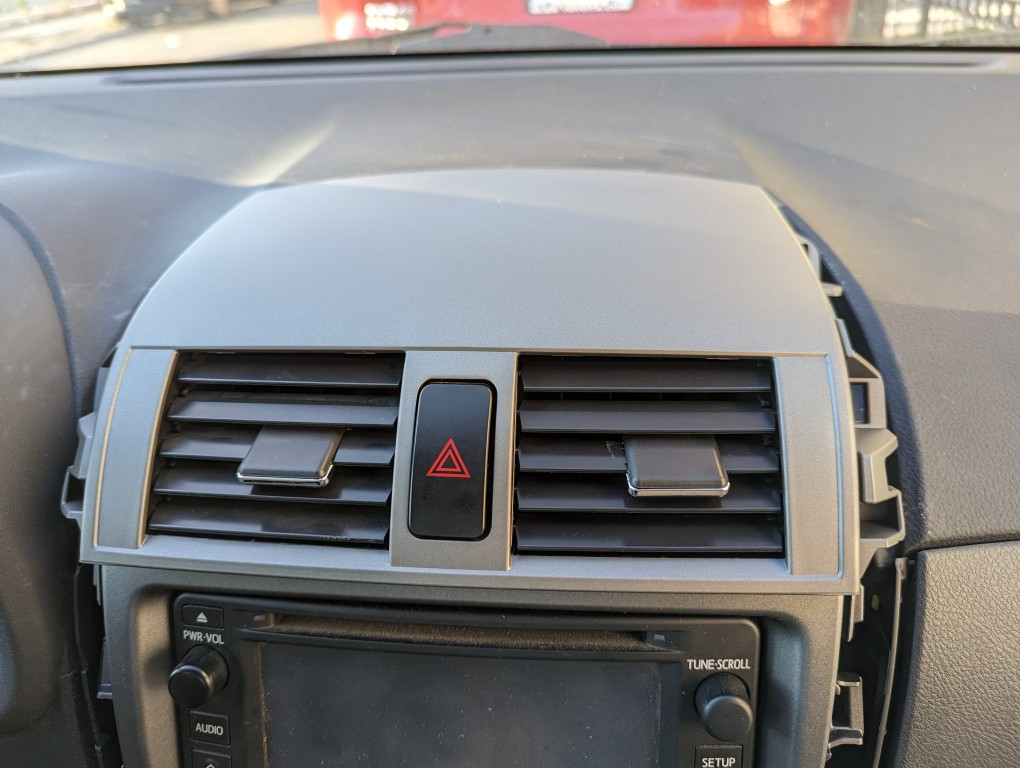
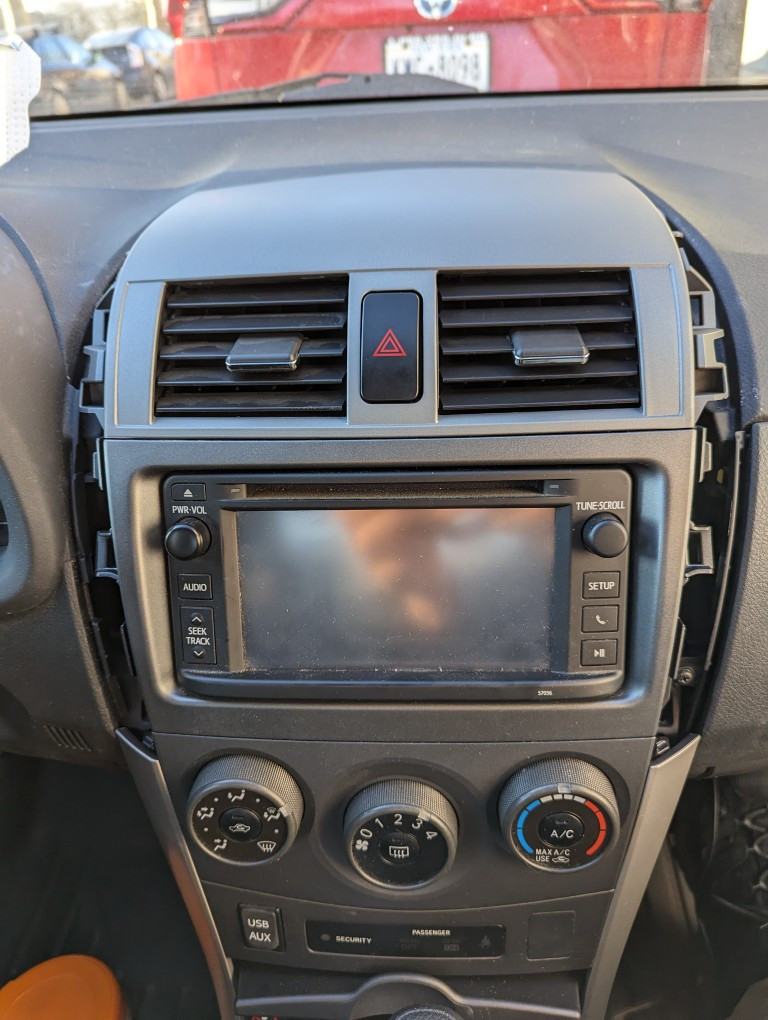
 Completed replacement of the center console air vent in a 2013 Toyota Corolla.
Finally, snap the silver side covers back onto the center console of your 2013 Toyota Corolla. Give the caution light switch a test to ensure it’s working correctly.
With the new air vent installed in my 2013 Toyota Corolla, the annoying rattle is gone, and the interior looks as good as new, maybe even better in that area! This DIY fix is a straightforward way to address a common issue and improve your driving experience in your ’13 Corolla.