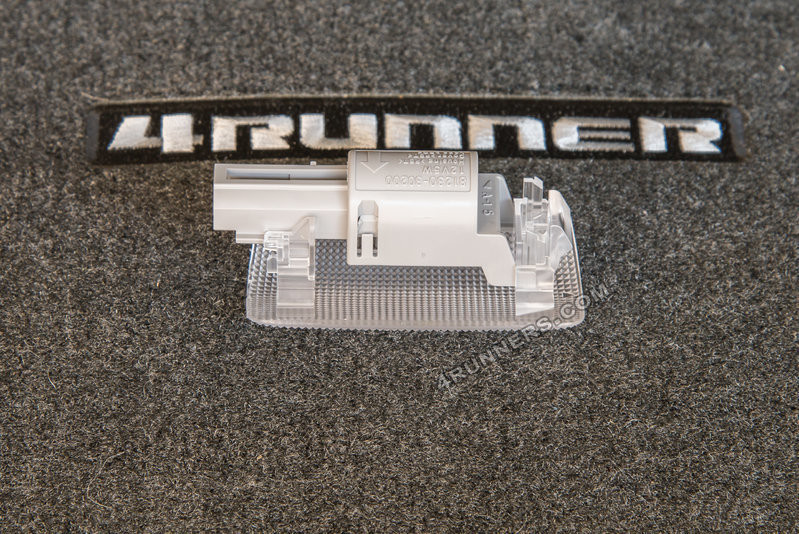
The 5th generation Toyota 4Runner is a fantastic vehicle, known for its off-road capabilities and ruggedness. However, one common complaint among owners is the dim, amber-colored interior lighting. If you’re finding the factory interior lights lacking in brightness, especially at night, you’re not alone. Fortunately, upgrading to LED interior lights is a straightforward DIY project that dramatically improves visibility and gives your 4Runner a more modern feel. This guide will walk you through replacing all the main interior bulbs with brighter, white LED alternatives.
For this upgrade, we’ll be using an LED kit from a reputable source: member csjumper2003 on tacomaworld. This kit includes a total of 9 LED bulbs, covering the map lights, lower door lights, dome light, and rear door dome lights. Let’s get started and transform your Toyota 4runner Interior lighting!
Tools and Parts You’ll Need for Your Toyota 4Runner Interior LED Upgrade
Before you begin, gather these simple tools and your new LED light kit to make the process smooth and efficient:
- Interior Pry Tool or Small Screwdriver: A plastic pry tool is ideal to avoid scratching interior trim, but a small flathead screwdriver, used carefully, will also work.
- New LED Interior Light Kit: Specifically designed for the 5th Gen Toyota 4Runner, ensuring correct bulb sizes and fitment.
Step-by-Step Guide to Replacing Your Toyota 4Runner Interior Lights with LEDs
Let’s tackle each type of interior light one by one. Remember to work carefully and take your time to avoid damaging any plastic trim.
Replacing the Toyota 4Runner Lower Door Lights
The lower door lights are often quite dim from the factory and upgrading them makes a noticeable difference when entering or exiting your 4Runner at night.
-
Pry off the Light Assembly: Using your pry tool or screwdriver, gently insert it into the side of the light housing, as shown, and carefully pry outwards. The assembly should pop loose.
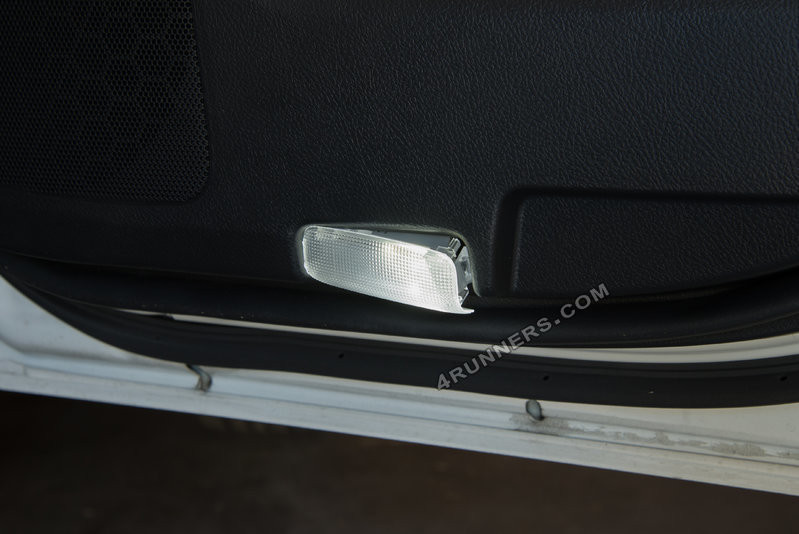 Prying open the lower door light assembly on a Toyota 4Runner interior.
 -
Assembly Pops Loose: Once you’ve pried it slightly, the entire light assembly will detach from the door panel.
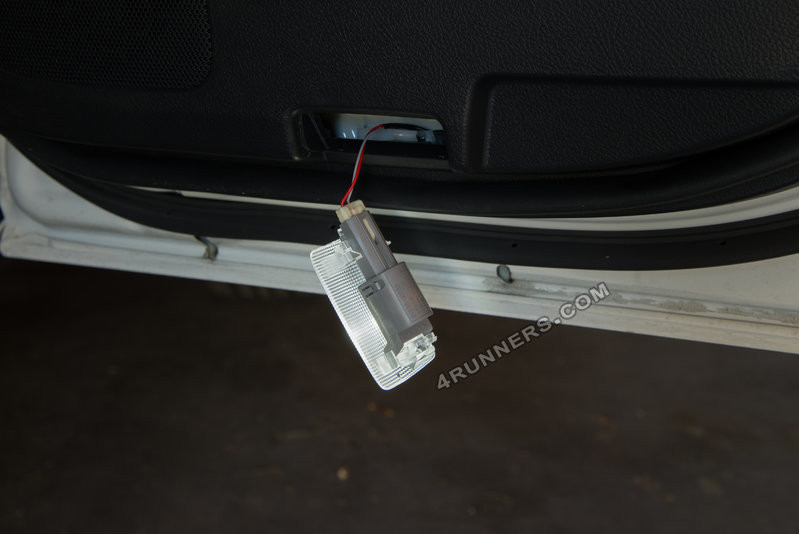 Lower door light assembly popped loose from Toyota 4Runner door panel.
 -
Disconnect the Power Clip: Locate the power connector on the back of the light assembly and carefully disconnect it.
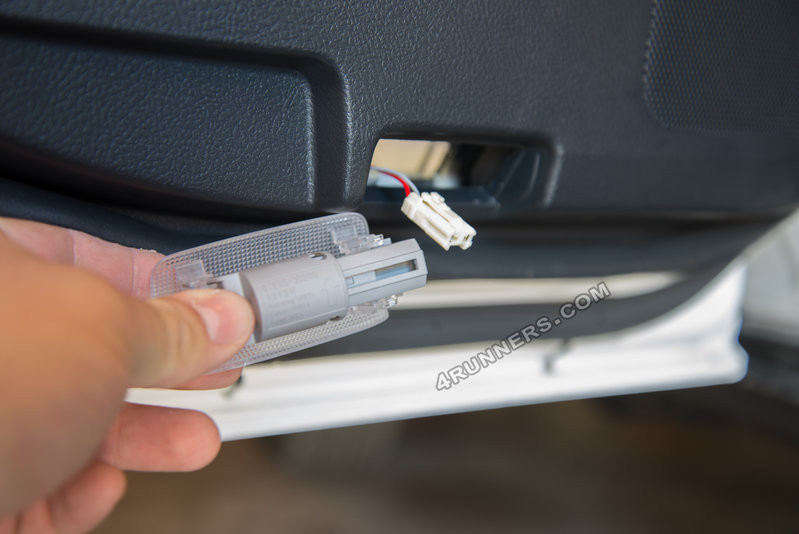 Disconnecting the power clip from the Toyota 4Runner lower door light assembly.
 -
Separate the Housing and Cover: On the side of the light assembly, you’ll find a small tab. Pry this tab gently to slide and separate the grey housing from the clear cover.
 Prying the tab to separate the grey housing from the clear cover of a Toyota 4Runner door light.
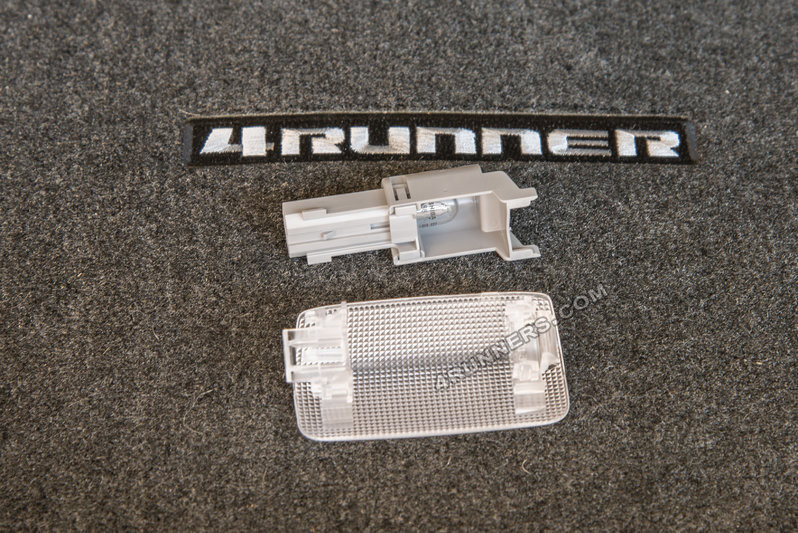 Separated grey housing and clear cover of Toyota 4Runner door light assembly.
 -
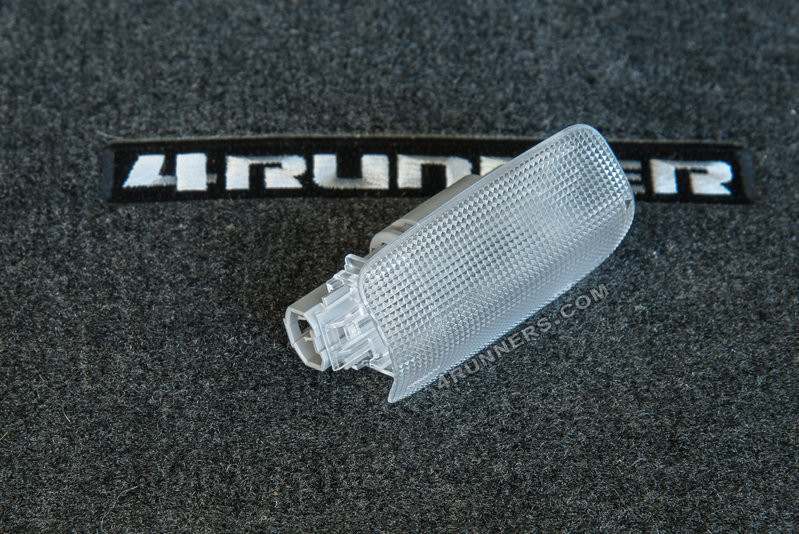
Remove the Grey Hood: Gently pop off the grey hood to finally access the bulb.
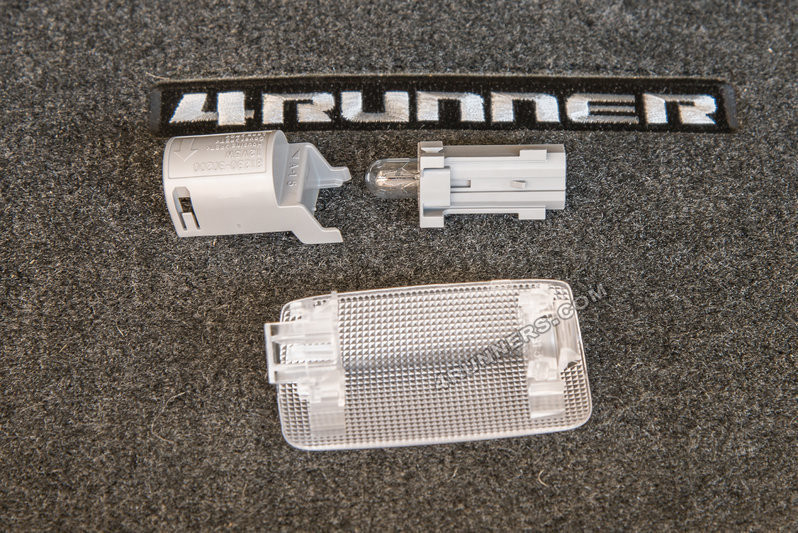 Grey hood removed, exposing the bulb in the Toyota 4Runner door light assembly.
 -
Replace with LED Bulb: Pull out the old bulb and insert the new LED bulb from your kit.
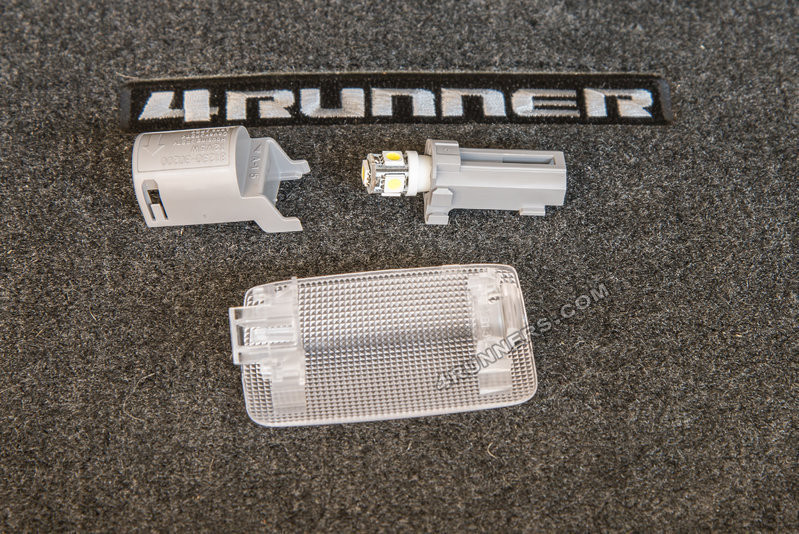 Inserting an LED bulb into the Toyota 4Runner door light assembly.
 -
Test the LED: Crucially, before reassembling, reconnect the power clip and test the LED. LEDs are polarity sensitive and only work in one direction. If it doesn’t light up, remove the LED, rotate it 180 degrees, and reinsert. Test again. This saves you from reassembling and then having to disassemble again.
-
Reattach the Grey Hood: Once you’ve confirmed the LED works, pop the grey hood back onto the assembly.
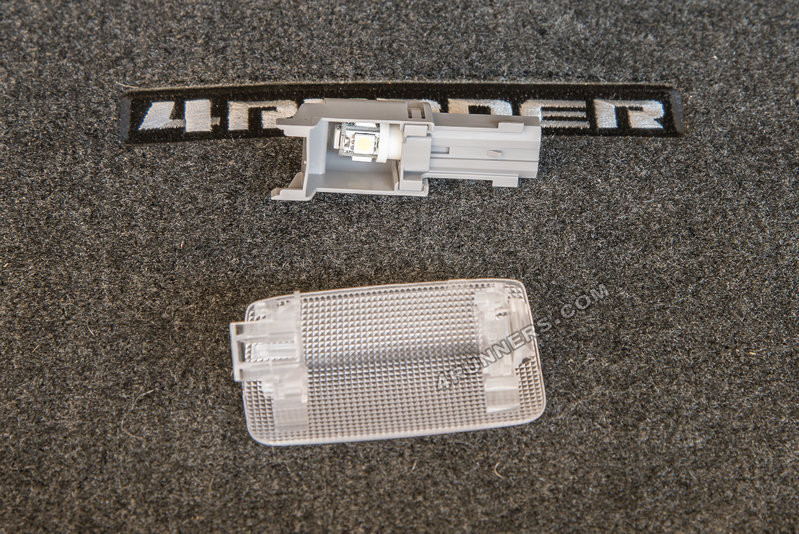 Reattaching the grey hood to the Toyota 4Runner door light assembly after LED bulb installation.
 -
Reattach the Cover: Snap the clear cover back onto the assembly.
 Reattaching the clear cover to the Toyota 4Runner door light assembly.
 -
Reinstall the Assembly: Reconnect the power cable, insert the left side of the assembly back into the door panel first, and then push the right side until it pops securely into place. Repeat this process for the remaining three door lights. You’ll find the process becomes quicker after the first one!
Upgrading the Toyota 4Runner Rear Door Dome Lights
The rear door dome lights are simple to access and upgrade, providing much-needed light in the cargo area.
-
Pry off the Light Cover: Locate the edge of the rear dome light cover closest to the driver’s side. Insert your pry tool or small screwdriver and gently push upwards. You’re aiming to push back a small metal clip that secures the light.
 Prying off the rear door dome light cover in a Toyota 4Runner.
 -
Slide Out the Assembly: Once the clip is released, the light assembly will slide out and hang by its power cable.
 Rear door dome light assembly slid out, hanging by power cable in a Toyota 4Runner.
 -
Remove the Clear Cover: The clear cover is held on by four small tabs around its edge. Carefully pry these tabs to remove the cover.
-
Access and Replace the Bulb: The bulb is held in place by two points, one of which is flexible. Push down on the flexible tab (usually on the bottom) to release the bulb. Remove the old bulb and insert the LED replacement, ensuring the LEDs are facing outwards for optimal light distribution.
 Accessing the bulb within the Toyota 4Runner rear door dome light assembly.
 -
Test the LED: Flip the light switch to the “on” position to ensure the LED is working. If not, reverse the LED’s direction.
-
Reattach the Cover and Reinstall: Snap the clear cover back on. Reinsert the power cable side of the assembly first, and then push the side with the metal clip back into place until it pops in. Repeat for the other rear door dome light.
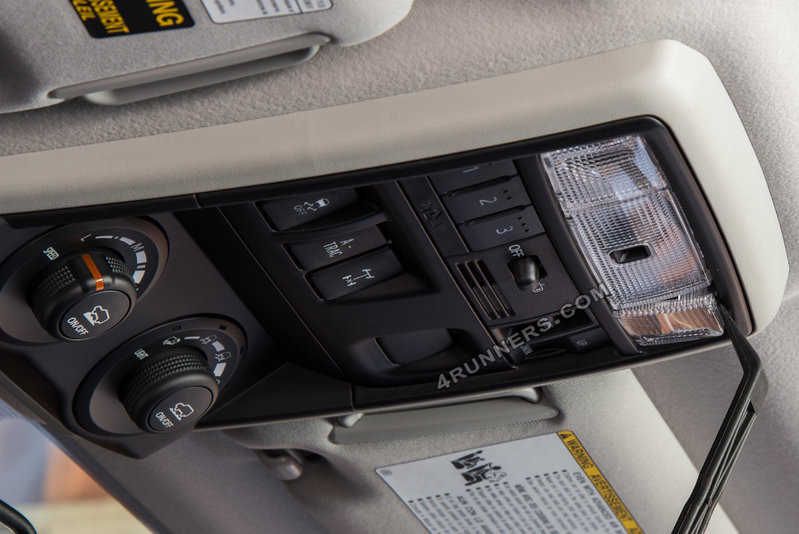
Swapping the Toyota 4Runner Interior Dome Light
The main interior dome light is also an easy upgrade and significantly improves overall cabin illumination.
-
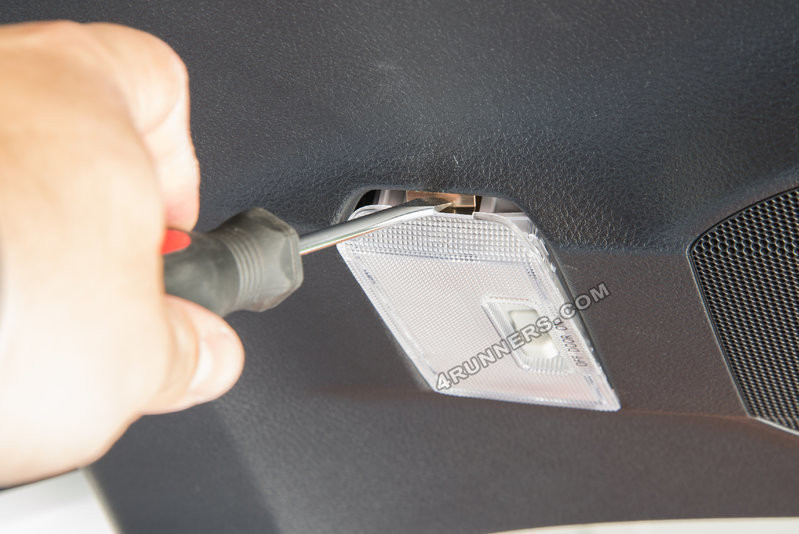
Pry off the Cover: For the interior dome light, you only need to remove the clear plastic cover. Locate the two pry points on the side of the cover facing the front of the 4Runner (the side with the switch). Gently pry at these points to pop the cover off. The light assembly itself stays mounted.
 Prying off the interior dome light cover in a Toyota 4Runner.
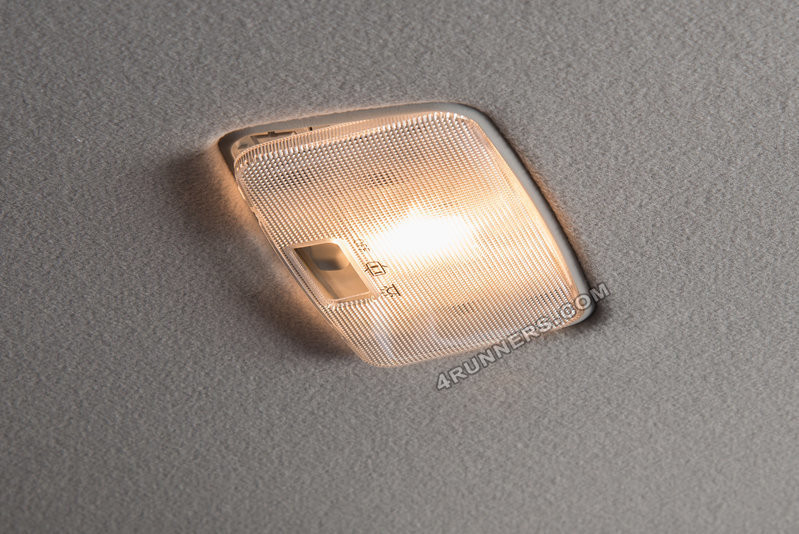 Prying point indicated on the Toyota 4Runner interior dome light cover.
 -
Replace the Bulb: Similar to the rear dome lights, the bulb is held by a flexible metal tab. Push this tab to release the bulb, remove the old one, and insert the LED replacement. Space can be a little tight, especially for larger hands, so take your time.
-
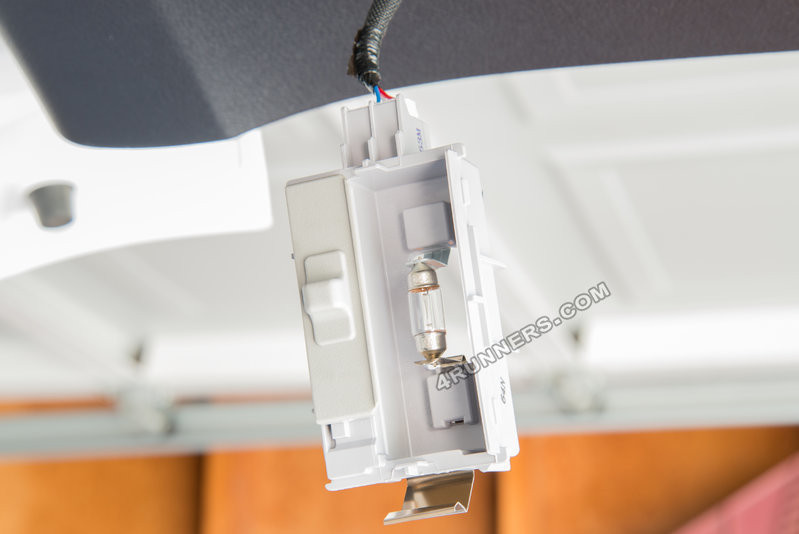
Test and Reassemble: Test the LED by switching the dome light on. If it works, simply snap the clear cover back into place.
 Interior dome light assembly with cover removed in a Toyota 4Runner, ready for LED bulb installation.
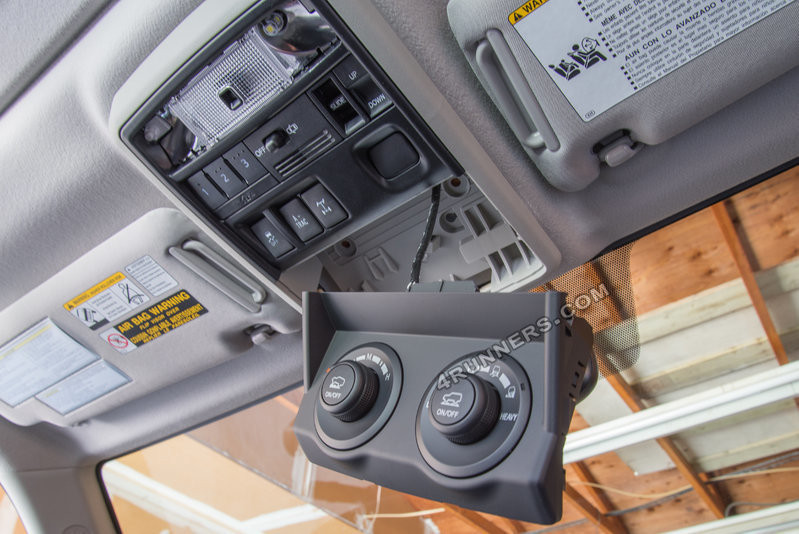
Installing Toyota 4Runner LED Map Lights
The map lights can be a bit trickier due to limited access, but with this method, it becomes much simpler.
-
Pry off the Map Light Cover: Use your pry tool or screwdriver to start prying off the map light cover from the side closest to you (the front of the vehicle).
 Prying off the map light cover in a Toyota 4Runner.
 -
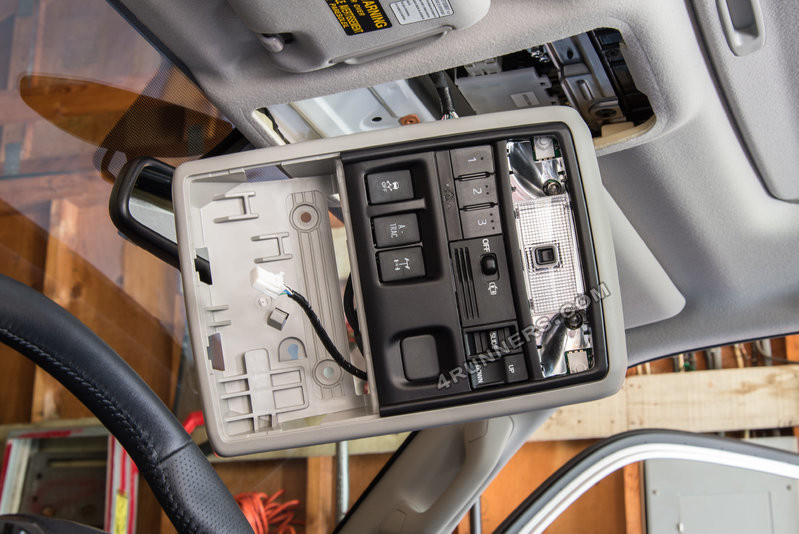
Remove the Console Section: Instead of struggling to reach the bulbs directly, it’s much easier to remove the small console section. Start on the windshield side of the crawl control box (if equipped). There are two openings where you can pry downwards. Apply gentle pressure; it shouldn’t require much force.
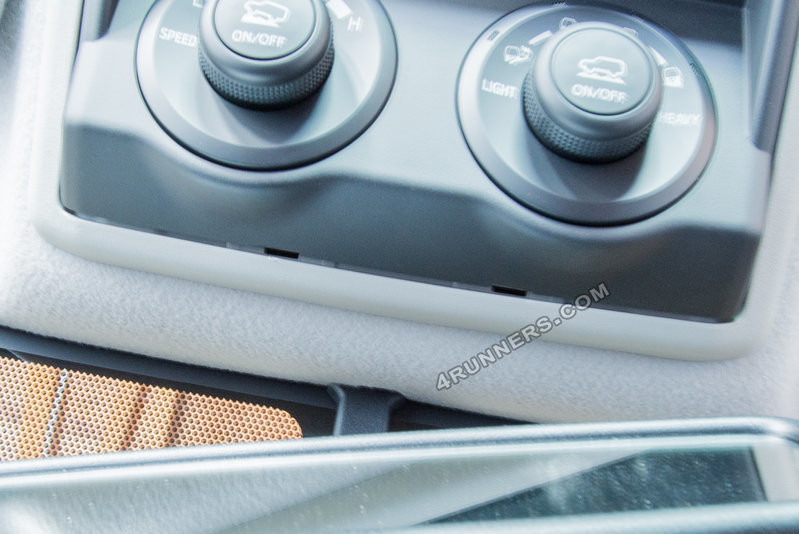 Prying down the console section near the crawl control box in a Toyota 4Runner.
 -
Detach Crawl Control and Remove Bolts: If equipped, the crawl control box will detach. Disconnect its wiring and set it aside. You’ll see two bolts (likely 8mm) in the opening where the crawl control box was. Undo these bolts.
 Disconnecting the crawl control and removing bolts in the Toyota 4Runner console.
 Location of bolts to remove in the Toyota 4Runner console for map light access.
 -
Lower the Console: Gently pull down the console section. It’s held by clips and one wiring harness. Be careful not to pull too hard. This will give you much better access to the map light bulbs.
-
Access and Replace Bulbs: On the backside of the console, you’ll see two black bulb holders. Turn each holder about a half turn to remove it along with the old bulb. Insert the LED replacements.
 Accessing the map light bulb holders from the back of the Toyota 4Runner console.
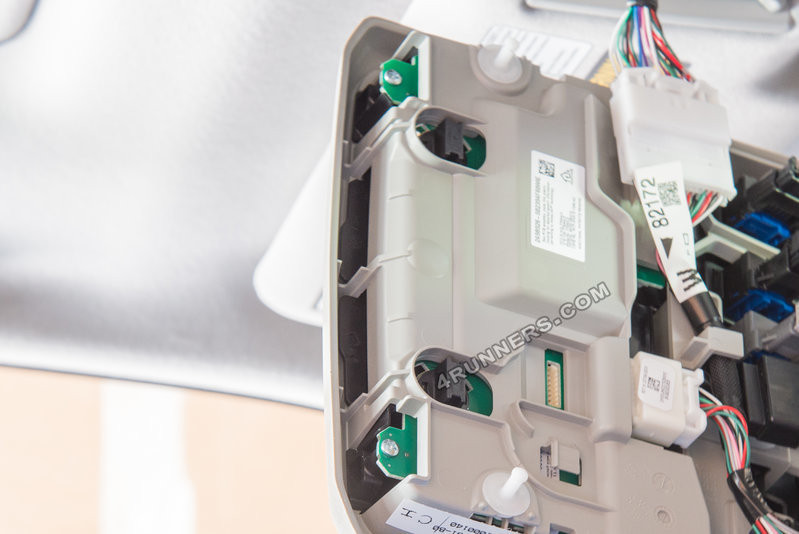 Removing the bulb holder to replace the map light bulb in a Toyota 4Runner.
 -
Test and Reinstall: Before fully reassembling, test the map lights to ensure the LEDs are working. Then, reinstall the upper console in reverse order of removal. Reconnect the crawl control wiring and snap it back into place.
 Reinstalling the upper console after replacing the map lights in a Toyota 4Runner.
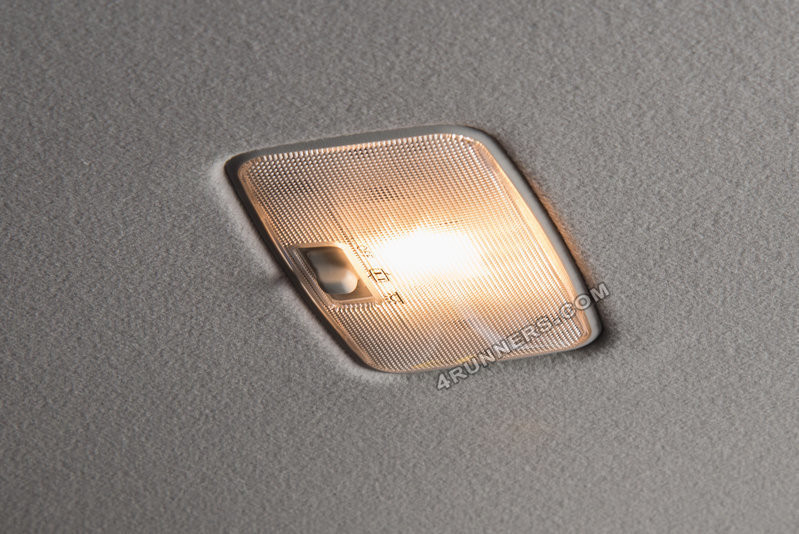
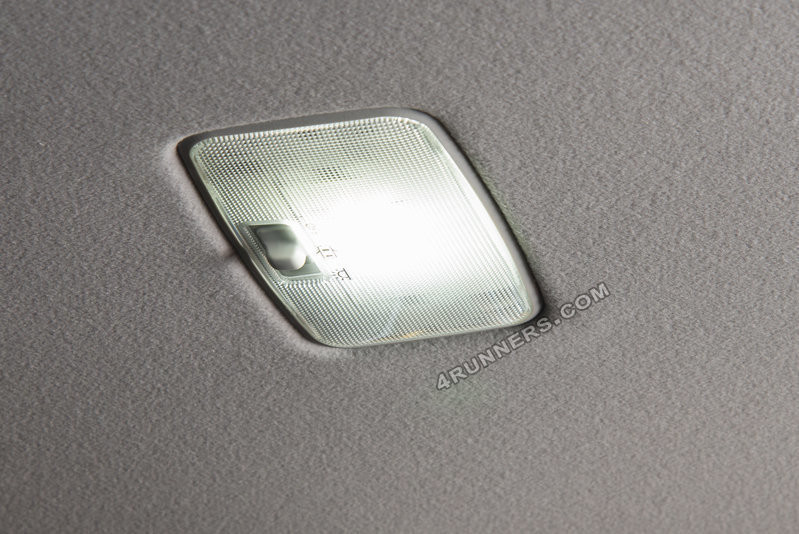
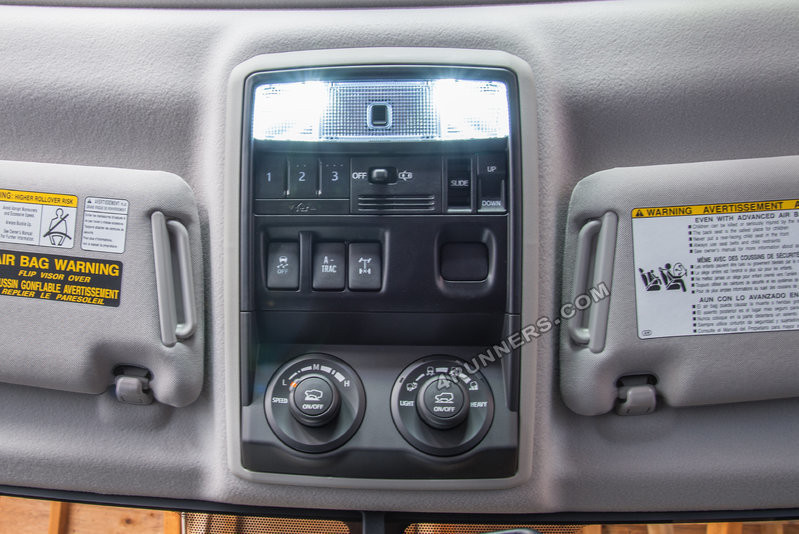
Enjoy Your Brighter Toyota 4Runner Interior
Once you’ve replaced all the bulbs, you’ll immediately notice a significant improvement in your Toyota 4Runner interior lighting. The crisp, white LED light provides much better visibility and creates a more modern and welcoming cabin environment.
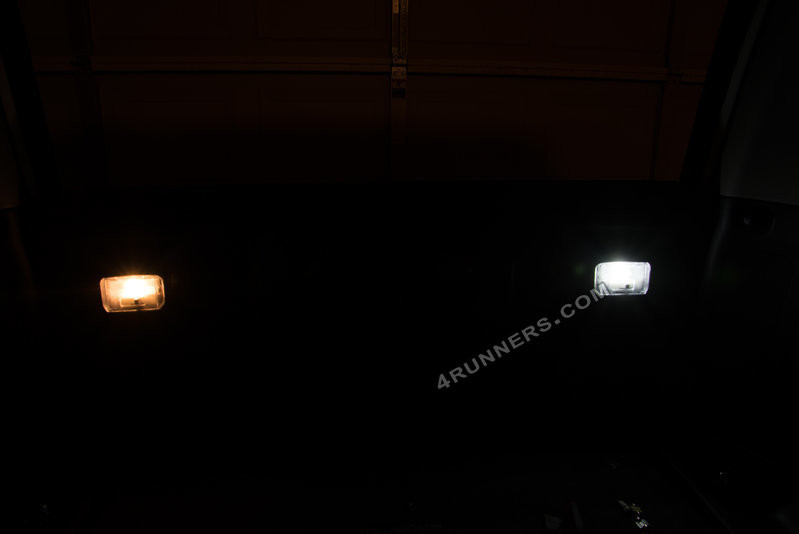 Comparison of old and new interior lighting in a Toyota 4Runner after LED upgrade.
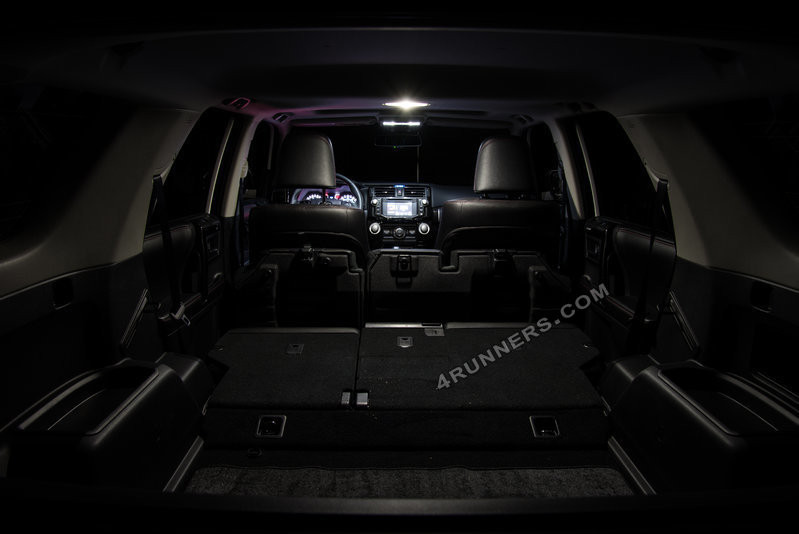
 Close up of new bright white LED interior lights in a Toyota 4Runner.
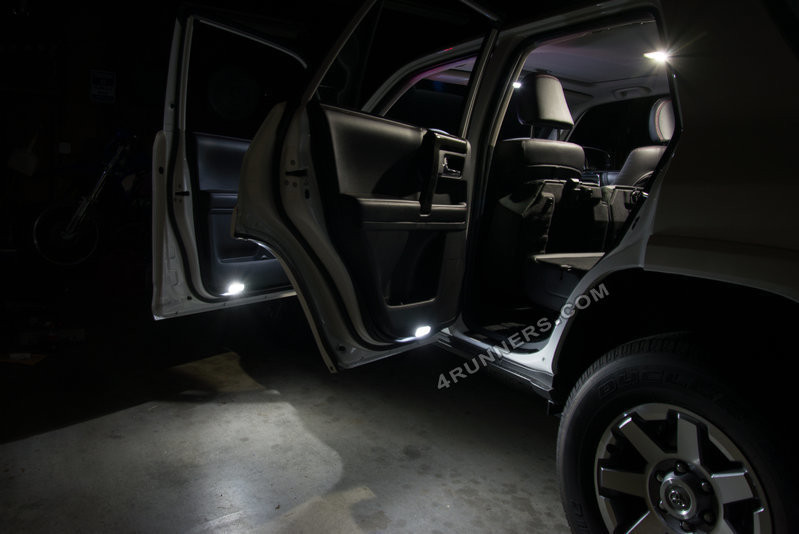
 New bright white LED interior lights in a Toyota 4Runner, door lights on.
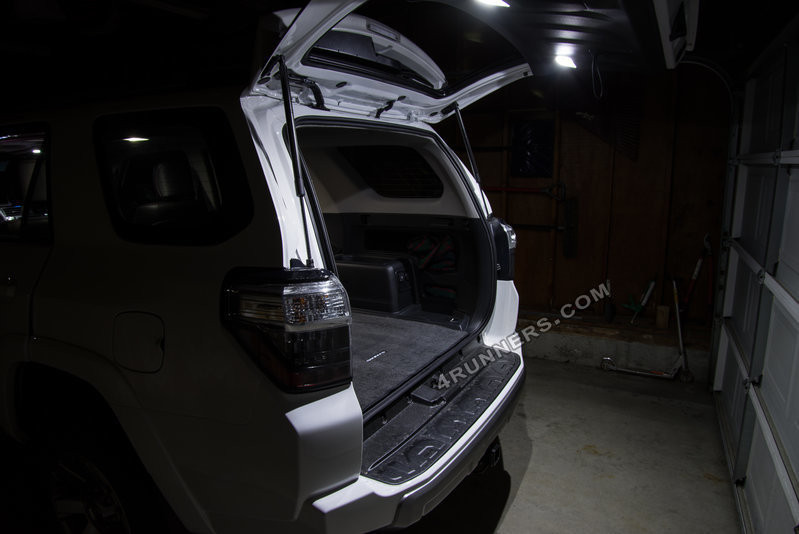
 Overall view of the much brighter LED interior lighting in a Toyota 4Runner after the upgrade.
This relatively simple and affordable upgrade makes a huge difference in the usability and ambiance of your Toyota 4Runner interior. Say goodbye to dim amber lights and hello to a brighter, more enjoyable driving experience!