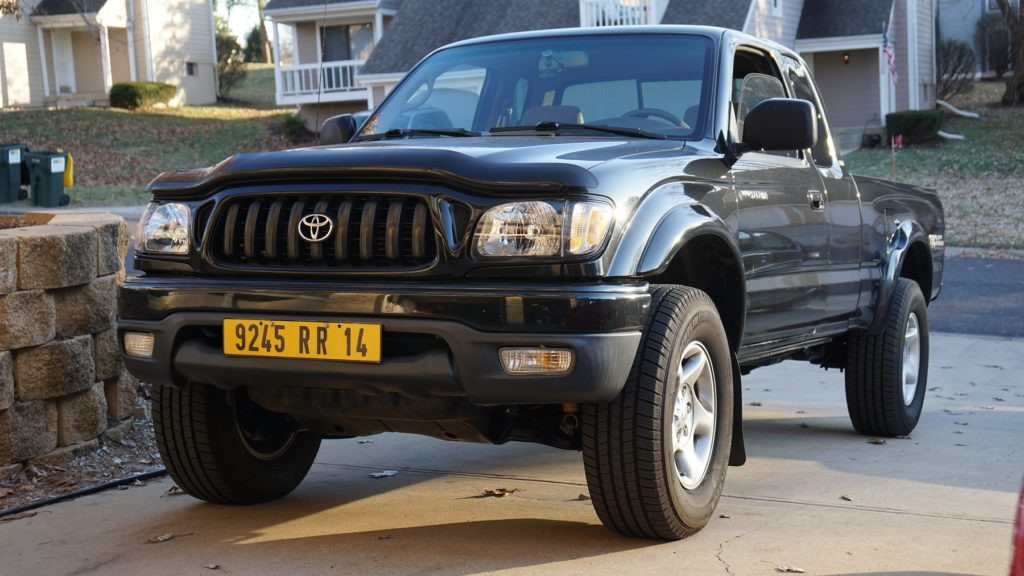
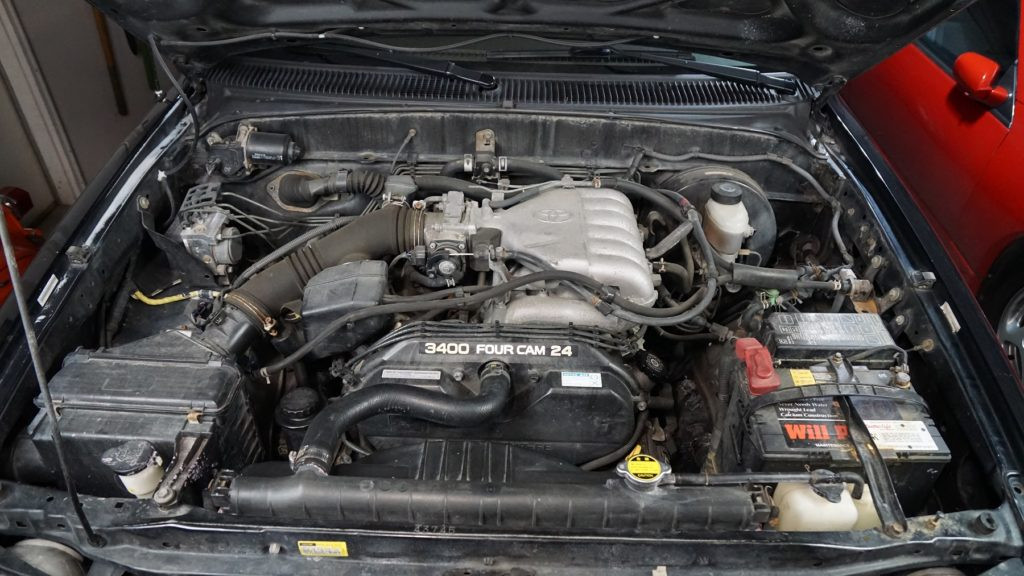
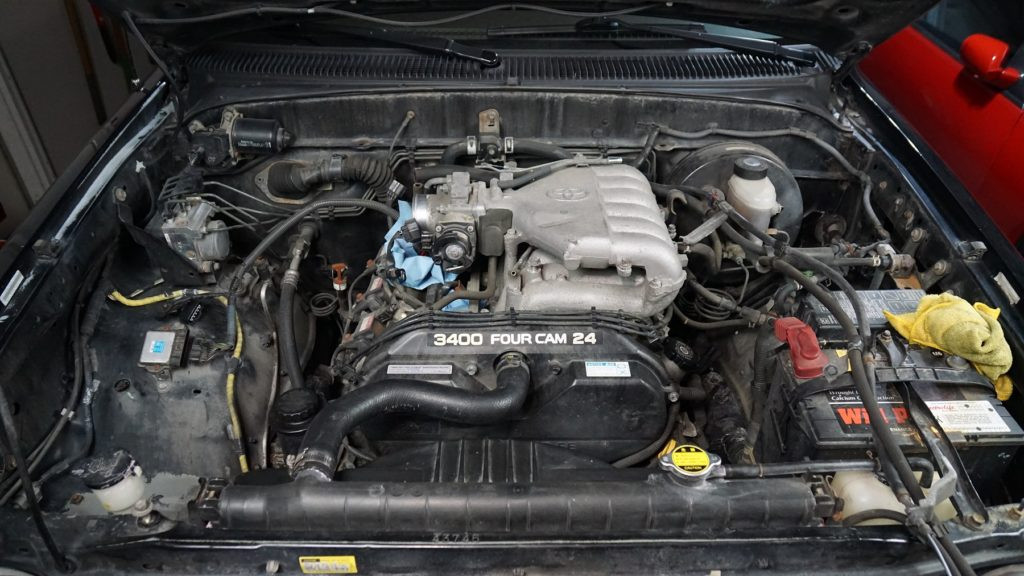
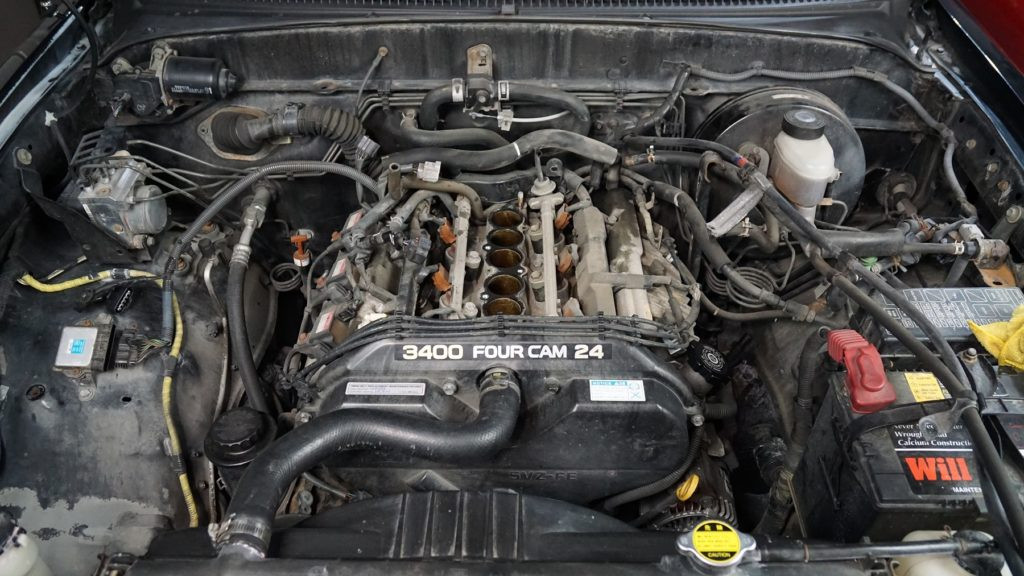
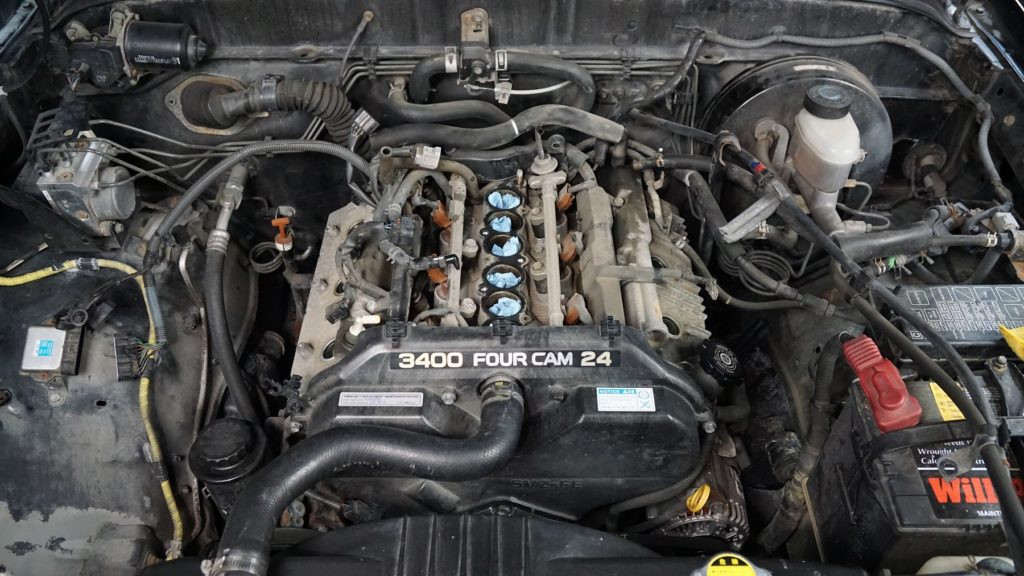
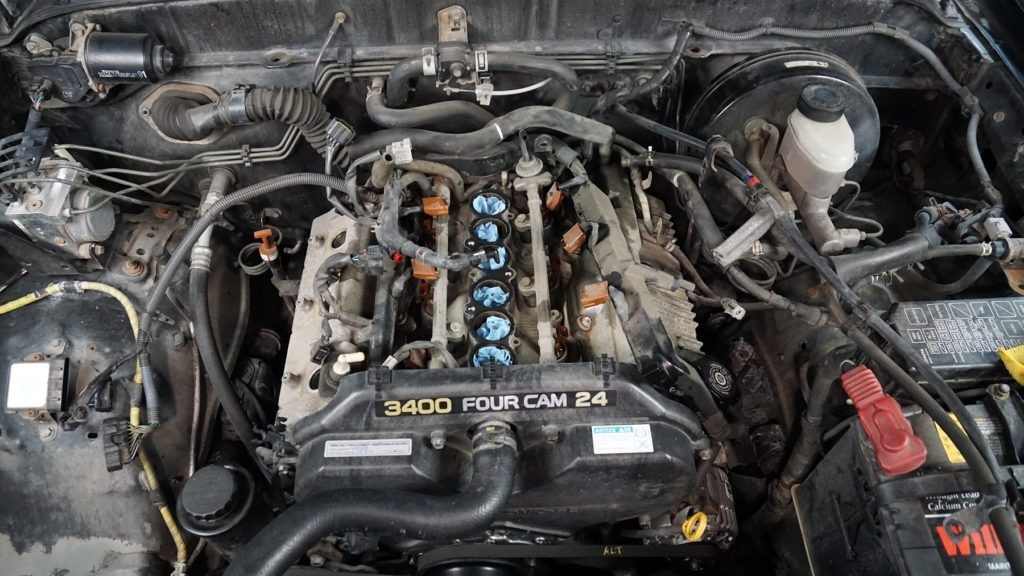
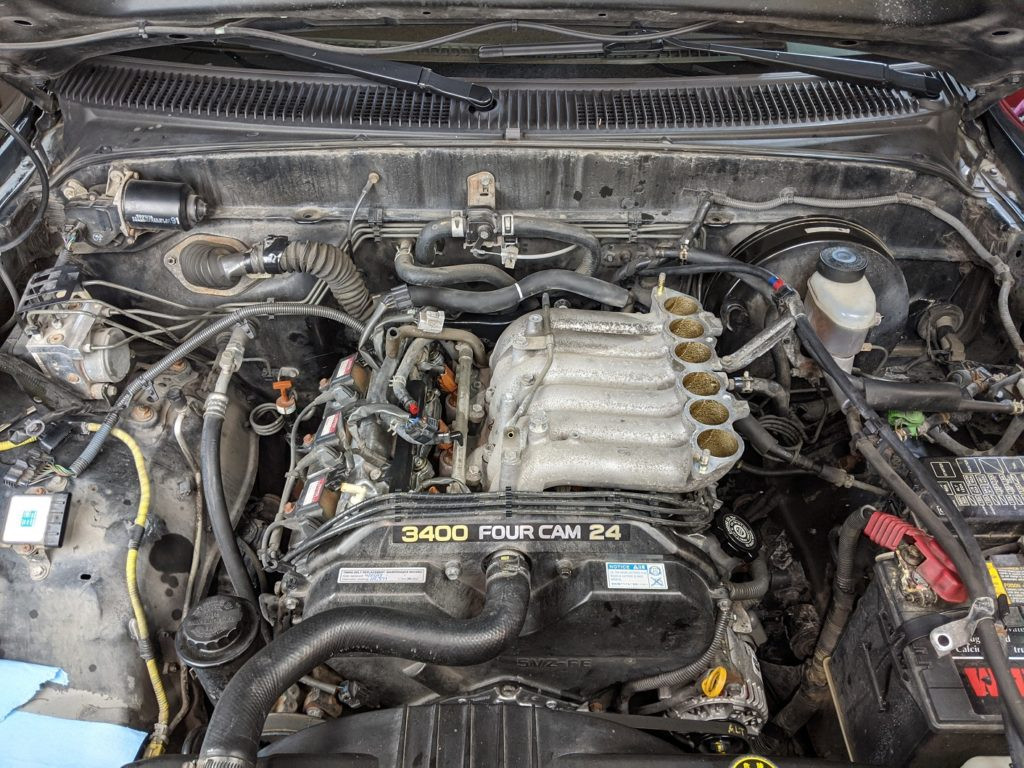
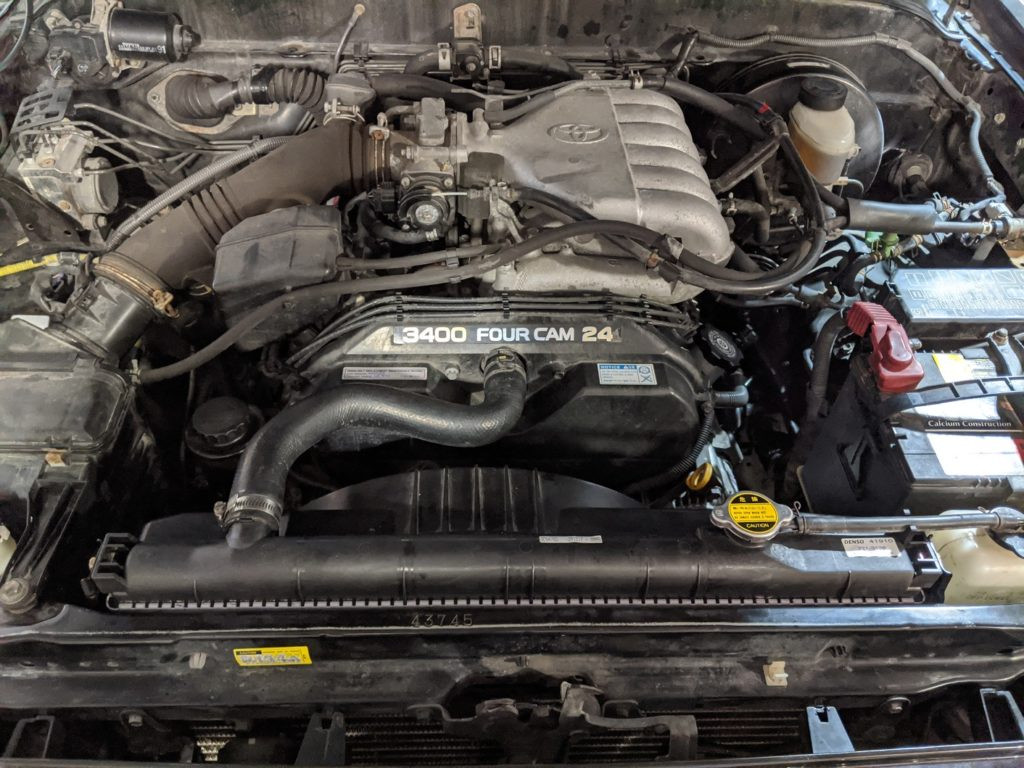
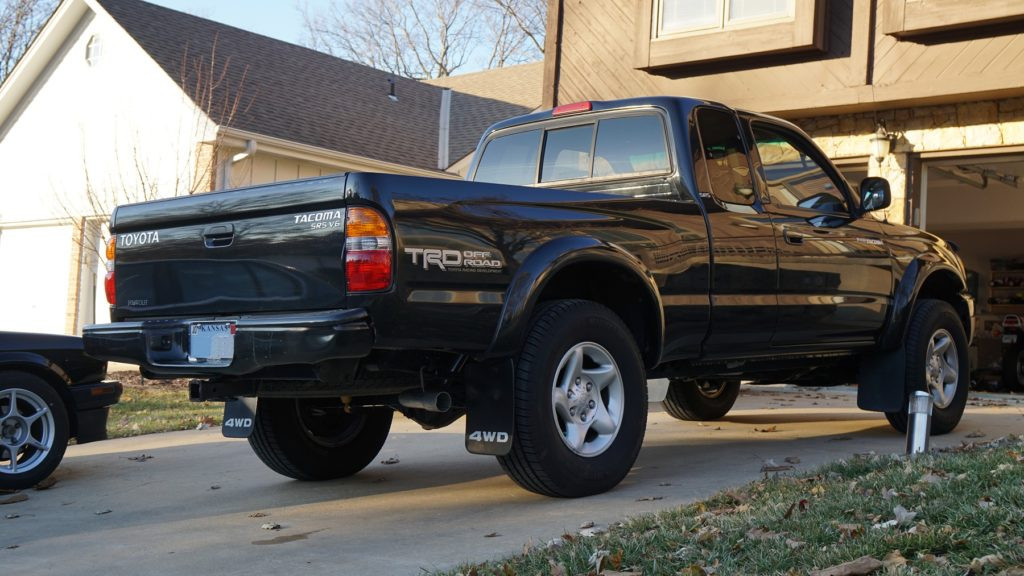
If you own a 2003 Toyota Tacoma with the robust 3.4-liter V6 5VZ-FE engine and have clocked over 130,000 miles, it’s prime time to consider some essential maintenance that’s often overlooked: a valve adjustment. The 5VZ-FE engine, a workhorse found in many Toyota Tacomas and 4Runners from 1995 to 2004, is known for its reliability. However, Toyota recommends a valve clearance inspection and adjustment every 60,000 miles. Despite this recommendation, many 2003 Toyota Tacoma owners, and those with similar models, often skip this crucial service.
There are a couple of reasons why this maintenance is frequently ignored. First, the 5VZ-FE engine is remarkably resilient and often runs smoothly even without valve adjustments. Second, performing the adjustment itself can be quite a challenging task. However, neglecting valve adjustments can lead to long-term engine issues. In this guide, we’ll walk you through the process of performing a valve adjustment and valve cover gasket replacement on a 2003 Toyota Tacoma. This is a vital procedure to ensure your 2003 Toyota Tacoma continues to run efficiently and leak-free for years to come.
Why Valve Adjustments on the 2003 Toyota Tacoma 5VZ-FE Engine Are Difficult
The complexity of valve adjustments on the 2003 Toyota Tacoma 5VZ-FE engine stems from its shim-over-bucket valvetrain design. While this design contributes to a quieter and more efficient engine compared to rocker arm systems, it necessitates replacing shims to adjust valve clearances. This adds layers of difficulty, from accessing the valve covers to the intricate shim replacement process. Many 2003 Toyota Tacoma owners find this procedure daunting and may avoid it altogether.
However, ignoring valve clearances is a gamble. Even though the 5VZ-FE engine is known for its tolerance, adhering to the recommended maintenance schedule is crucial for optimal performance and longevity. In my case, my 2003 Toyota Tacoma also had leaking valve cover gaskets, which provided an additional compelling reason to address the engine’s valve lash. Leaking valve covers are a common issue in older vehicles like the 2003 Toyota Tacoma, and addressing them alongside valve adjustments is a smart move.
 Leaking valve cover on a 2003 Toyota Tacoma engine.
Below, you’ll find a step-by-step guide with images detailing the entire procedure, from start to finish, along with valuable insights. For detailed specifications and torque values, refer to the factory service manual files provided at the end of this article. Additionally, a video walkthrough of this procedure is available here: https://youtu.be/08ia1PIgFz8. This guide aims to empower 2003 Toyota Tacoma owners to tackle this maintenance task with confidence.
Step-by-Step Teardown for 2003 Toyota Tacoma Valve Adjustment
Before you can access the valves for adjustment on your 2003 Toyota Tacoma, you need to perform a teardown to reach the valve covers. This involves removing several components to gain access. Follow these steps carefully:
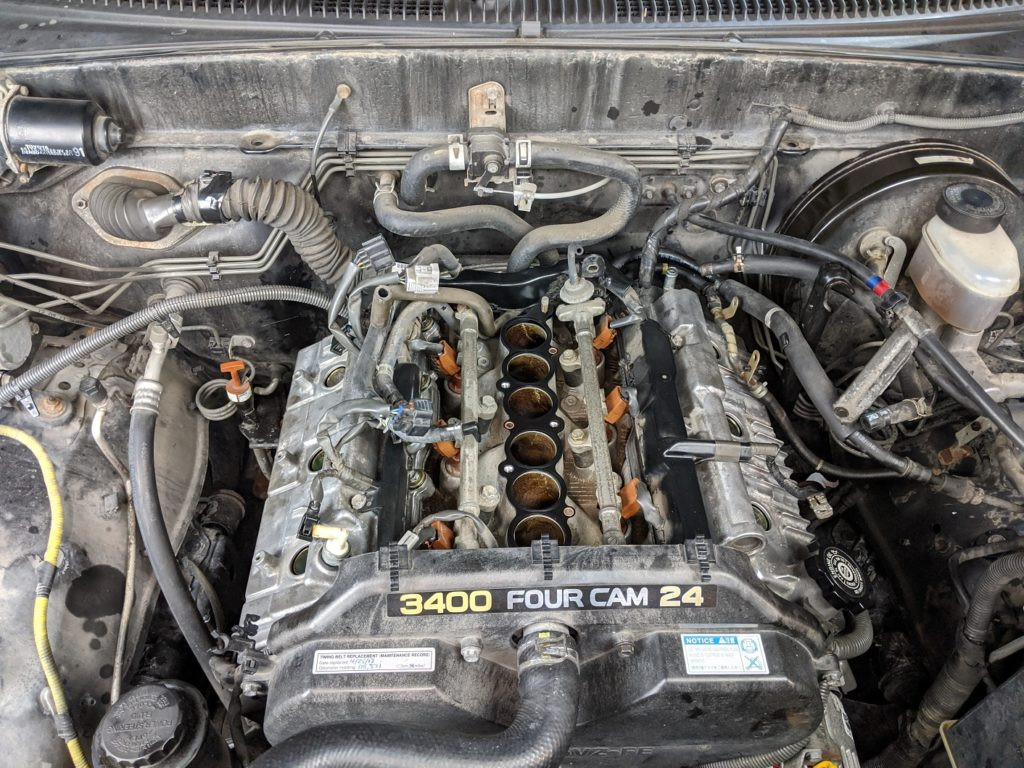
 Airbox and associated intake plumbing removed from the 2003 Toyota Tacoma engine bay.
Start by removing the airbox and all related intake plumbing. This will clear the path to the top of the engine.
 Disconnecting throttle body coolant hoses, vacuum lines, and electrical connectors on the 2003 Toyota Tacoma.
Next, disconnect the throttle body coolant hoses, vacuum lines, and any electrical connectors attached to the throttle body and intake plenum.
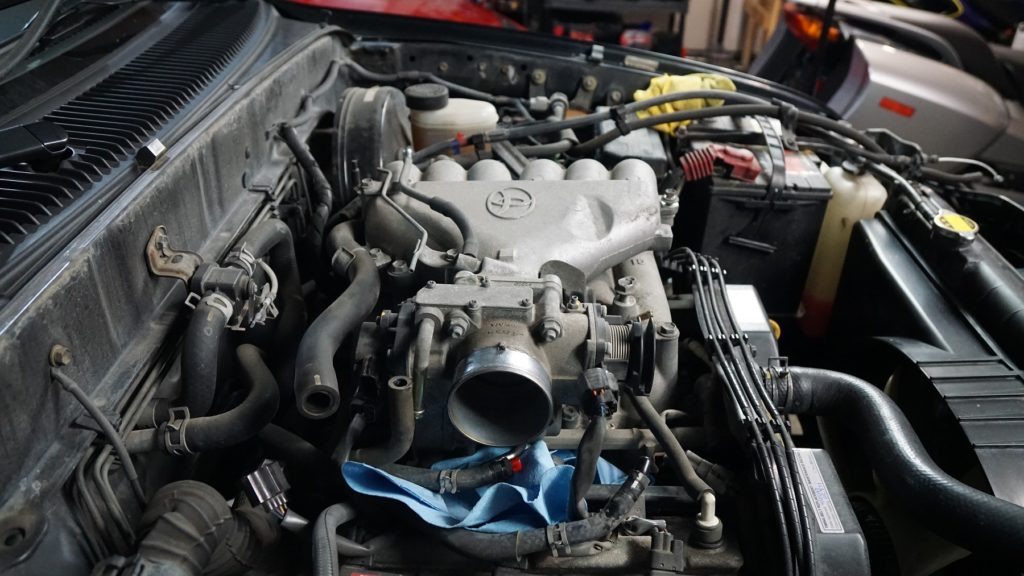
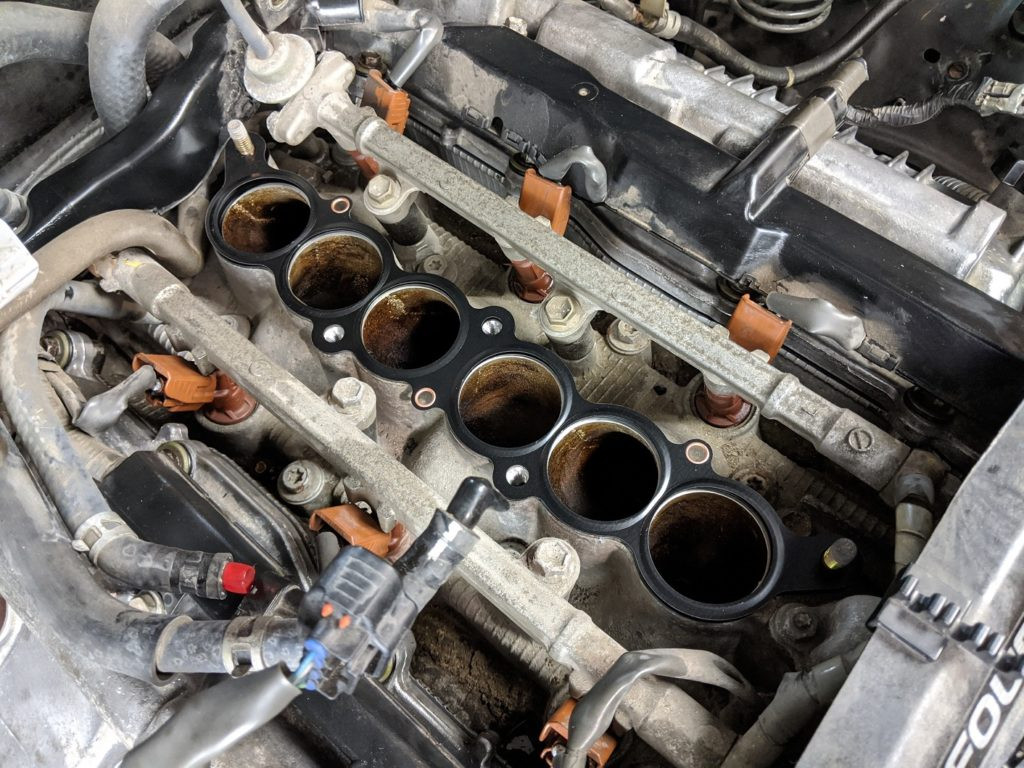
 Removal of the two-piece intake plenum from the 2003 Toyota Tacoma 5VZ-FE engine.
Remove the two-piece intake plenum. This is necessary to access the valve covers located beneath.
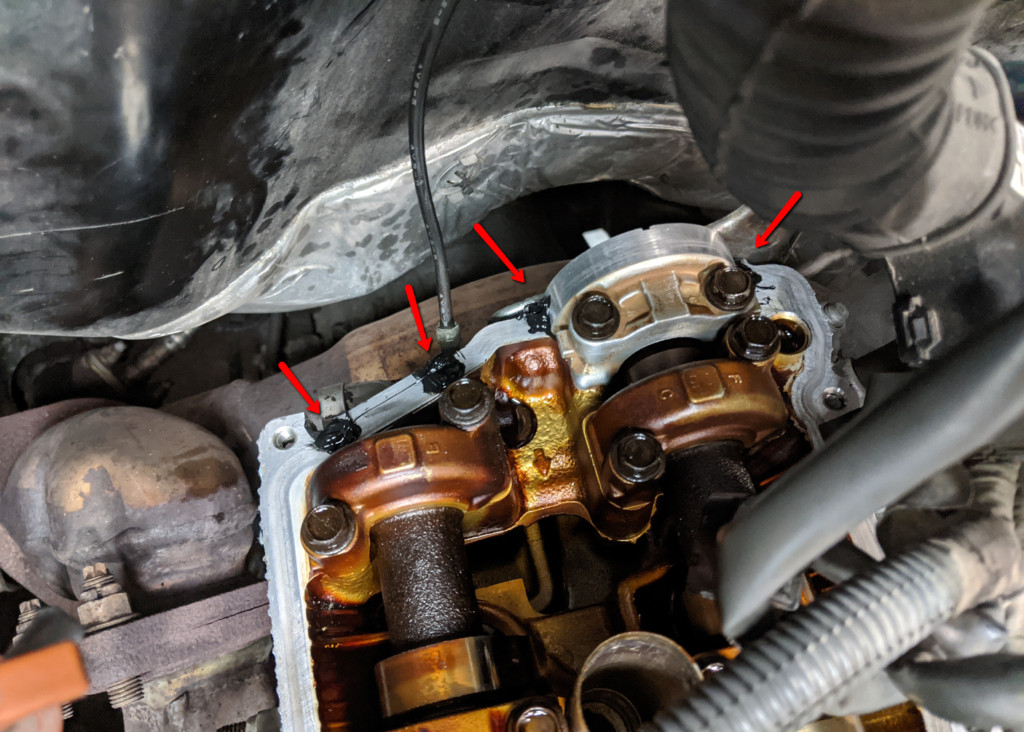
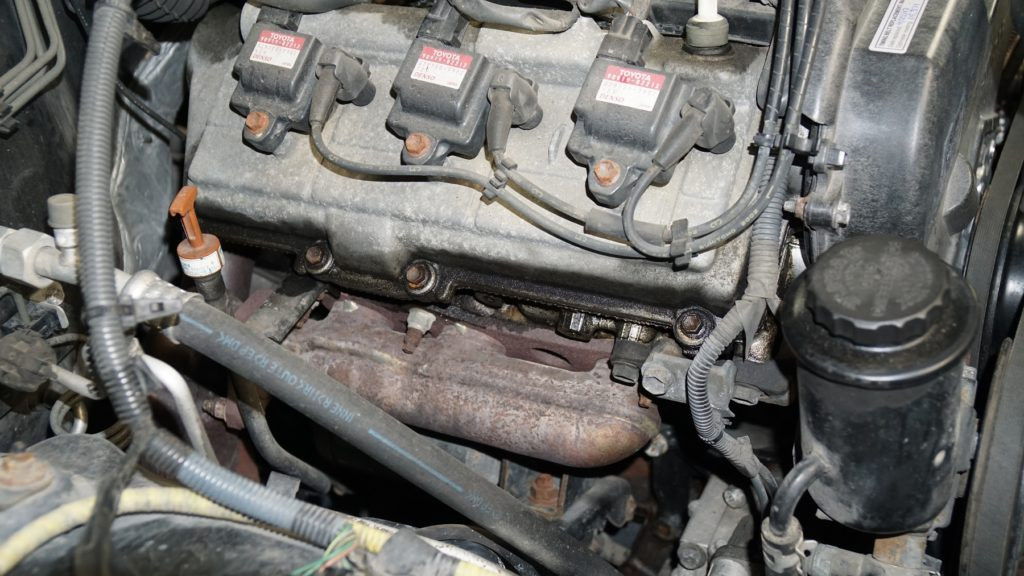 Close-up view of a valve cover gasket leak on the 2003 Toyota Tacoma engine. Oil leakage onto the exhaust manifold can cause a burning smell.
Inspect for valve cover gasket leaks. As seen here, oil leaking onto the exhaust manifold will produce a distinct burning oil smell, a common symptom in 2003 Toyota Tacoma models with aging gaskets.
 Coil packs, spark plug wires, and spark plugs removed from the 2003 Toyota Tacoma engine.
Remove the coil packs, spark plug wires, and spark plugs. Set these aside in an organized manner to ensure correct reinstallation.
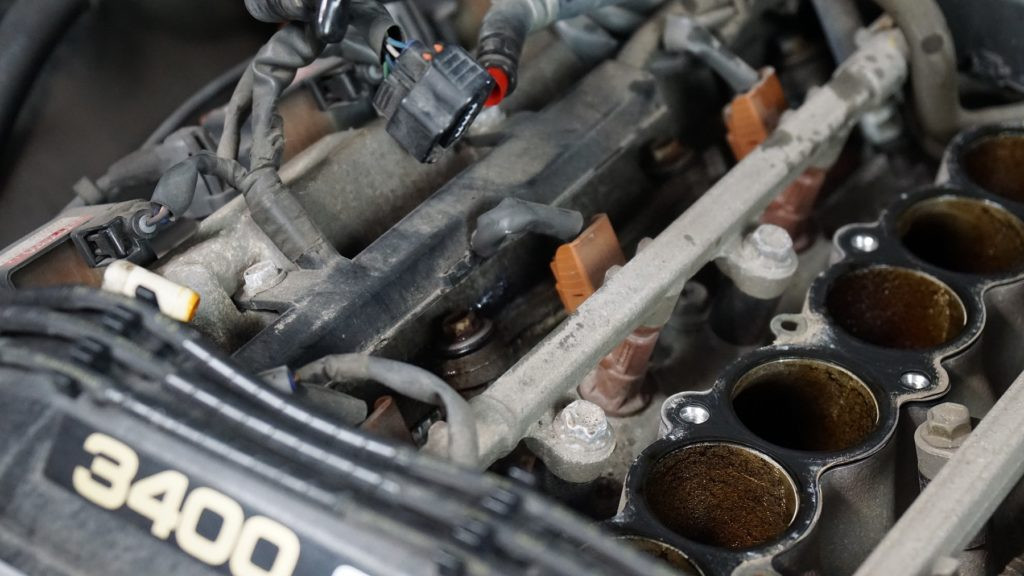
 Disconnecting fuel injector connectors and wiring harness. Engine lift bracket also removed on the 2003 Toyota Tacoma.
Disconnect the fuel injector connectors and detach the wiring harness from the valve covers. Also, remove the engine lift bracket for better access.
 Valve covers removed from the 2003 Toyota Tacoma 5VZ-FE engine, exposing the valvetrain.
Remove the valve covers. Before lifting them off completely, ensure you clean any dirt and debris around the valve cover edges to prevent contaminants from falling into the engine.
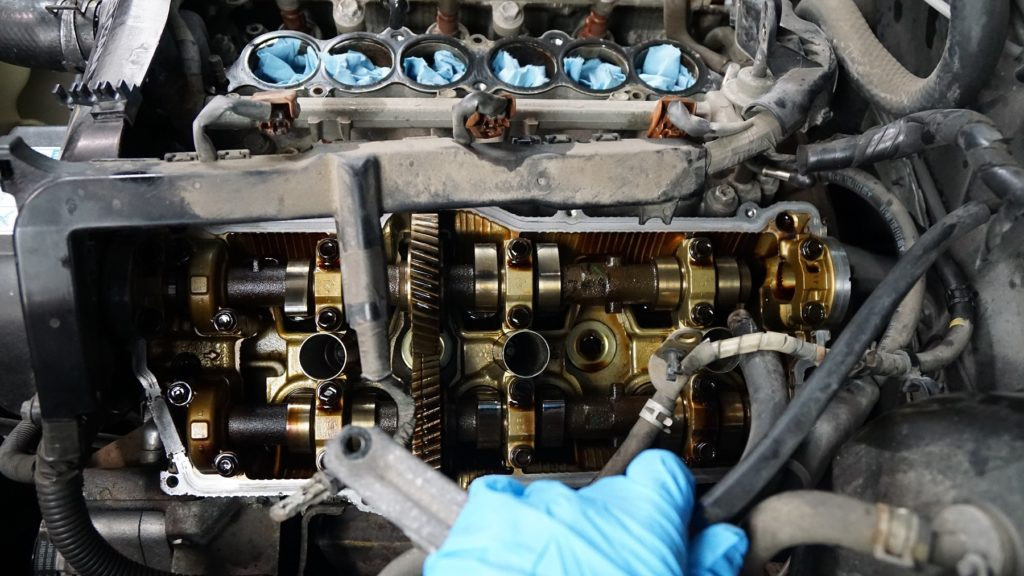
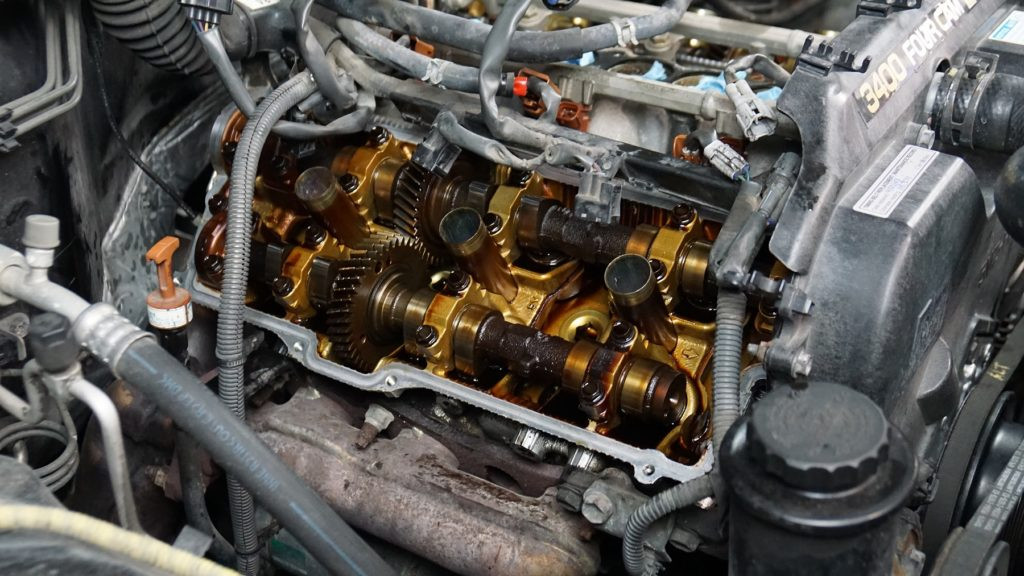 A detailed view of the right bank’s valvetrain on the 2003 Toyota Tacoma 5VZ-FE engine.
Here’s a close look at the right bank’s valvetrain, now accessible for valve clearance measurements and adjustments.
 The left bank valvetrain of the 2003 Toyota Tacoma 5VZ-FE engine.
And this is the left bank valvetrain. With the valve covers removed, you are now ready to proceed with measuring and adjusting the valve clearances on your 2003 Toyota Tacoma.
Adjusting Valves on Your 2003 Toyota Tacoma 5VZ-FE Engine
Before making any adjustments, you must first measure the valve clearances. Consult the service manual files at the end of this guide for the detailed procedure on how to take these measurements. If your measurements reveal valves that are out of specification and require re-shimming, you will need a specialized tool: the Schley Products 88250 shim removal and installation tool. This tool set includes eccentric pliers and a spacer wedge, essential for manipulating the shim-over-bucket system.
 Schley Products 88250 tool for shim removal and installation on the 2003 Toyota Tacoma 5VZ-FE engine.
Replacing shims is arguably the most challenging part of this procedure. To do it effectively, follow these steps:
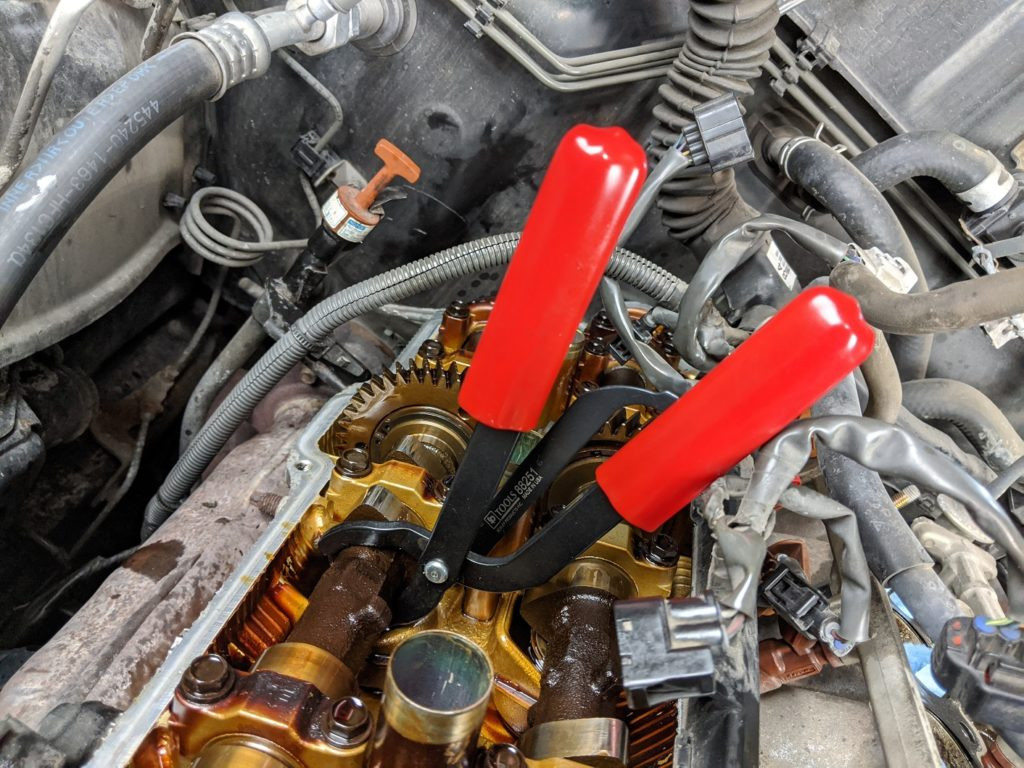
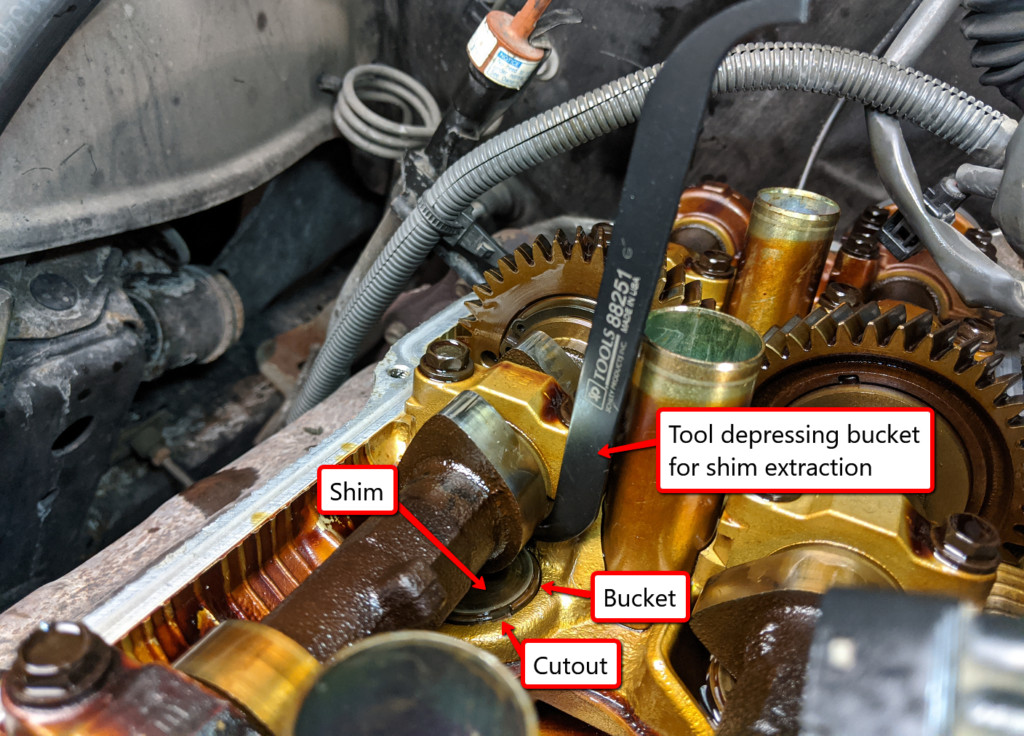
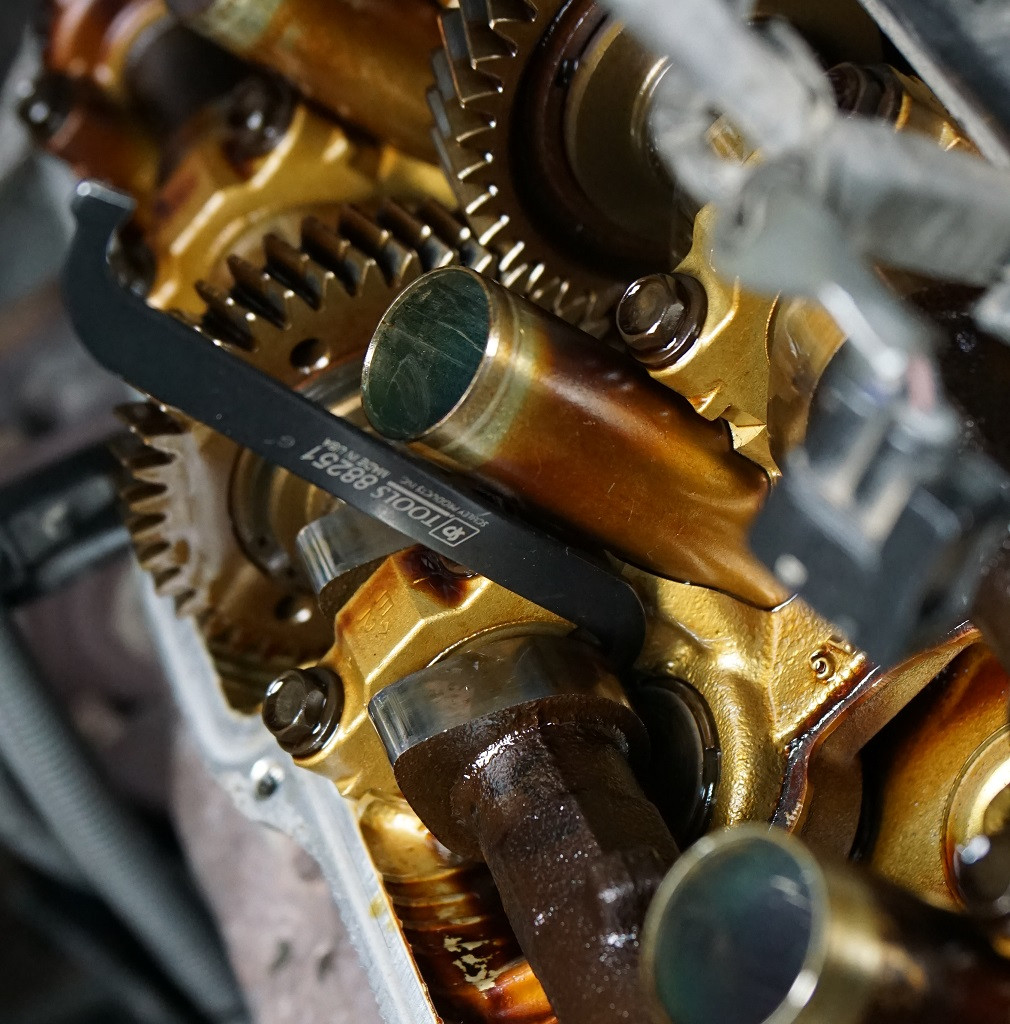 Using the eccentric pliers to depress the valve bucket and the wedge tool to hold it down on the 2003 Toyota Tacoma 5VZ-FE engine.
First, use the eccentric pliers to grip the camshaft. Rotate the pliers to depress the valve bucket, creating space to remove the shim. Once depressed, insert the wedge tool onto the lip of the bucket to keep it in the depressed position. Ensure the wedge does not overlap the shim, as this will prevent shim removal.
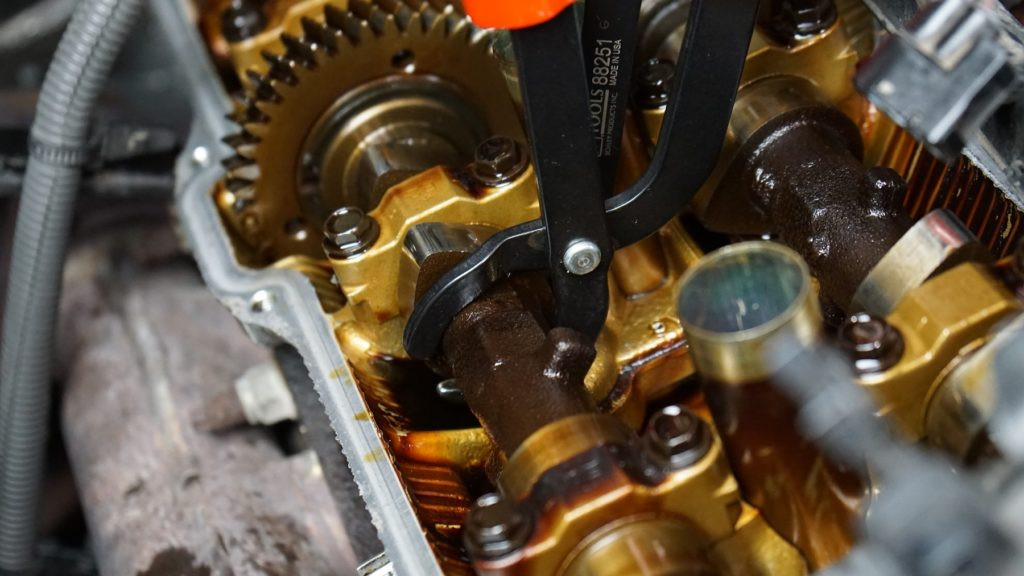
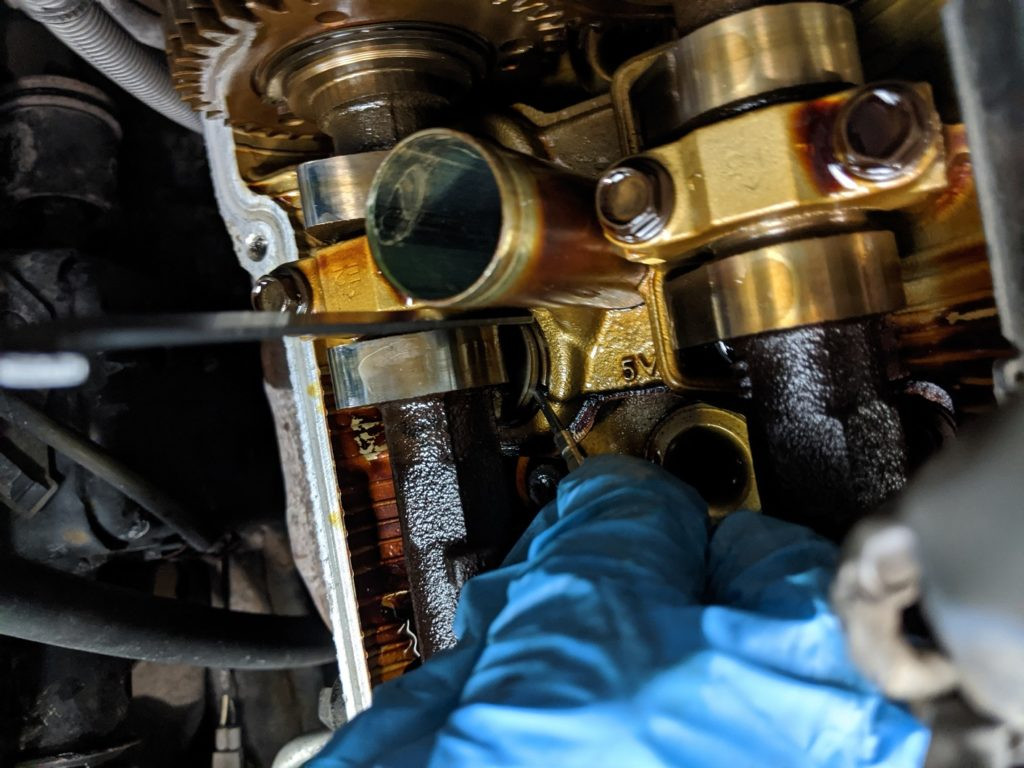 Prying out the valve shim using a small flat-tip screwdriver through the cutout on the 2003 Toyota Tacoma 5VZ-FE engine.
Using a small flat-tip screwdriver, carefully pry up the shim from the bucket through the provided cutout.
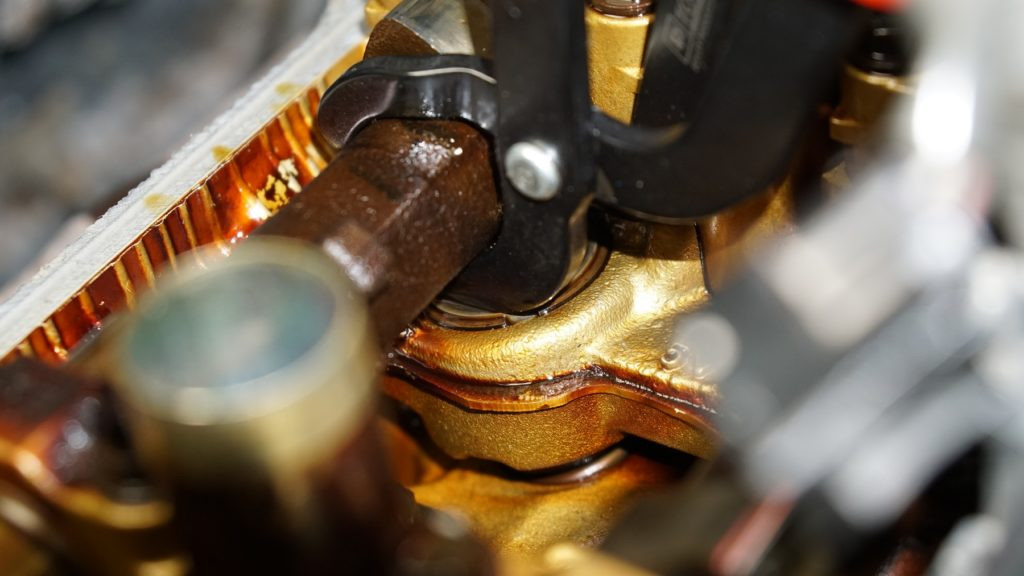
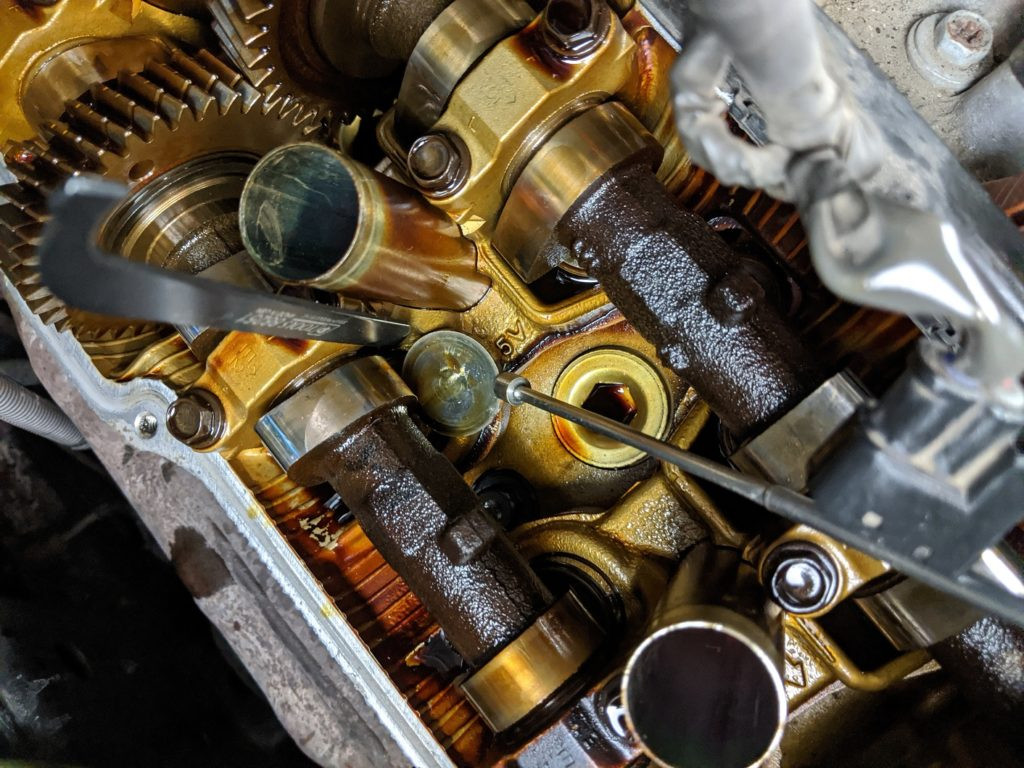 Extracting the valve shim using a magnet tool from the 2003 Toyota Tacoma 5VZ-FE engine.
Use a magnet to safely extract the shim. Magnets are crucial to prevent dropping the shim into the engine.
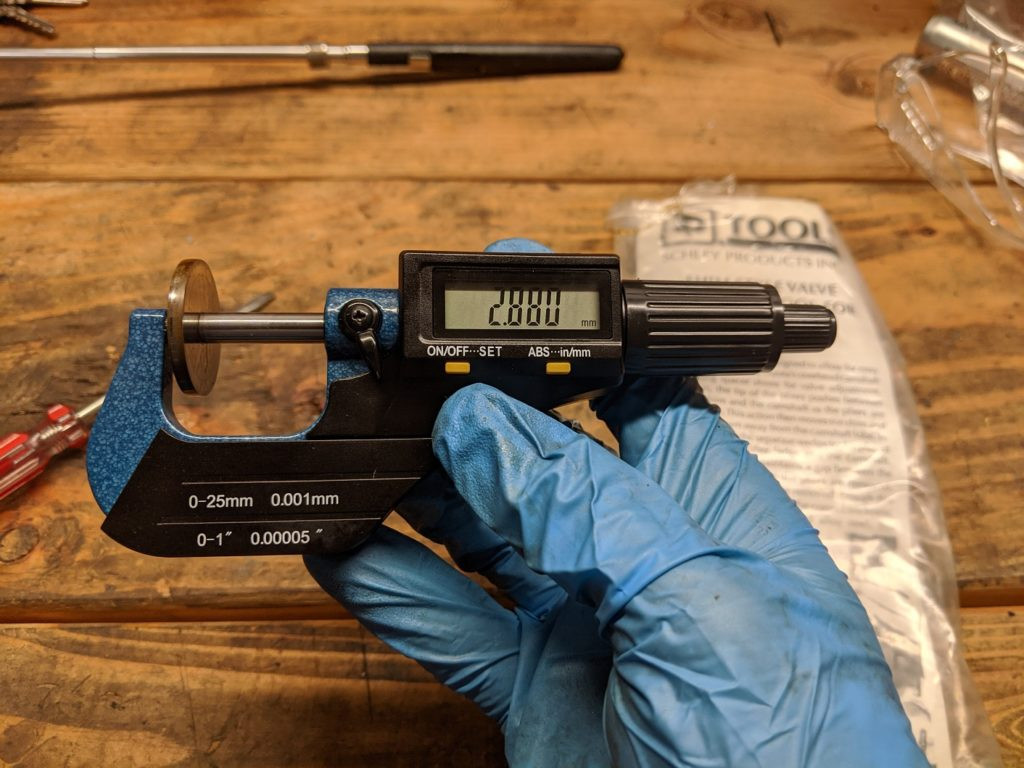 Measuring the removed valve shim with a micrometer for accurate replacement on the 2003 Toyota Tacoma.
Measure the removed shim at its center using a micrometer. This central area experiences the most wear and is the basis for your initial valve clearance measurement. Refer to the valve adjustment service manual to determine the correct replacement shim size. Typically, you will need to order shims from your local Toyota dealer, which may take a few days for delivery, putting your 2003 Toyota Tacoma out of service temporarily. Repeat this shim replacement procedure for each valve that is out of specification. Crucially, remember to reinstall any removed shim before disengaging the wedge tool. Failure to do so can damage the camshaft and hinder shim reinsertion.
Replacing Valve Cover Gaskets on Your 2003 Toyota Tacoma
For a comprehensive valve cover gasket replacement on your 2003 Toyota Tacoma, it’s best to replace all related seals and gaskets to prevent future leaks. Here is a list of the necessary parts with their OEM Toyota part numbers. Using genuine OEM Toyota parts is highly recommended for optimal fit and longevity.
- Valve Cover Gaskets (Qty: 2): 11213-62020
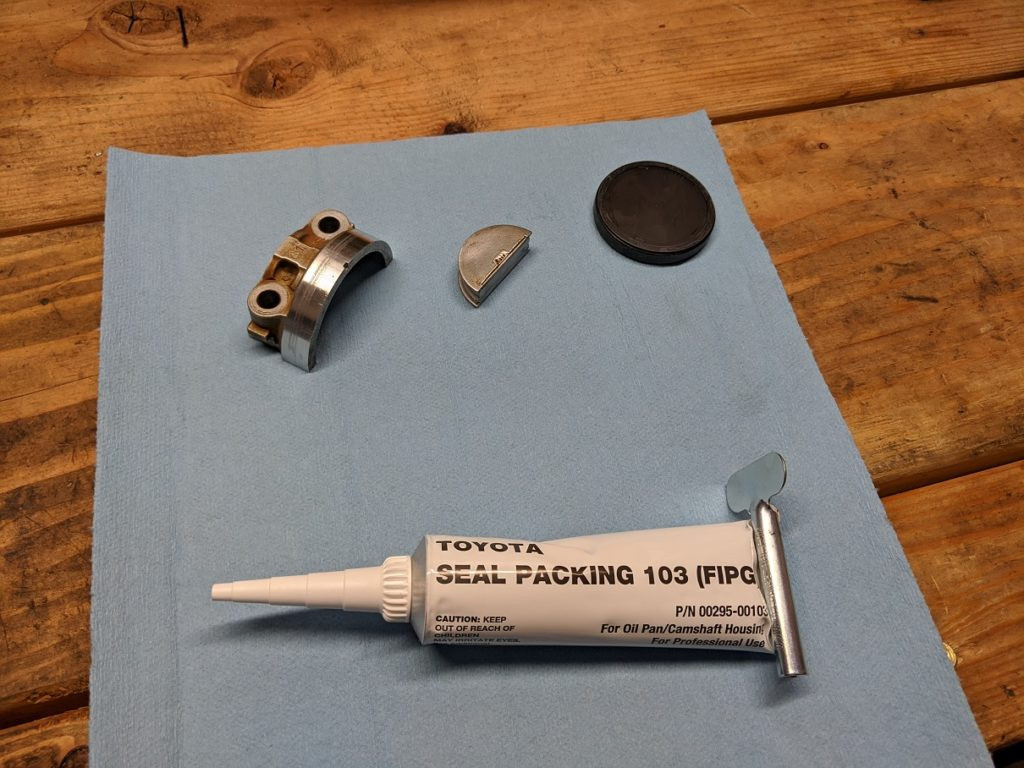
- Form In Place Gasket Sealant (FIPG, Qty: 1): 00295-00103
- Cam End Plug Seals (Qty: 2): 11188-62010
- Valve Cover bolt washers (Qty: 16): 90210-05007
- Spark Plug Tube seals (Qty: 6): 11193-70010
- Oil Filler Cap seal (Qty: 1): 90430-37140
- Intake Plenum Gaskets (Qty: 2): 17176-62040
Tip: Check online marketplaces like eBay for potential kits that include all these parts at a discounted price, specifically for the 2003 Toyota Tacoma or 5VZ-FE engine.
 Bending back the metal retaining tabs to remove the spark plug tube seals from the valve cover of the 2003 Toyota Tacoma.
Start by bending back the small metal retaining tabs on the underside of the valve cover that secure the spark plug tube seals. Use a socket and hammer to carefully tap out the old seals. If a seal breaks due to age, you might need a seal puller to remove the remaining piece from the backside.
 Using a PVC pipe to install new spark plug tube seals into the valve cover on the 2003 Toyota Tacoma.
Use a piece of PVC pipe or a similar tool to gently tap the new spark plug tube seals into place from the underside of the valve cover.
 Metal retaining tabs pushed back down to secure the new spark plug tube seals on the 2003 Toyota Tacoma valve cover.
Once the new seals are installed, push the metal retaining tabs back down to secure them.
 Cleaning the valve cover gasket groove with brake parts cleaner in preparation for the new gasket on the 2003 Toyota Tacoma.
Thoroughly clean the valve cover gasket groove using a rag and brake parts cleaner to remove any old gasket material and oil residue. Then, install the new valve cover gasket into the clean groove.
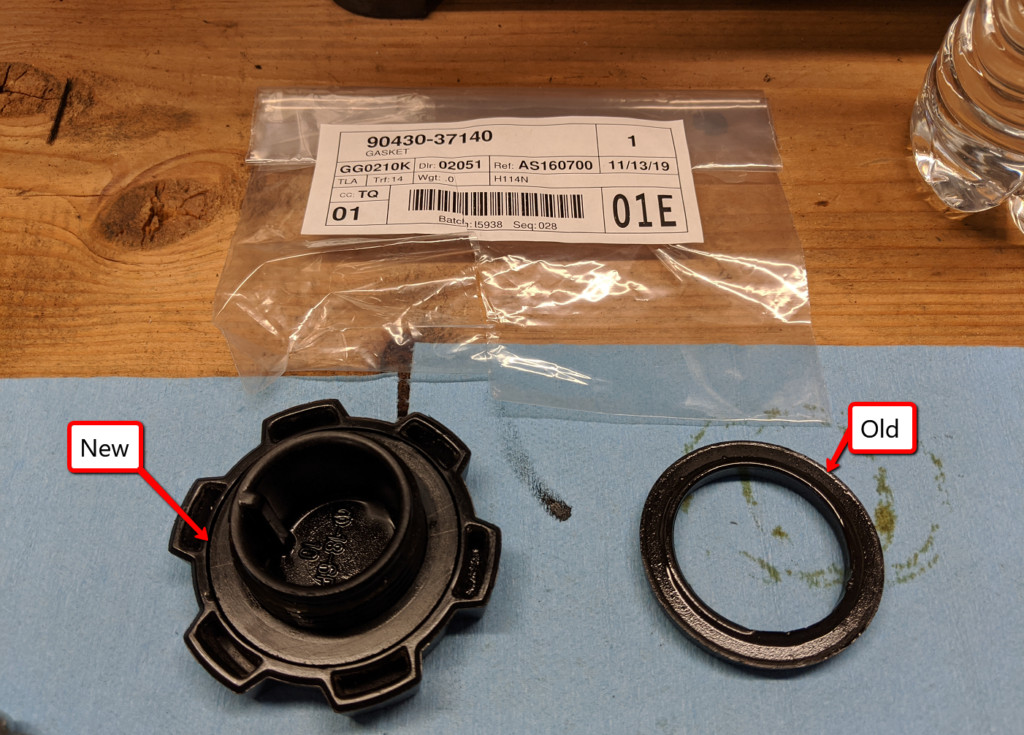 Replacing the oil filler cap gasket using a small flat blade screwdriver on the 2003 Toyota Tacoma.
Replace the oil filler cap gasket by prying out the old one with a small flat blade screwdriver and pressing the new one into place.
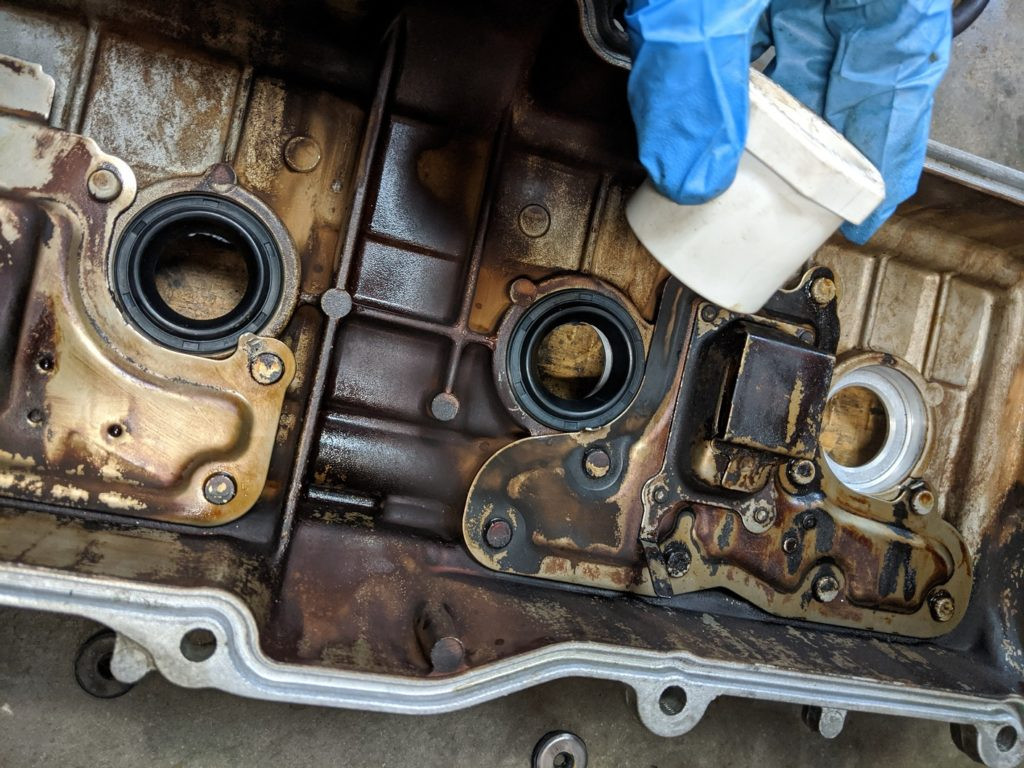
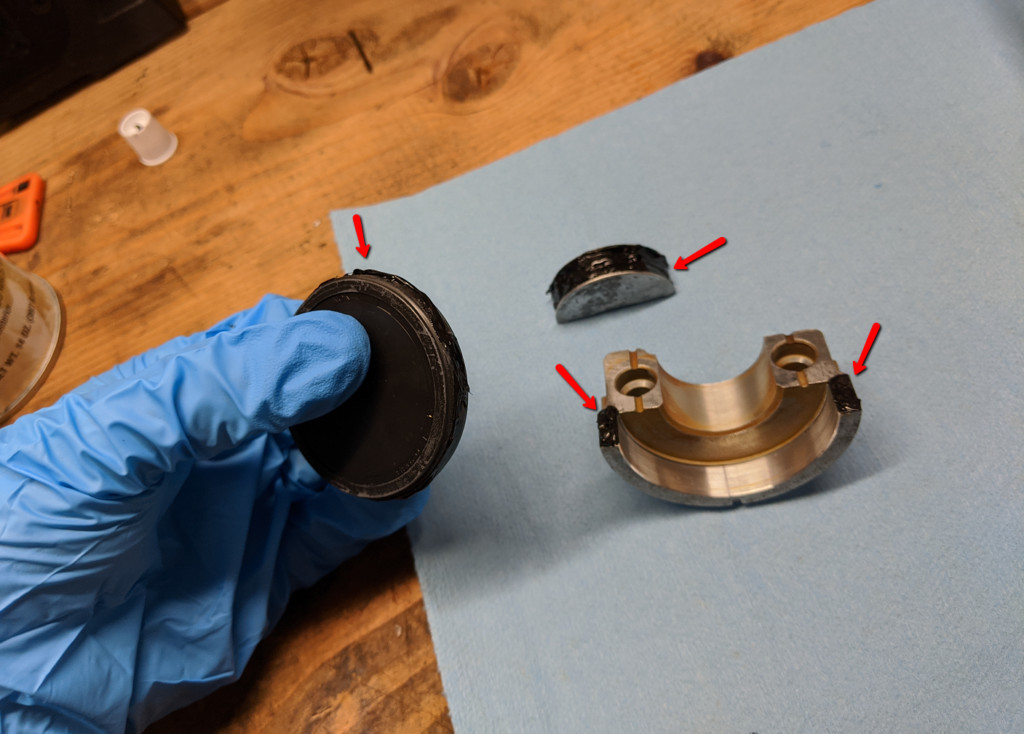
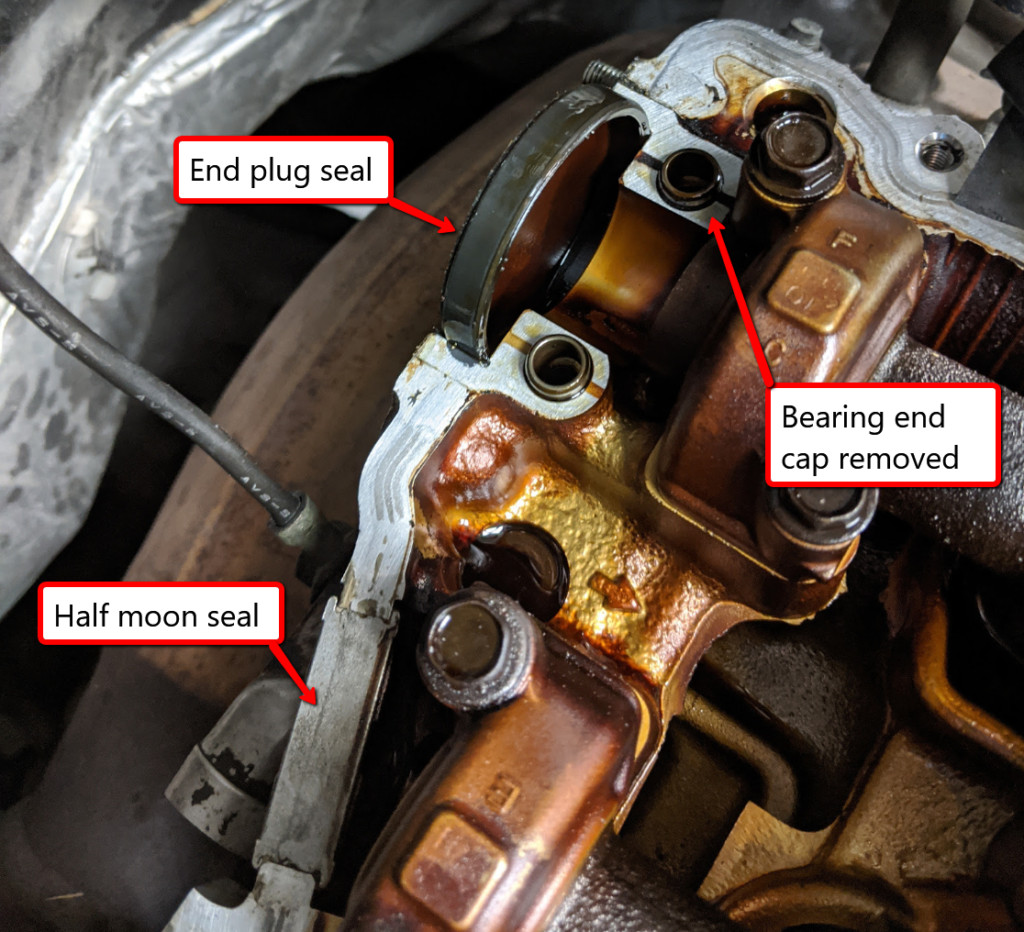 Locations of the bearing end caps, end cap plug seals, and half-moon plugs on the 2003 Toyota Tacoma cylinder head, areas prone to leaks.
Before reinstalling the valve covers, address potential leak points by resealing the bearing end caps (one per cylinder head, near the firewall), replacing the end cap plug seals, and resealing the aluminum half-moon plugs.
 Cleaning the sealing surfaces for the bearing end cap and half-moon plug using a Scotch-Brite pad on the 2003 Toyota Tacoma engine.
Clean these sealing surfaces using a green Scotch-Brite pad, brake parts cleaner, and shop towels to ensure good adhesion of the new sealant.
 Removing old sealant residue from the bearing end cap and half-moon plug on the 2003 Toyota Tacoma.
Remove all traces of old sealant from the bearing end cap and half-moon plug to ensure a clean and effective new seal.
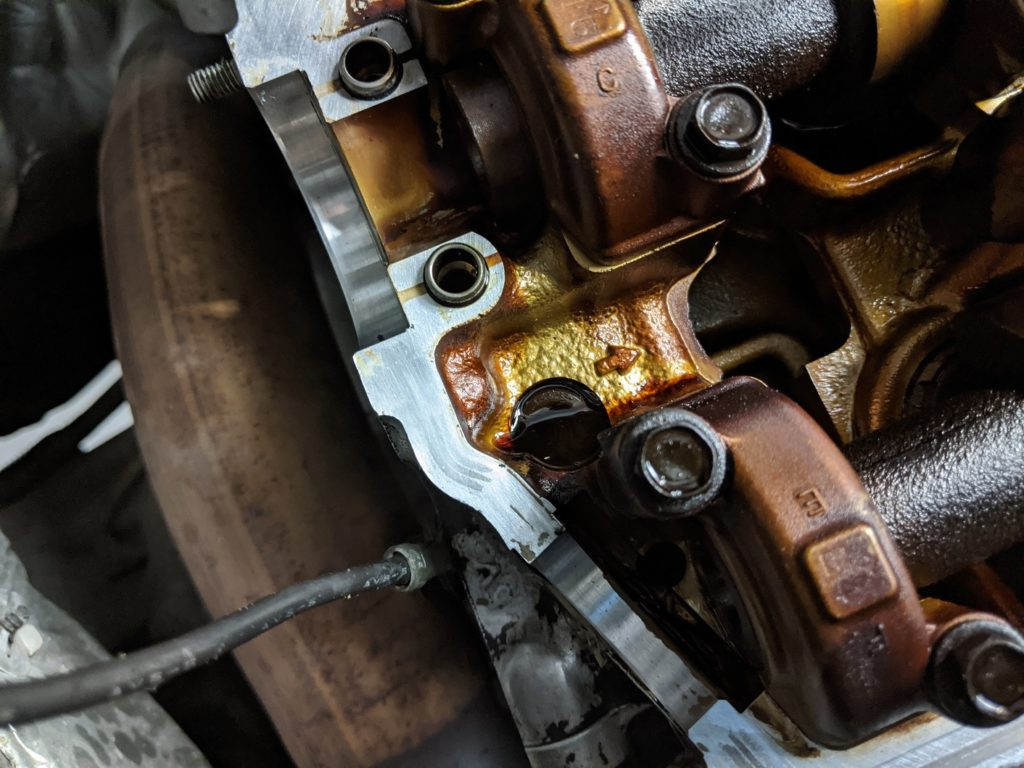
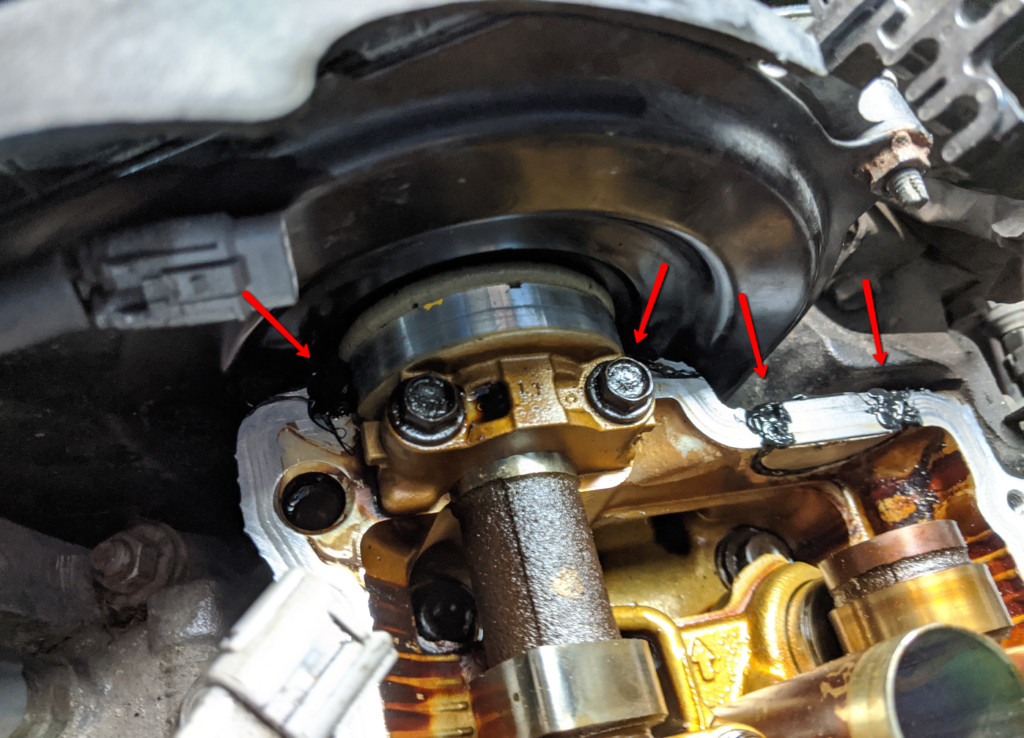
 Applying Form-In-Place Gasket (FIPG) sealant to the bearing end cap, half-moon plug, and end cap plug on the 2003 Toyota Tacoma.
Apply a thin, even layer of FIPG sealant to the bearing end cap, half-moon plug, and around the perimeter of the end cap plug as shown in the service manual. Install the end cap plug first, followed by the bearing end cap, and then the half-moon plug into the cylinder head. Expect a small amount of sealant to squeeze out upon installation, indicating good sealing pressure.
 Applying FIPG sealant to the corners of the bearing end caps and half-moons on the rear of the 2003 Toyota Tacoma engine.
Before reinstalling the valve covers, apply a small dab of FIPG sealant at the corners where the half-moons and bearing end caps meet the cylinder head. This ensures a robust, leak-free seal at these critical points on the valve cover gasket surface, especially at the rear of the engine.
 Applying FIPG sealant to the front side of the 2003 Toyota Tacoma engine before valve cover reinstallation.
Repeat the application of FIPG sealant on the front side of the engine, ensuring all corners and junctions are covered for optimal sealing.
 Left valve cover reinstalled on the 2003 Toyota Tacoma engine.
Reinstall the left valve cover carefully, aligning it properly onto the cylinder head.
 Right valve cover reinstalled with new bolt sealing washers and bolts tightened to specification on the 2003 Toyota Tacoma engine.
Reinstall the right valve cover, using new valve cover bolt sealing washers. Tighten all valve cover bolts to the torque specifications listed in the service manual to avoid over-tightening and damaging the new gaskets.

Reassembling Your 2003 Toyota Tacoma Engine
With the valve adjustments completed and valve covers resealed, it’s time to reassemble the engine components you removed during teardown.
 Reconnecting fuel injector electrical connectors and installing new intake plenum gaskets on the 2003 Toyota Tacoma.
Reconnect the fuel injector electrical connectors. Install new intake plenum gaskets onto the lower intake plenum.
 Bolting the fuel injection wiring harness back into place on the 2003 Toyota Tacoma.
Bolt the fuel injection wiring harness bracket back into its original position.
 Reinstalling spark plugs, wires, coil packs, vacuum lines, and the lower intake plenum on the 2003 Toyota Tacoma.
Install the spark plugs, spark plug wires, and coil packs. Route all necessary vacuum lines correctly. Reinstall the lower intake plenum and torque its bolts to the specified values.
 Installing the upper intake plenum with a new gasket, throttle cable, vacuum hoses, and reconnecting electrical connectors on the 2003 Toyota Tacoma.
Install the upper intake plenum with a new gasket. Bolt it down to the correct torque. Route the throttle cable and vacuum hoses. Reconnect the throttle body electrical connectors and coolant hoses.
 Reinstalling the intake plumbing to complete the valve adjustment and gasket replacement on the 2003 Toyota Tacoma.
Finally, reinstall the intake plumbing. Double-check all connections, hoses, and connectors to ensure everything is properly secured.
With reassembly complete, your 2003 Toyota Tacoma should now benefit from adjusted valves and leak-free valve covers, ensuring smooth and reliable performance.
2003 Toyota Tacoma Service Manual Files for Reference
Loading…
Taking too long?
Reload document
| Open in new tab
Intake Removal Steps – Download [337.39 KB]
Loading…
Taking too long?
Reload document
| Open in new tab
5VZE-FE Valve Adjustment Procedure -Download [428.88 KB]
Loading…
Taking too long?
Reload document
| Open in new tab
Valve Cover & Intake Install – Download [390.86 KB]
Loading…
Taking too long?
Reload document
| Open in new tab
5VZ-FE Spark Plug Seal R&R – Download [78.76 KB]
Loading…
Taking too long?
Reload document
| Open in new tab
5VZ-FE Cam Cap Install – Download [61.17 KB]
Loading…
Taking too long?
Reload document
| Open in new tab
Torque Specifications – Download [260.53 KB]