Embarking on the journey of restoring a classic car like a 1990 Toyota Supra often involves tackling years of accumulated grime. Recently, I dedicated some time to cleaning up the passenger side wiring harness, a crucial step in engine bay maintenance. This process, while seemingly simple, makes a significant difference in both the aesthetics and the overall health of your Supra.
To begin, components such as the ignitor, injector resistor pack, and relay were carefully removed to allow for thorough cleaning. The underlying bodywork, hidden beneath layers of engine bay clutter, was addressed with a combination of kerosene and a toothbrush for initial grime removal. This was followed by a cleaning with a soapy sponge to ensure a residue-free finish. The transformation was immediately noticeable, revealing cleaner surfaces, although some paint underneath showed its age. It’s surprising how much dirt and grease accumulates over the years, especially when comparing this to another Supra of similar vintage that was in much better condition.
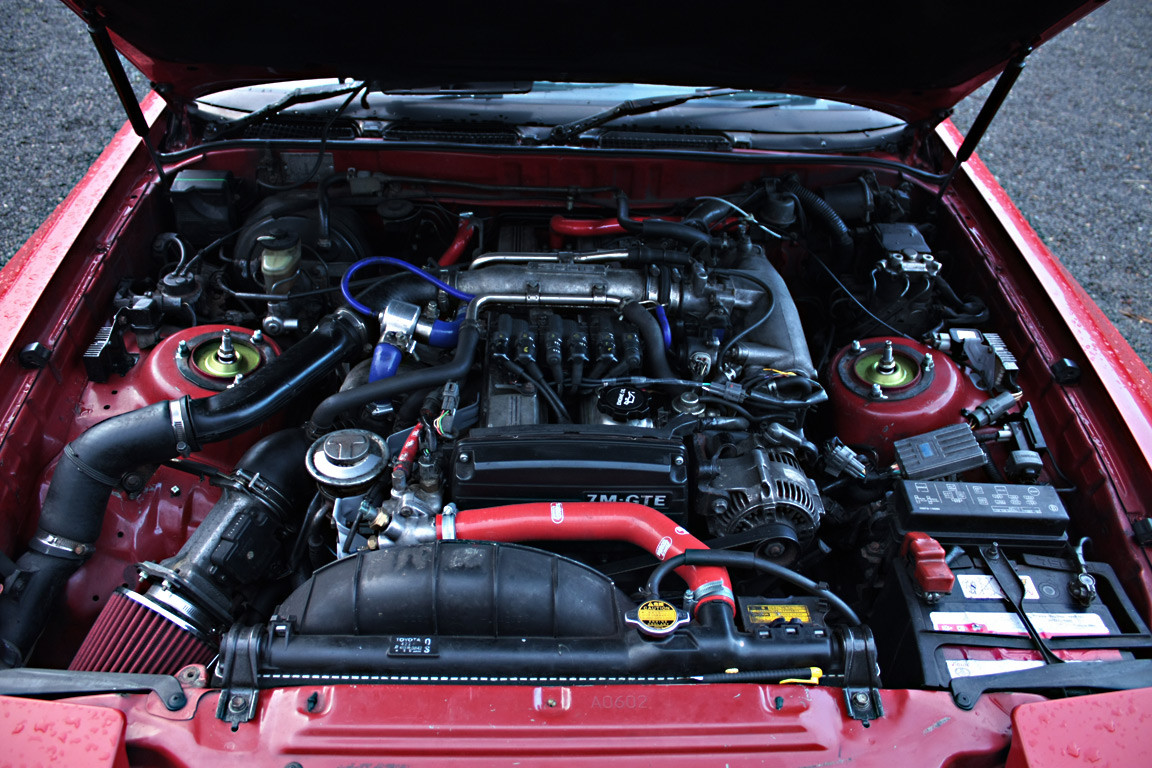 Engine bay of a 1990 Toyota Supra after initial cleaning showing overall layout
As previously mentioned, the coil pack wiring had already been addressed in a prior session. However, recognizing the need for a more permanent solution, the plan is to eventually overhaul the entire engine bay wiring loom from scratch. For now, the focus is on meticulous cleaning and temporary fixes to improve the current state. The removed parts were also treated with kerosene and paper towels, revealing the original wire colors beneath the dirt – a small but satisfying discovery.
The bracketry, specifically the piece that houses the resistor pack and turbo pressure sender, also received attention. After removal, it was scrubbed, lightly sanded to provide a key for paint adhesion, and then treated with a primer. This significantly improved its appearance. The future plan includes refinishing these brackets in the Toyota Supra’s body color (3E5) with a clear coat, but this will coincide with the comprehensive engine bay wiring loom redo.
 Closeup of cleaned wiring and brackets in a 1990 Toyota Supra engine bay
For a more dynamic view of the cleaning process and the engine bay’s transformation, a video was also captured.
http://www.youtube.com/watch?v=TlFzOxVFX9Y[/video]
Cleaning the engine bay of a 1990 Toyota Supra is a rewarding task that enhances both the visual appeal and the maintainability of your vehicle. Simple steps like cleaning wiring and brackets can make a significant difference and are a great starting point for any restoration enthusiast. What are your thoughts or ideas on further improving the engine bay?